
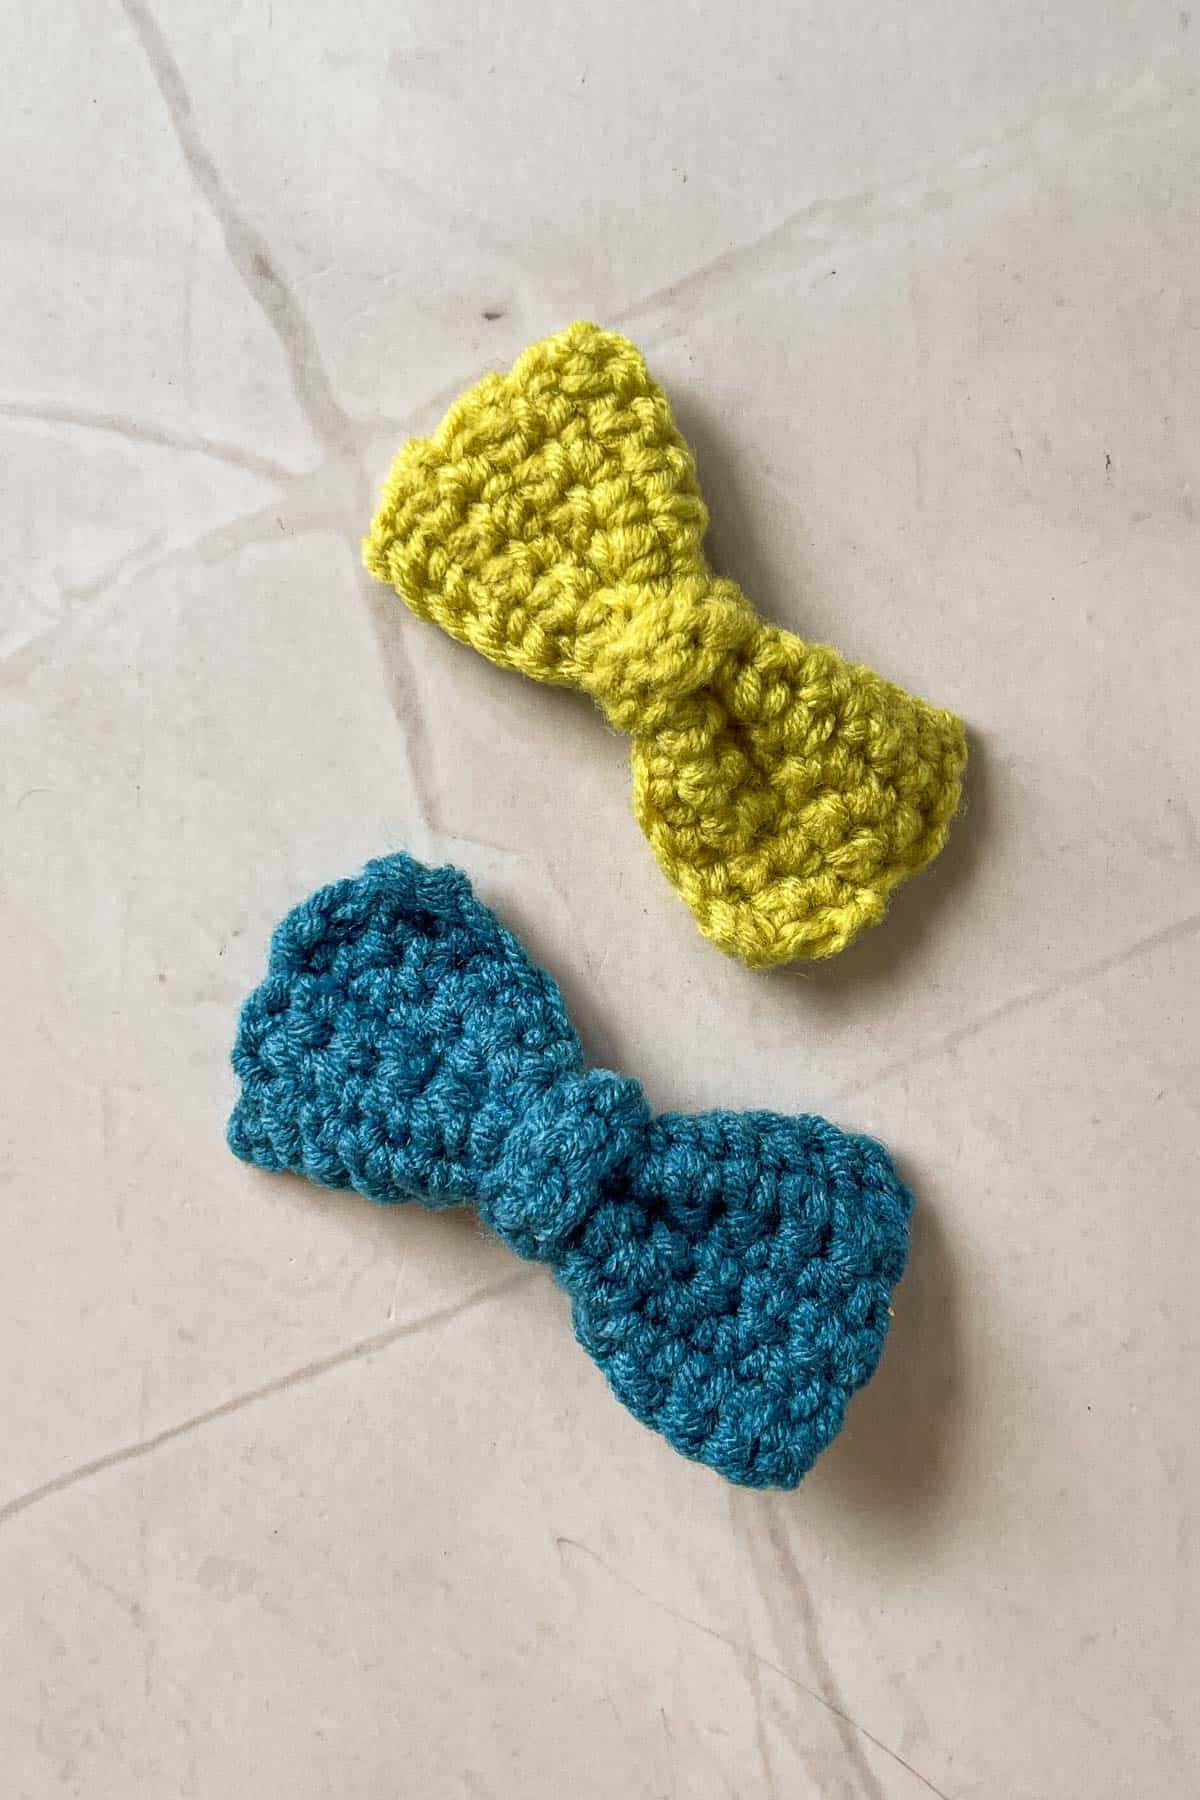
Learn how to crochet a bow with this easy step-by-step tutorial. Using only very basic stitches of chains and single crochets, these cute crochet bows are very quick to make and you can use these free patterns to make hair bows and make hair accessories like hair clips, hair ties and hair bands or use them to decorate dresses or as crochet gift bows.
Each bow takes less than 10 minutes to make and does not require much yarn. They are perfect crochet project for scrap yarn.
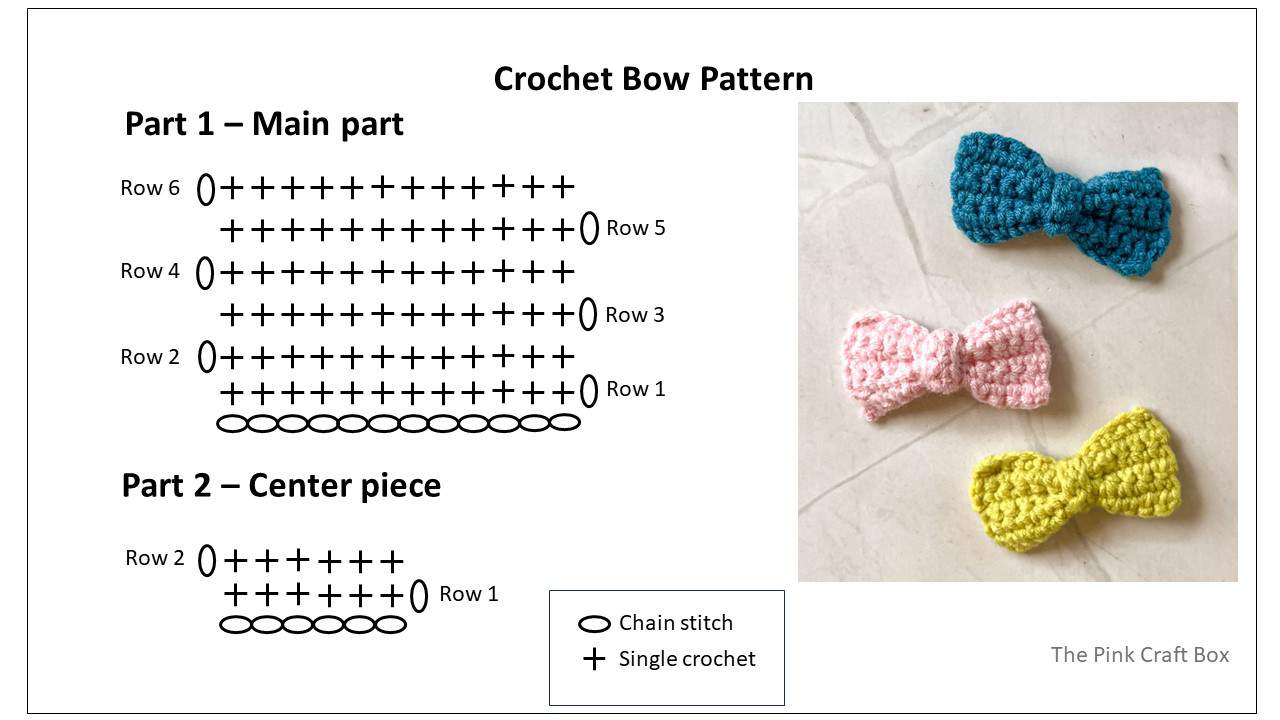
Each bow starts with 2 crocheted pieces. The first is a rectangle piece made up of row of starting chain stitches and topped with 6 rows of single crochets. This makes the main part of the bow. The other piece is a longer and thinner rectangle (made up of a row of chains and 2 rows of single crochet) to make the center of the bow.
To assemble the bow, the first rectangle piece is folded horizontally into a 'w' shape and stitched in the center to make a bow. To complete the bow, the center piece is wrapped around the middle of the bow and tightly stitched at the back of the bow.
These bows are made using medium weight yarn (worsted weight yarn) and each bow measures 6cm by 3cm (at widest points). You can easily make these adorable bows in different sizes (larger bow or smaller bow) by simply adjusting the number of starting chains, rows of stitches or type of yarn.
If you like this easy crochet bow tutorial, you will also like my other crochet bows tutorial. Check out my free crochet bow patterns to make larger crochet bows with tails. These are perfect to make a bow tie (without the tails) or hair bow. They also make great gifts.
And learn how to use crochet bows on hair accessories like an a french barette or alligator clip with these cute crochet hair bows pattern. These are made using DK weight yarn and make very elegant bows. All tutorials come with free crochet patterns and video tutorials and are very easy to make.
Jump to:
🎥Video tutorial
Here is the full video tutorial on how to crochet a bow. See the full list of supplies and detailed step by step written instructions with images right below the video.
🧾Tools and Supplies
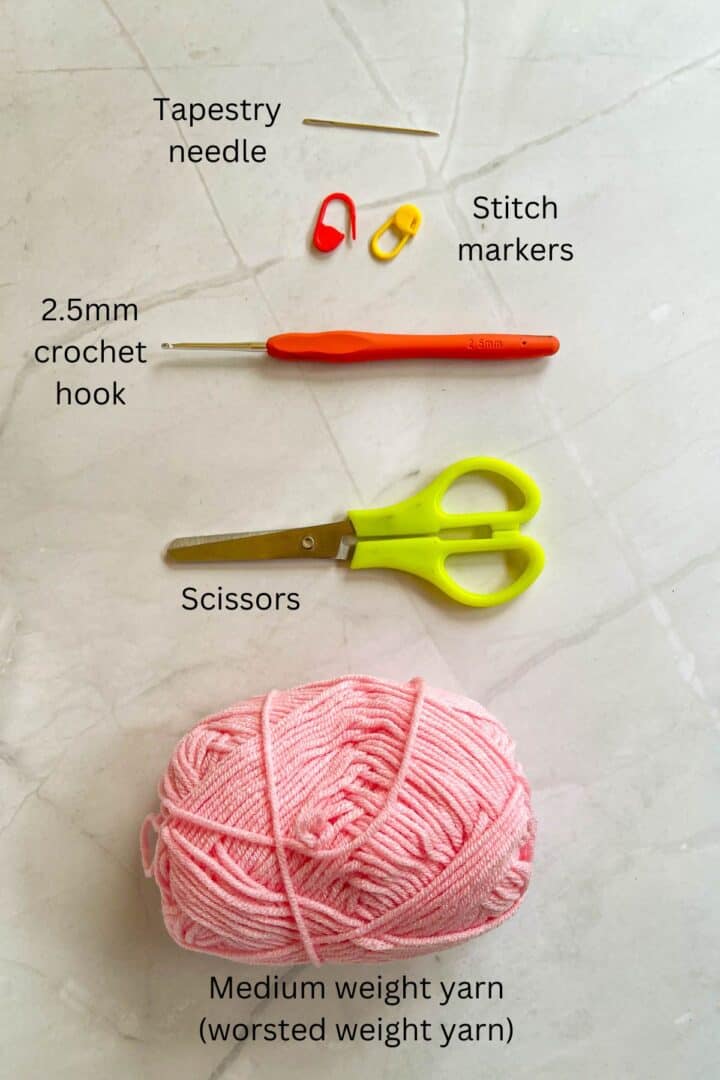
- Worsted weight yarn
- 2.5 mm crochet hook (you can use a larger hook size if you are more comfortable with one)
- Tapestry needle
- Scissors
- Stitch markers (optional)
🪡Stitches Used (US terms)
- Chain (ch)
- Single crochet (sc)
- Stitch (st)
✂️How to Make
First part:
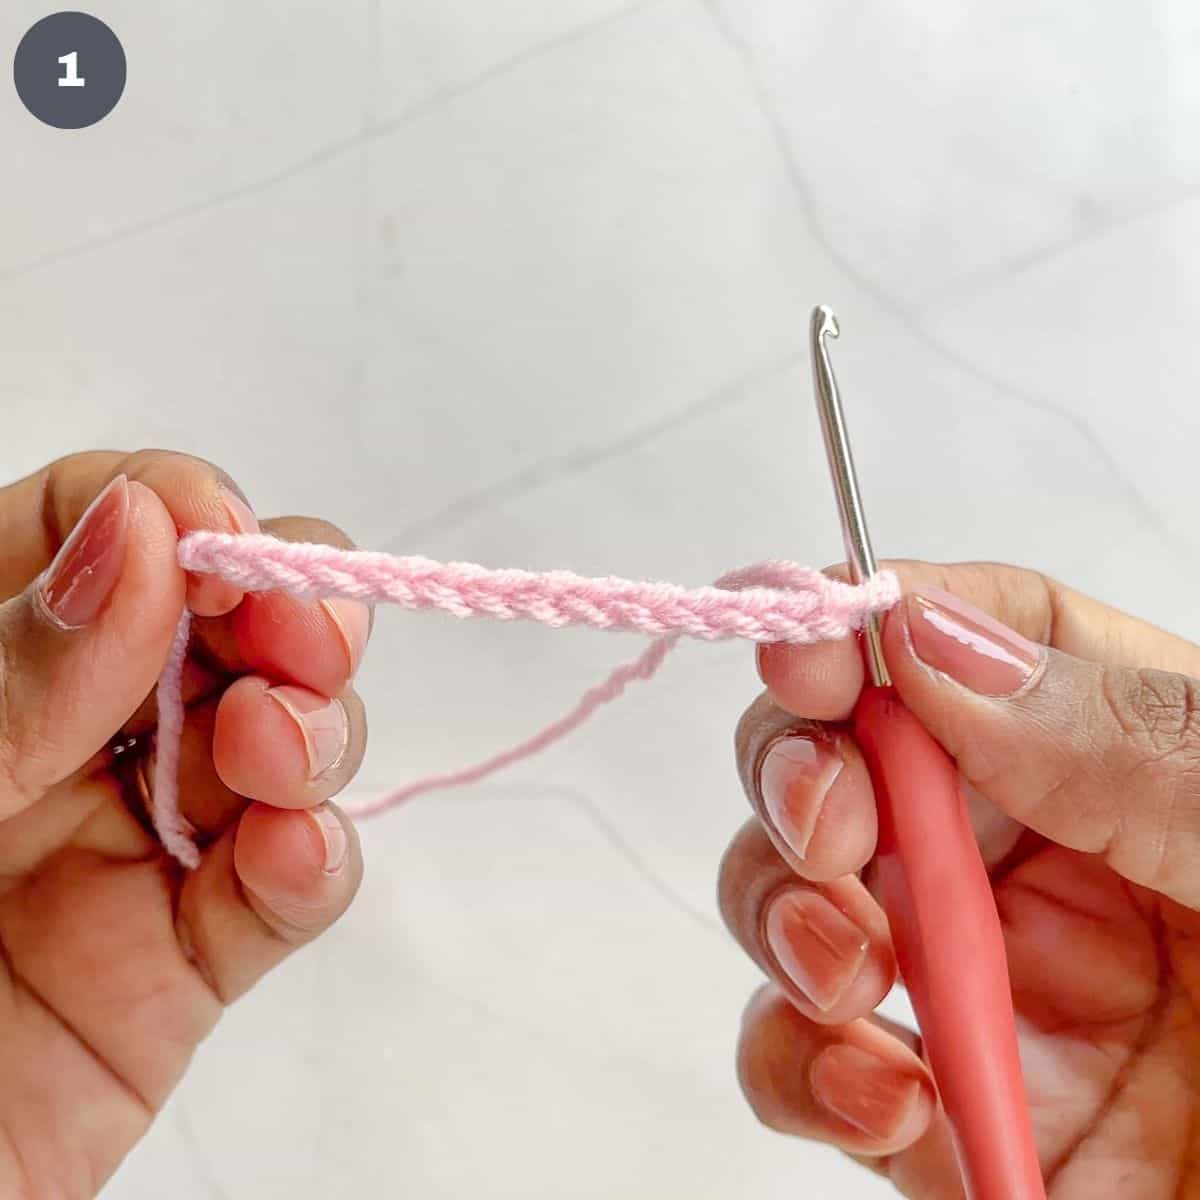
Make a slip knot and ch 13 (image 1).
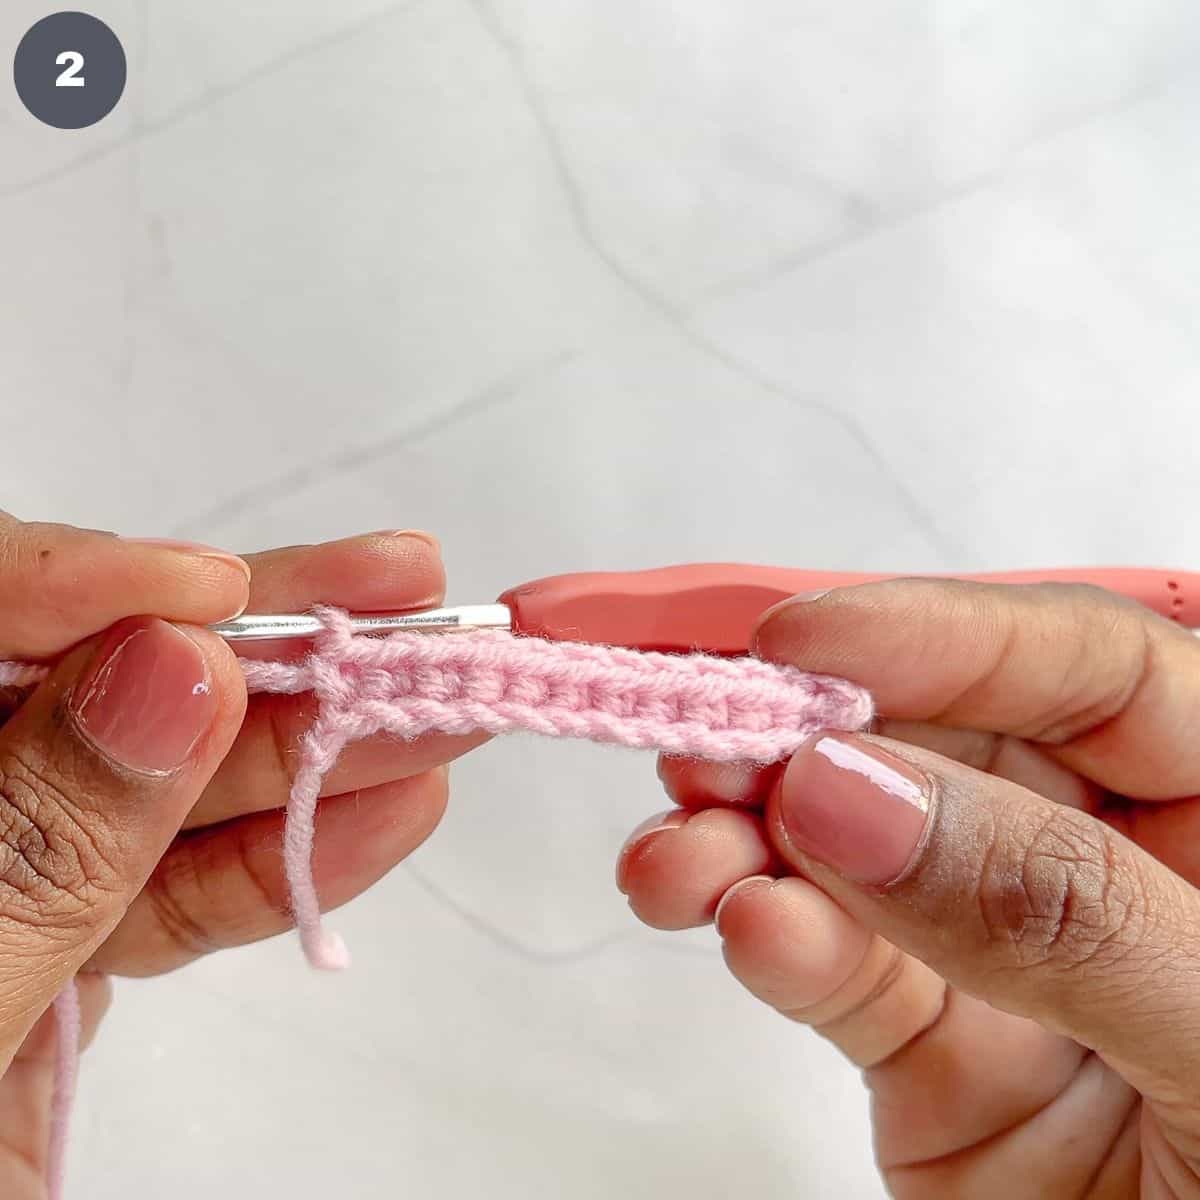
Row 1: Work 1 sc in the second ch from hook. Continue working one sc in each stitch until the end. You will have a total of 12 sc (image 2). Ch and turn over.
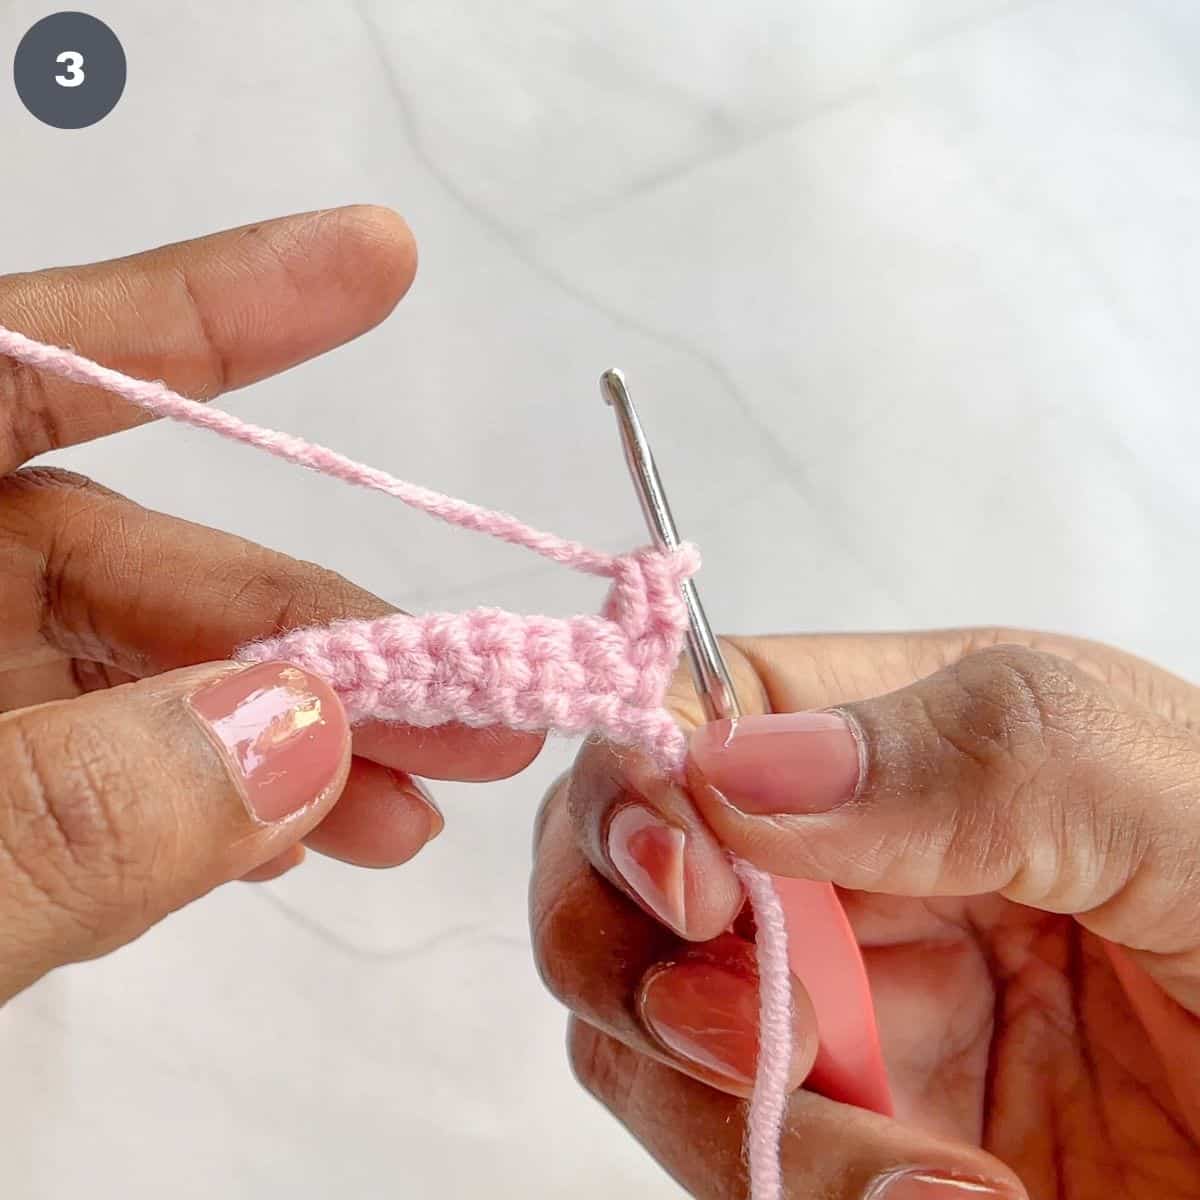
Rows 2: Work 1 sc in the second stitch from hook (image 3). Continue working one sc in each stitch until the end of the row. You should have a total of 12 sc. Ch and turn over.

Rows 3 to 6: Repeat row 2 (image 4).
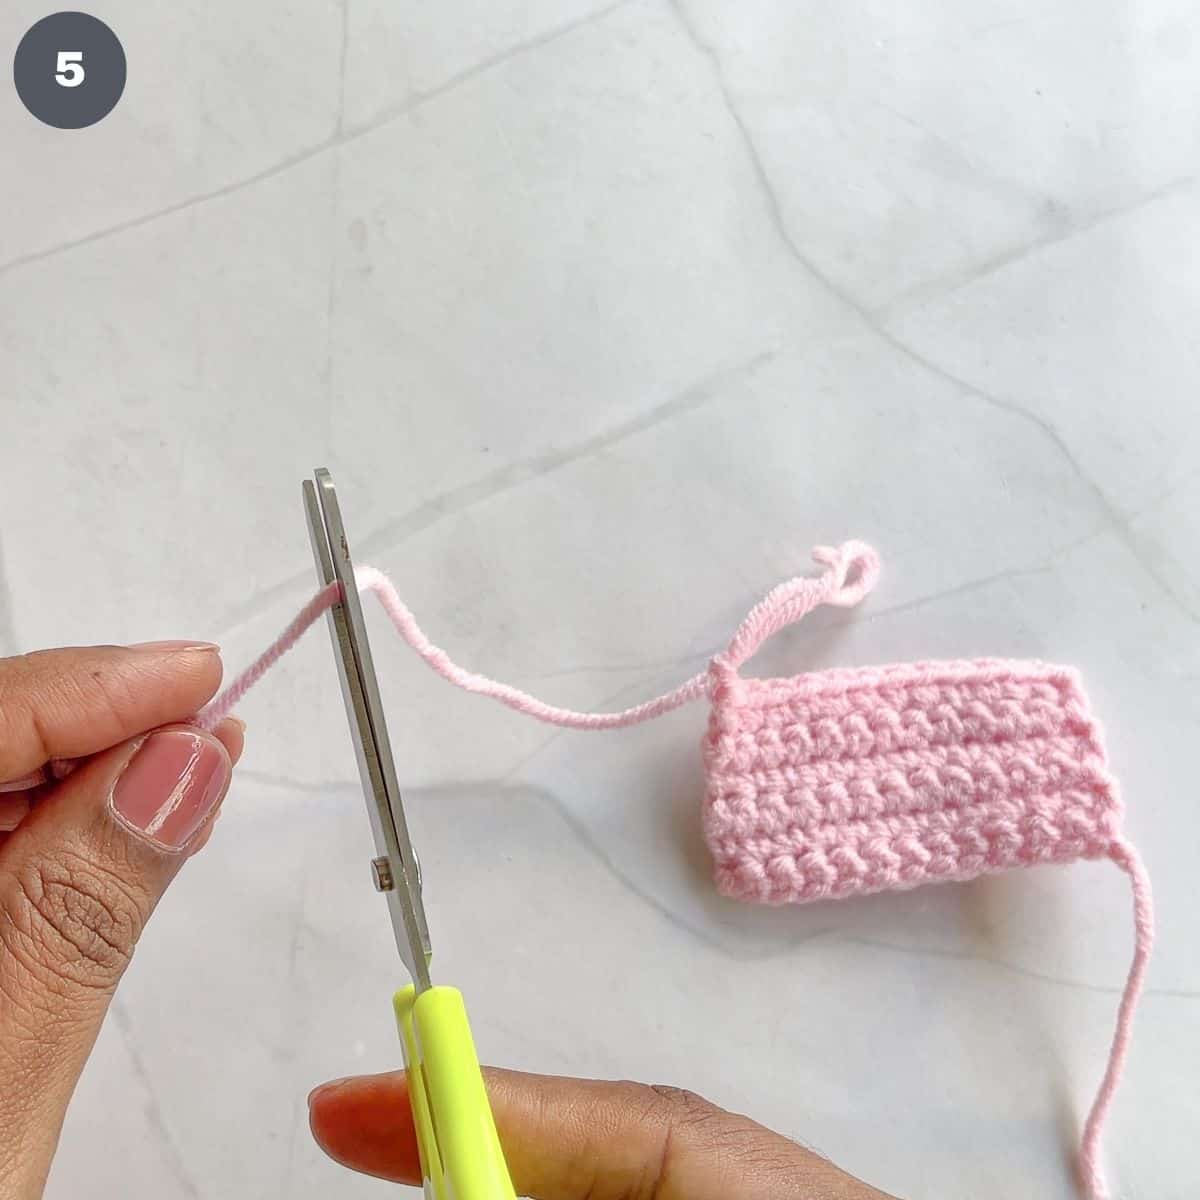
Ch 1. Remove the hook. Cut the yarn leaving a long tail for finishing (image 5).
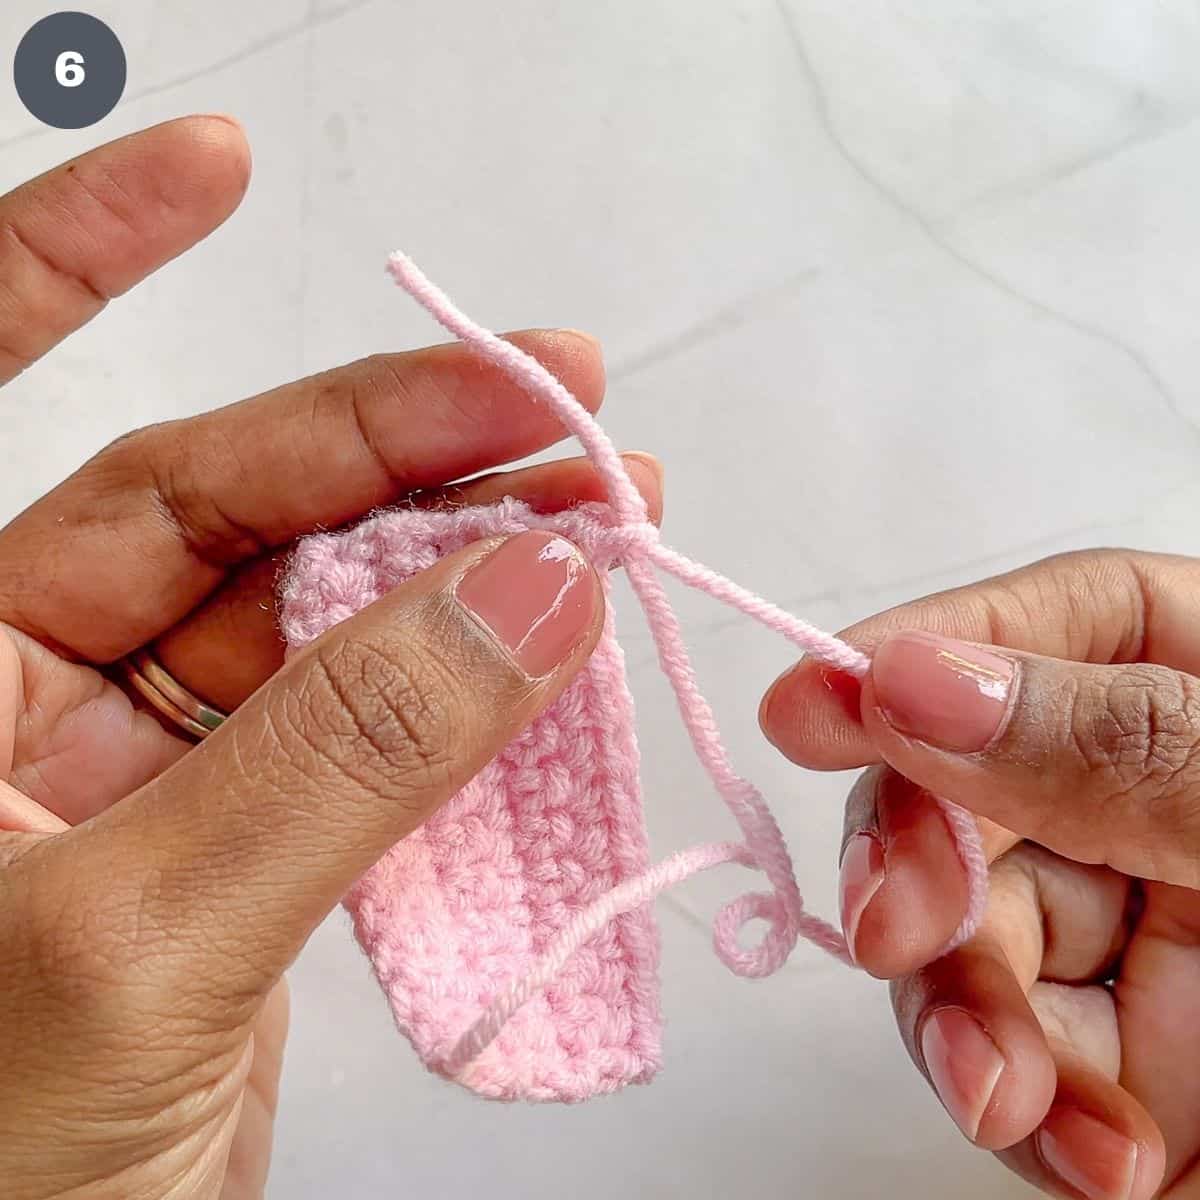
Pull the yarn to fasten (image 6).

Insert the starting excess yarn (at the slip knot) into a tapestry needle. Thread it through a few crocheted stitches close by (image 7). Trim off the excess.
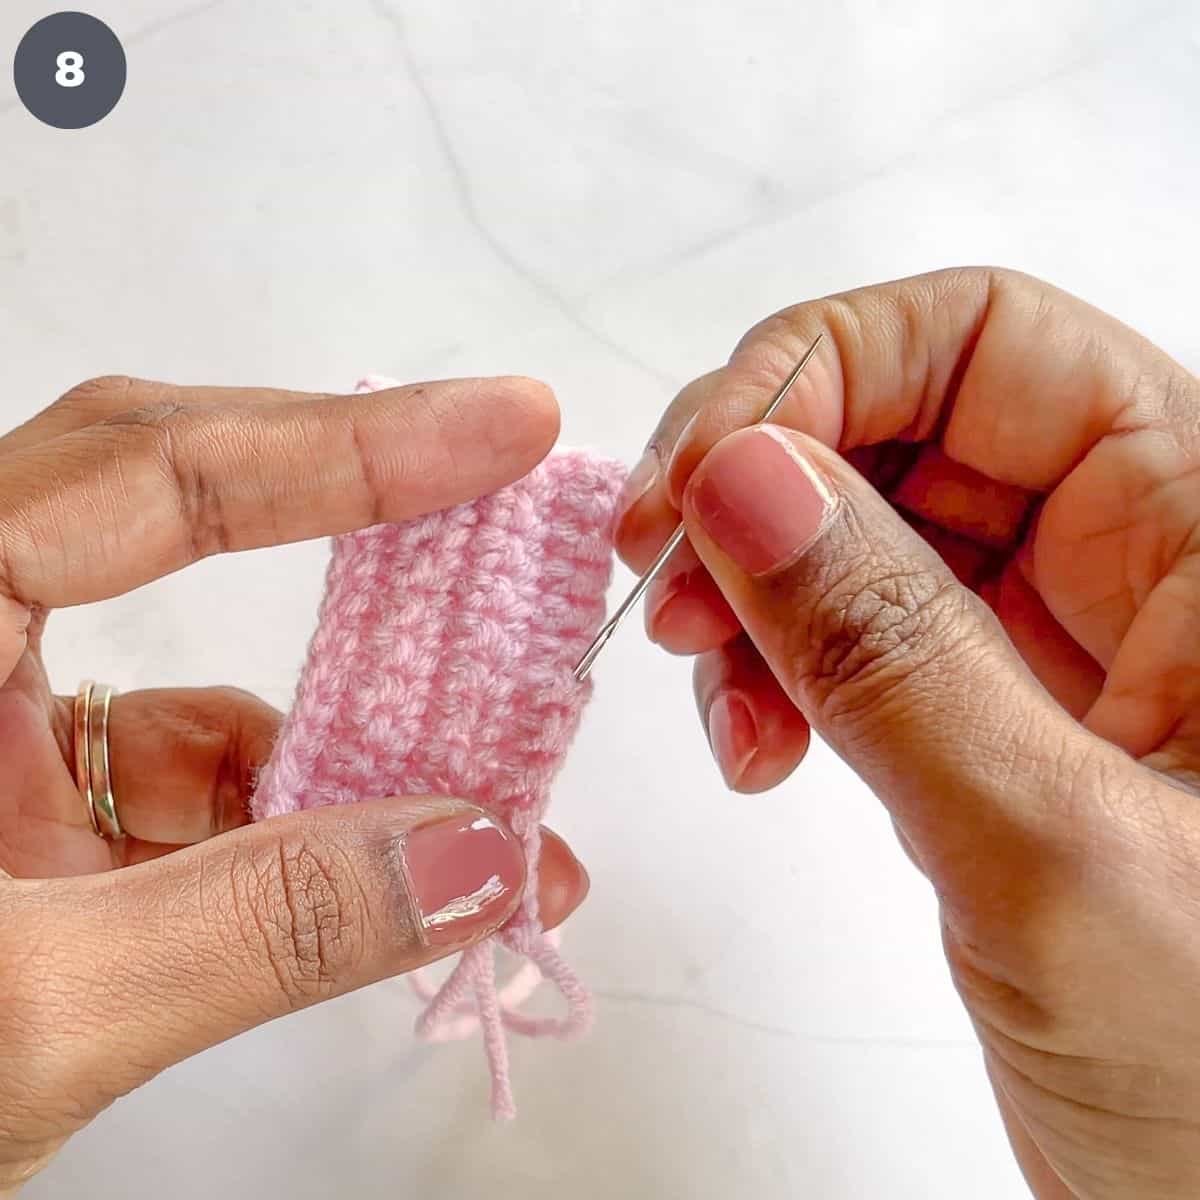
Insert the ending tail yarn into a tapestry needle. Thread the needle through the stiches to the center of the piece (image 8).
Note: You can do it by counting the stitches and identifying the center-most stitch or fold the piece into 2 and mark it with a stitch marker.
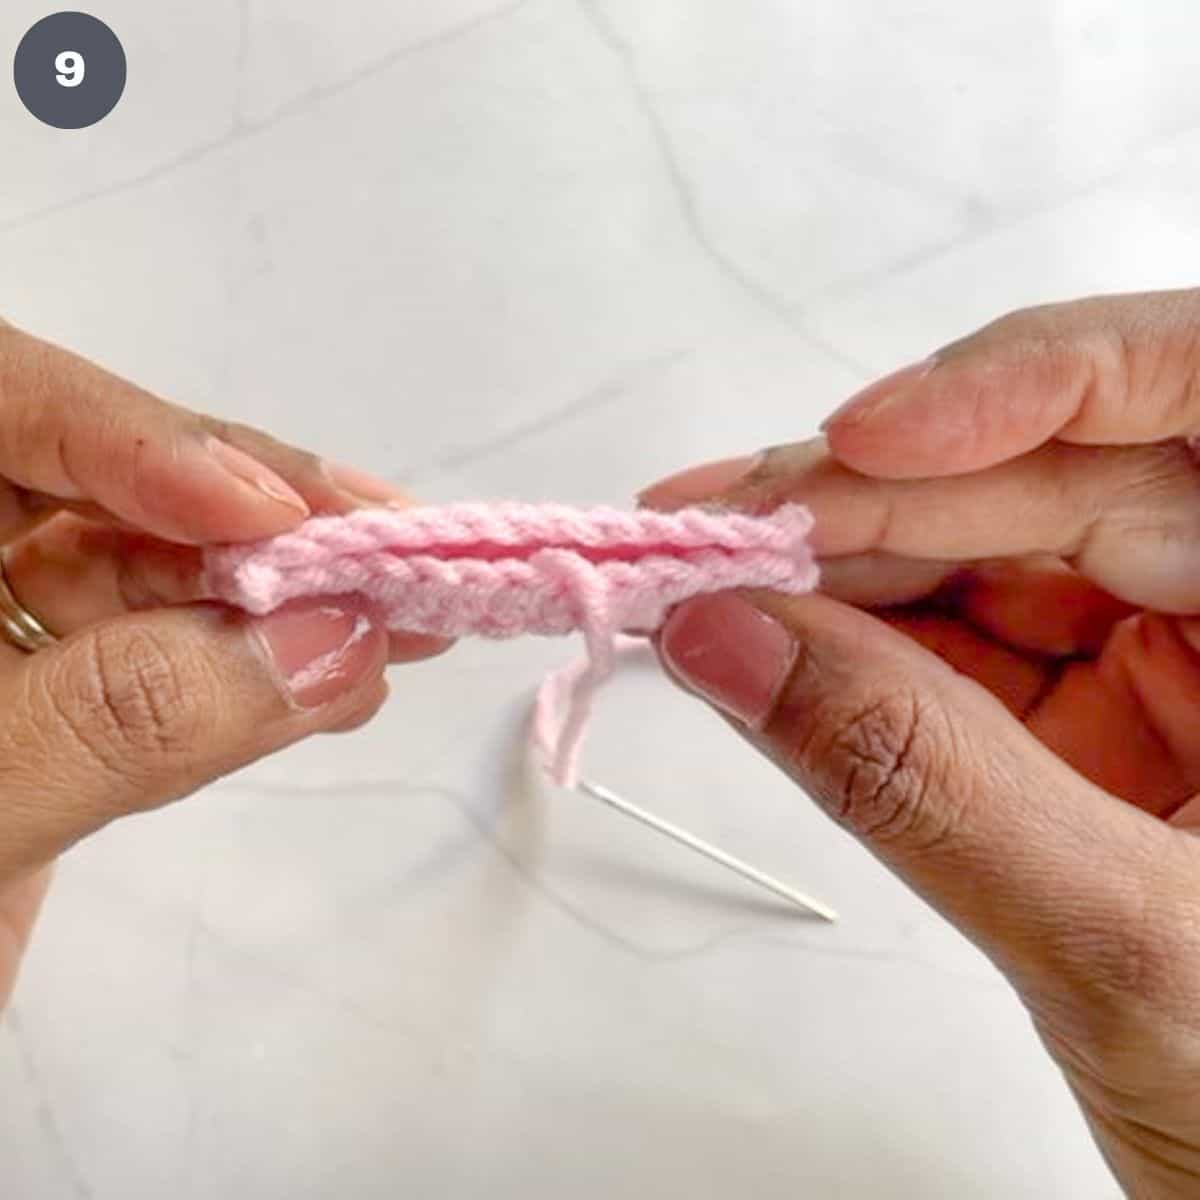
Next, fold the rectangle crocheted piece into 2, horizontally (image 9).
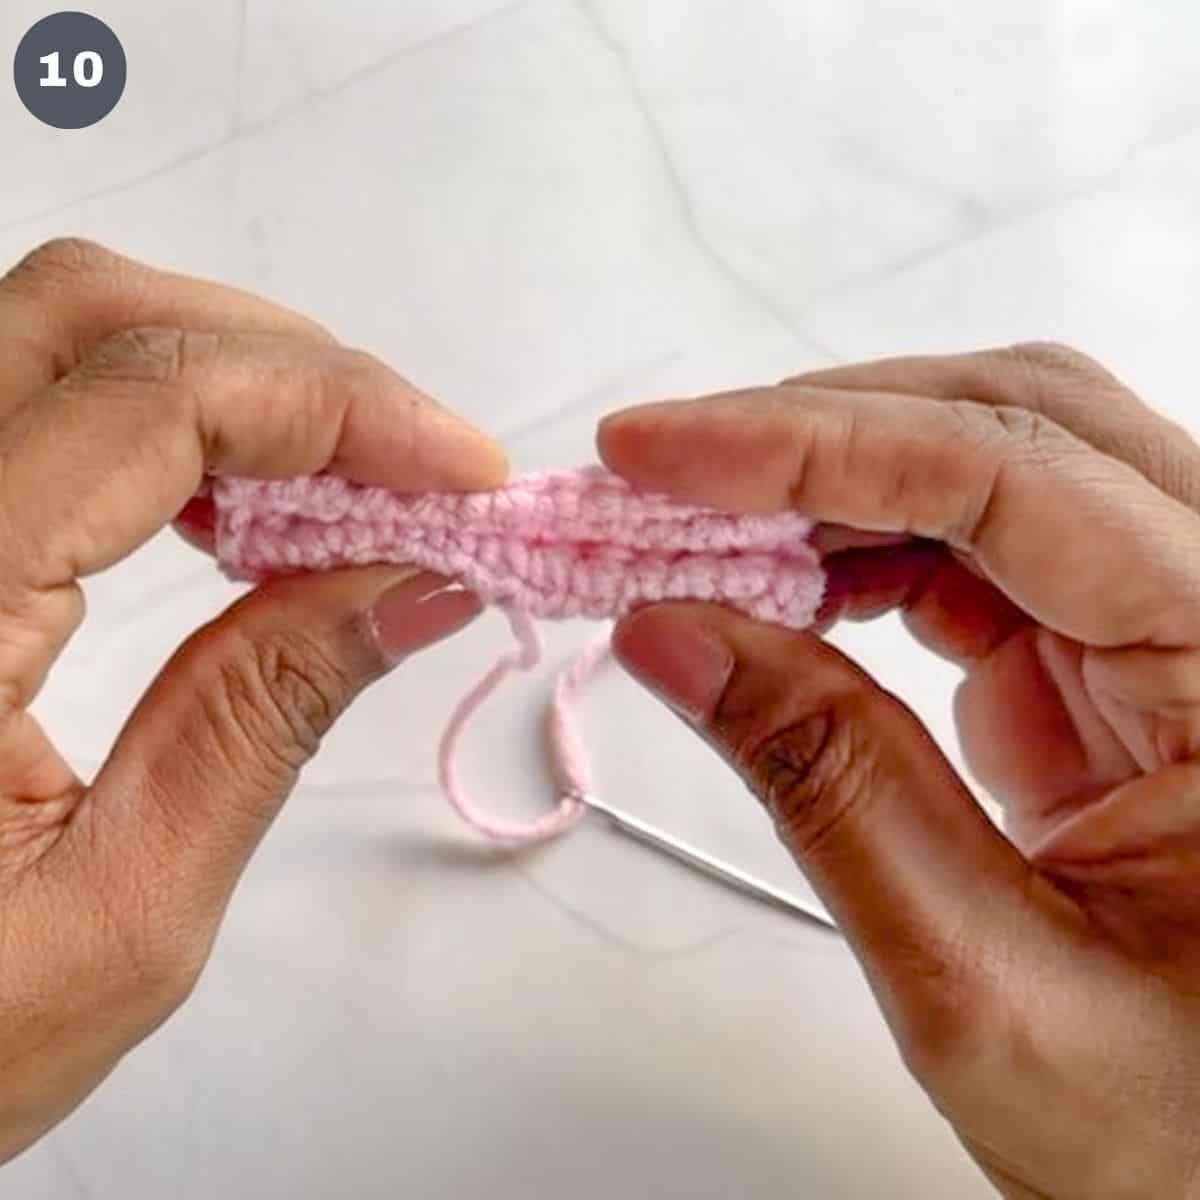
And then fold both edges towards the center to form a 'w' (image 10).

Run the needle through the folds right in the center mark. Pull tightly and then run the needle again in the opposite direction to hold the folds (image 11).
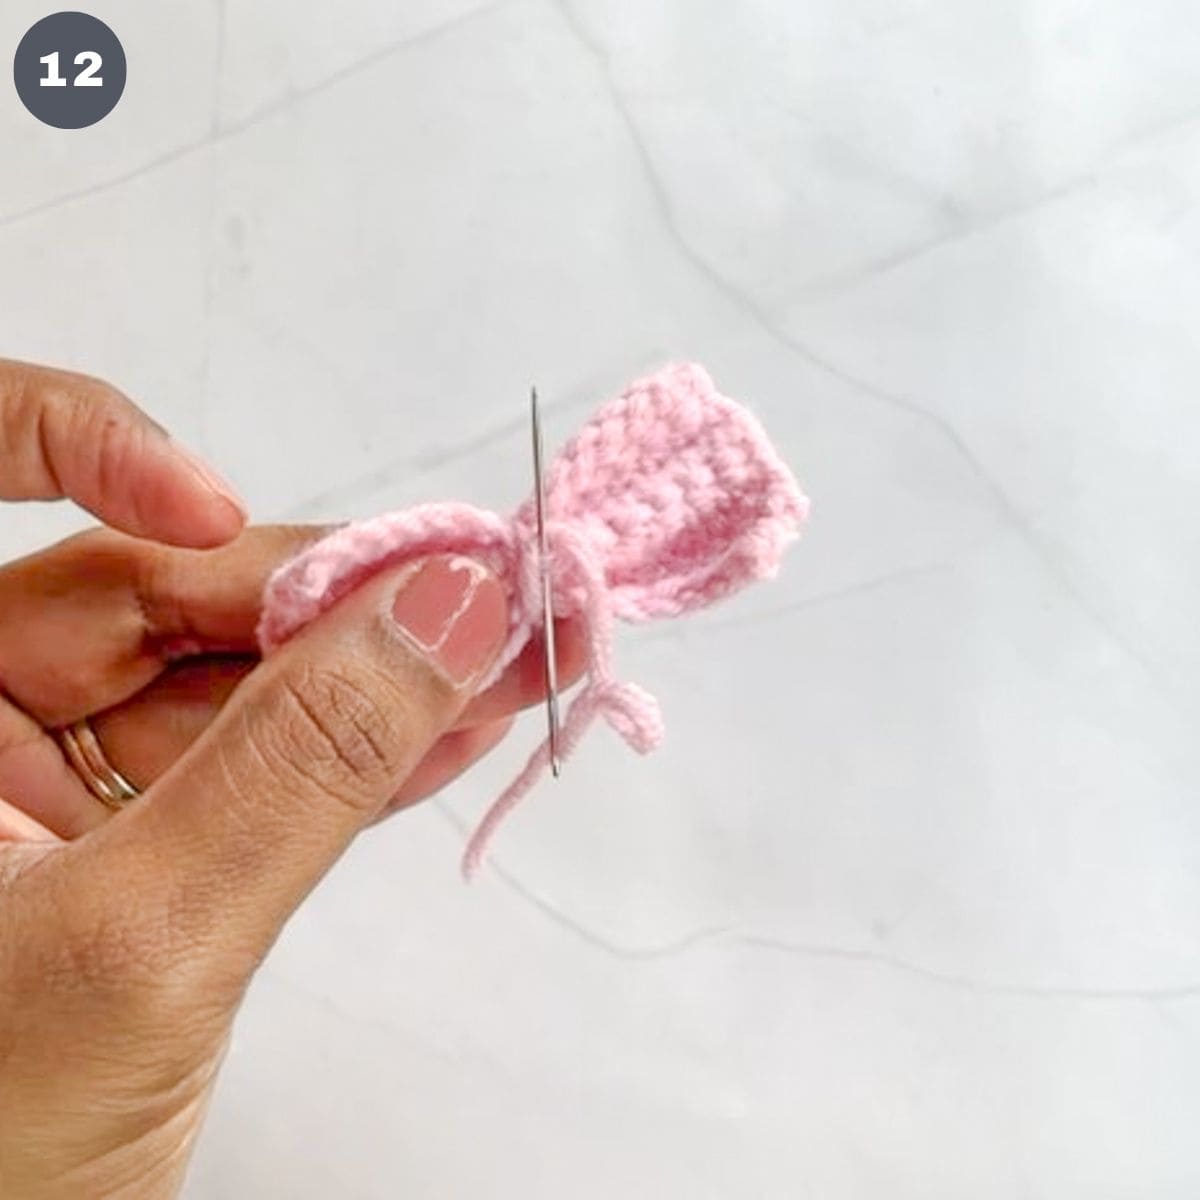
With the remaining extra yarn, wrap the bow tightly. To fasten, insert the needle into a stitch (at the back of the bow) halfway. Wrap yarn around it. Pull the needle out to form a simple knot (image 12).

Thread the needle into a few stitches and cut off excess yarn (image 13). Set aside.
Second part (the bow center):
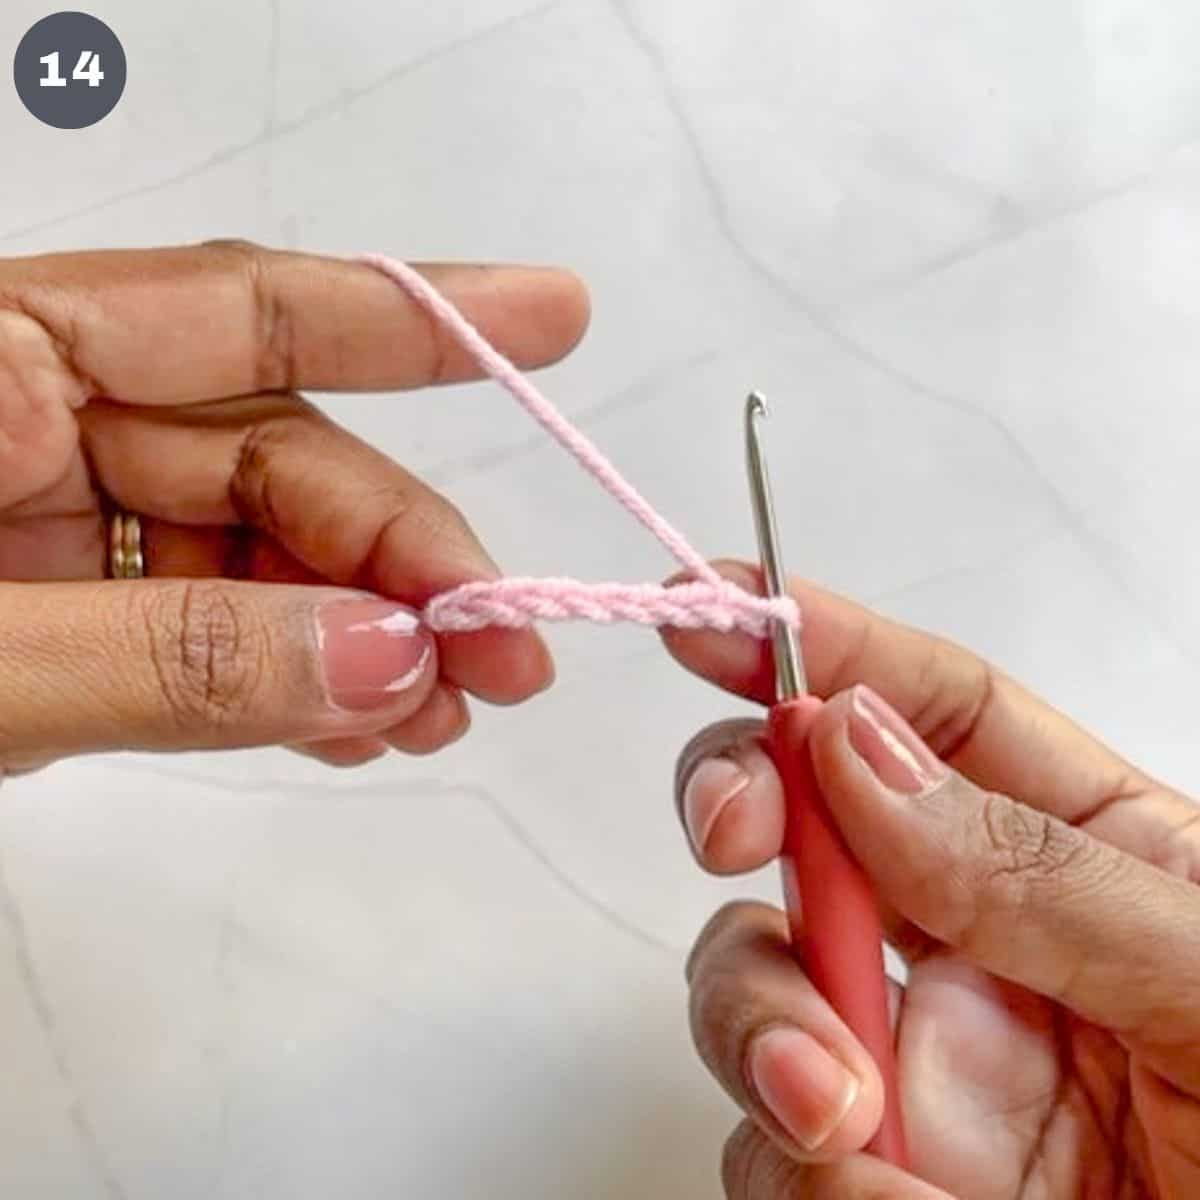
Ch 7 (image 14).
Row 1: Work 1 sc into the second chain from hook. Continue working one sc into each chain stitch until the end. You should have 5 sc. Ch 1.
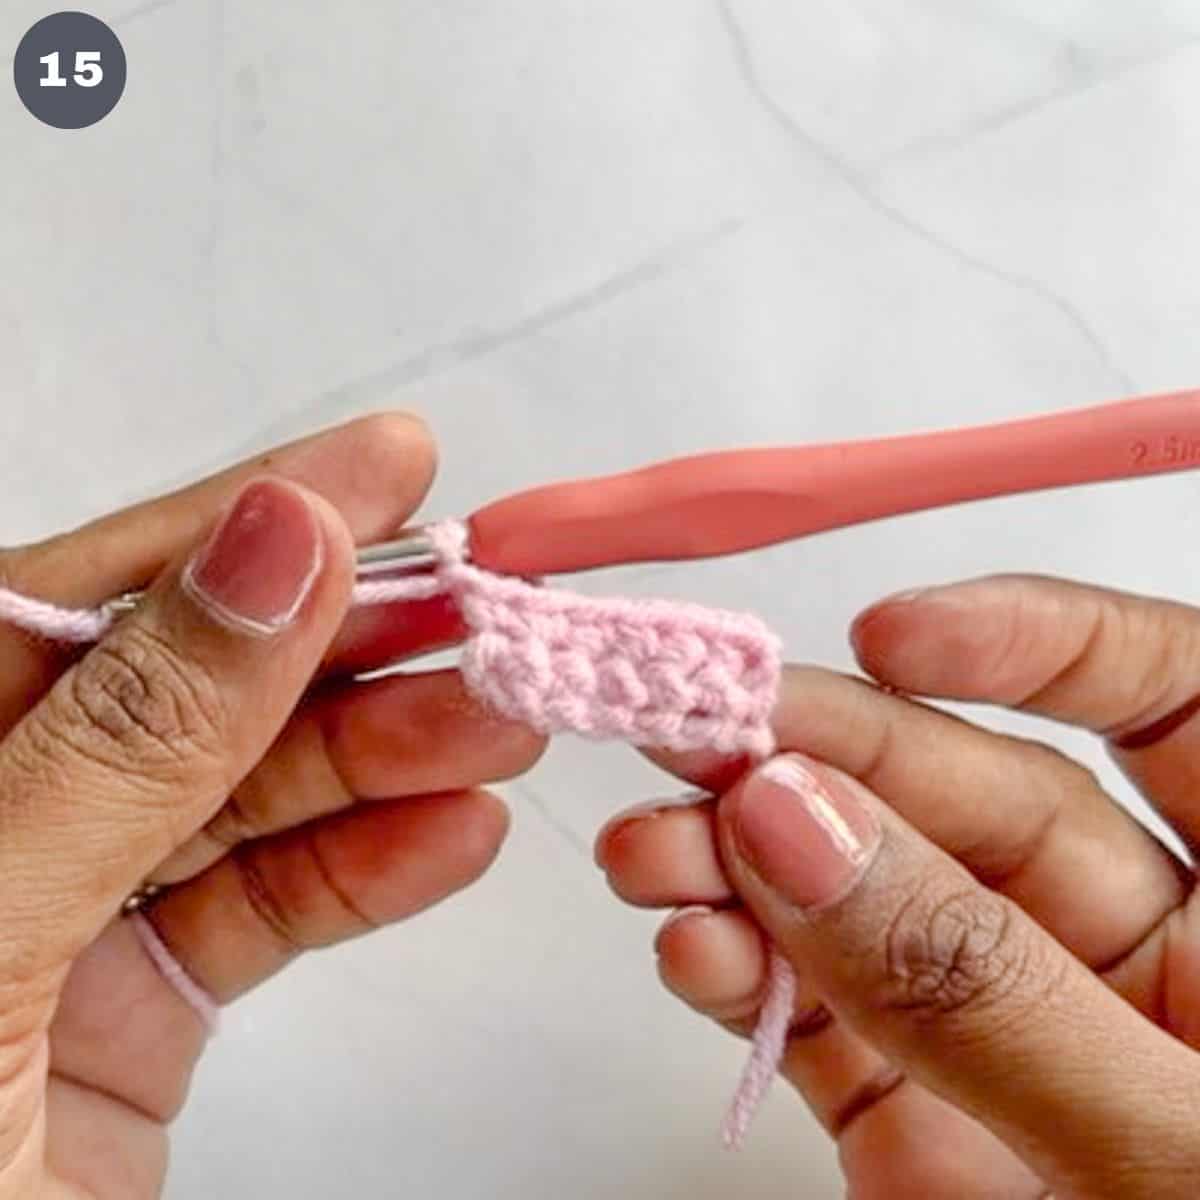
Row 2: Turn over and work 1 sc into second stitch from hook. Continue with one sc in each stitch until the end (image 15) .
Ch 1, remove the hook and and cut the yarn leaving a long tail for fastening and finishing.
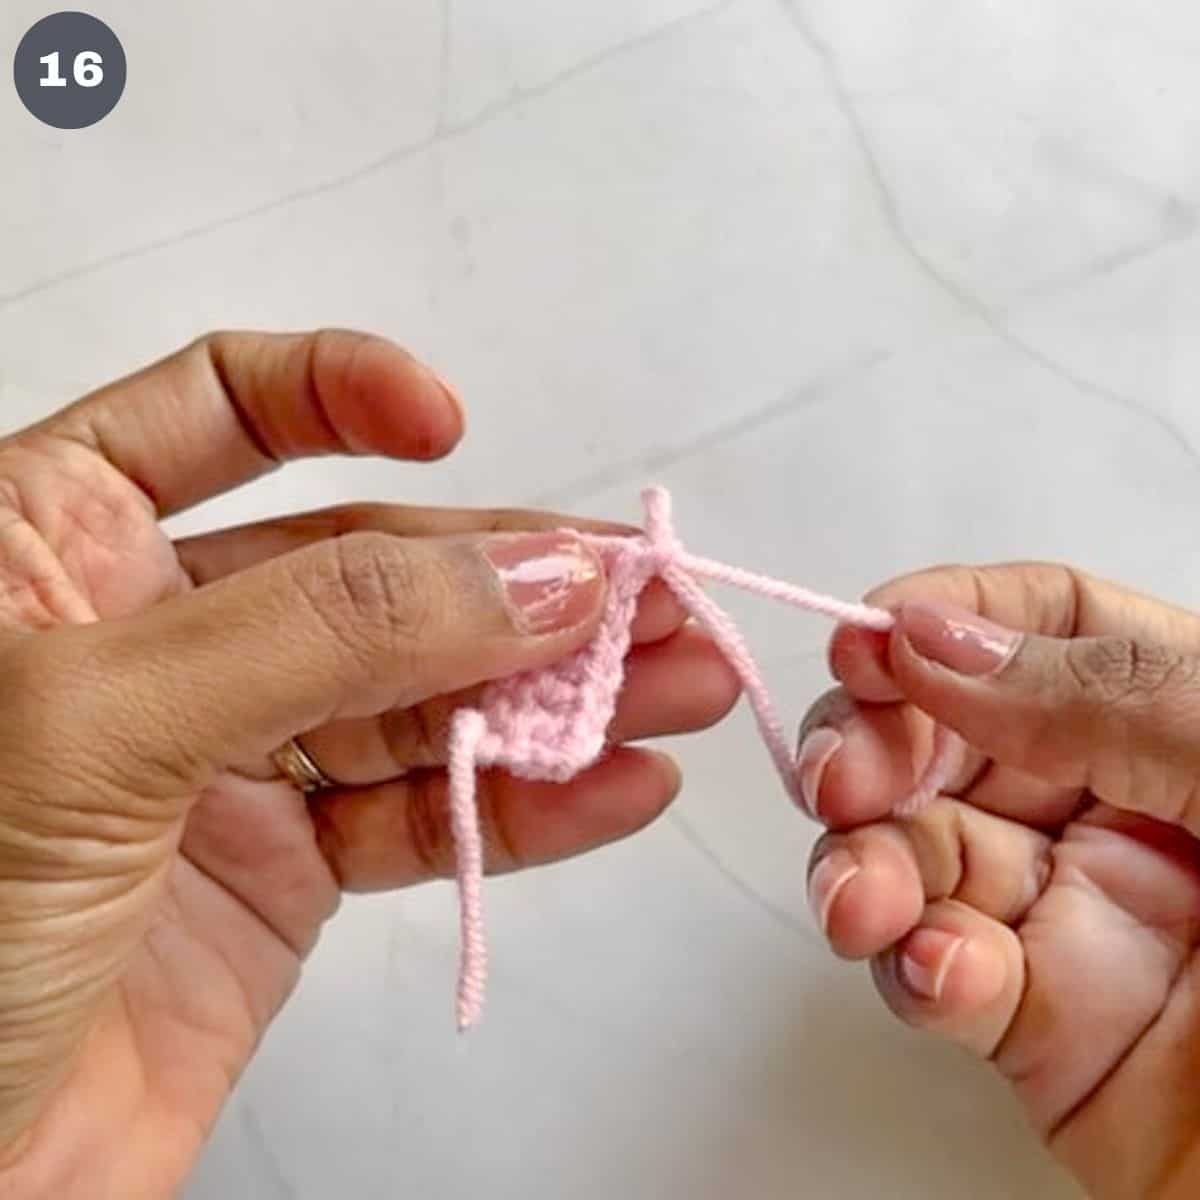
Fasten the last stitch (image 16).
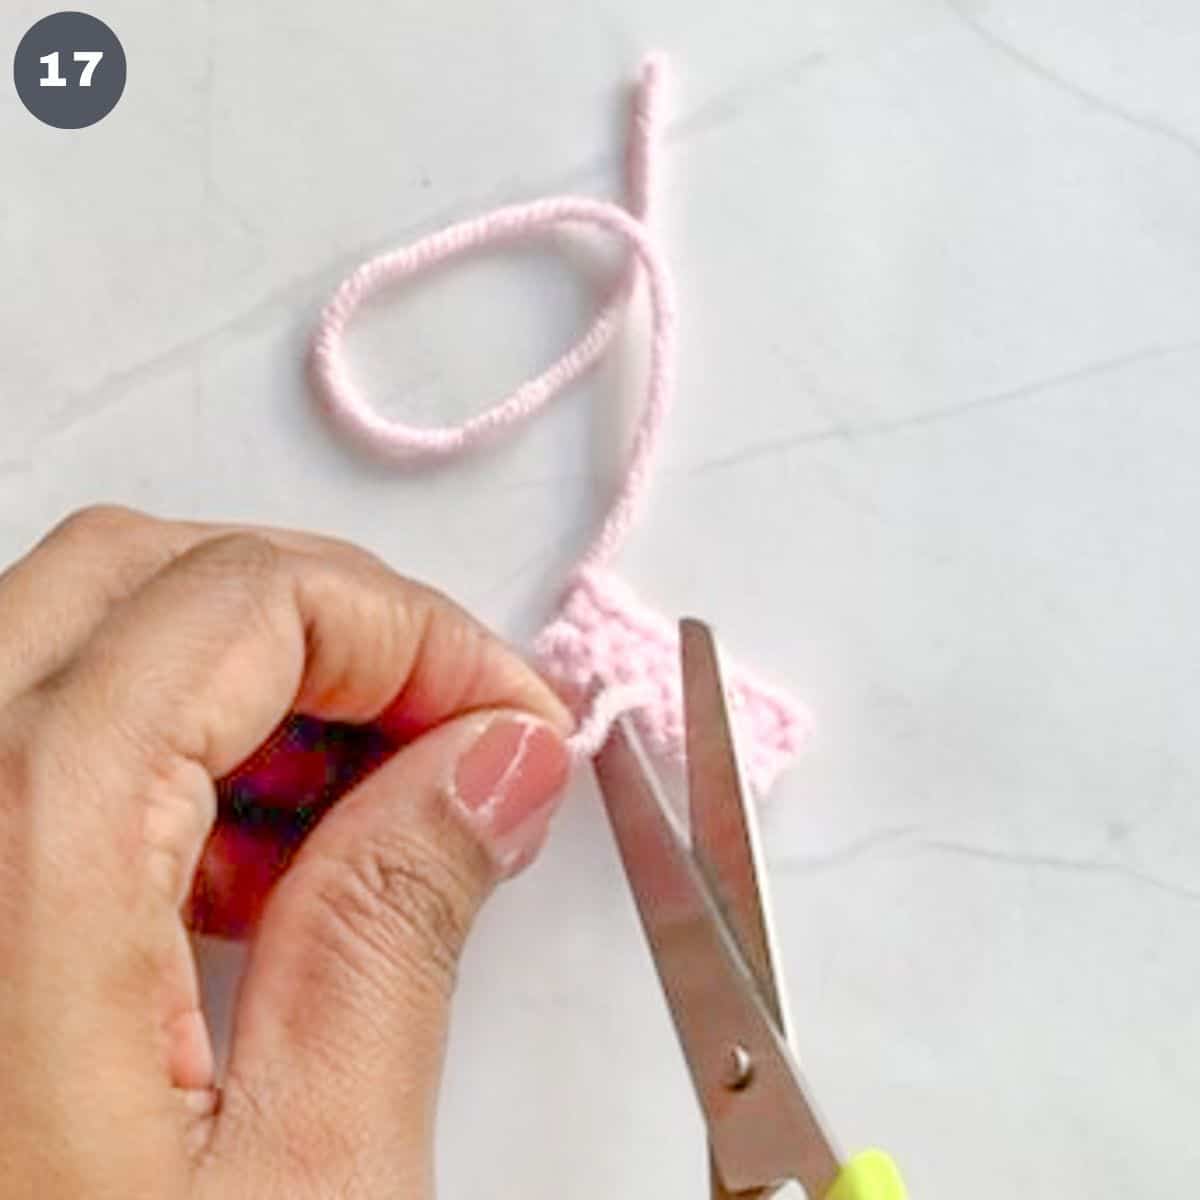
Insert the starting excess yarn (at the slip knot) into the tapestry needle. Thread it through a few stitches and cut off the excess yarn (image 17).
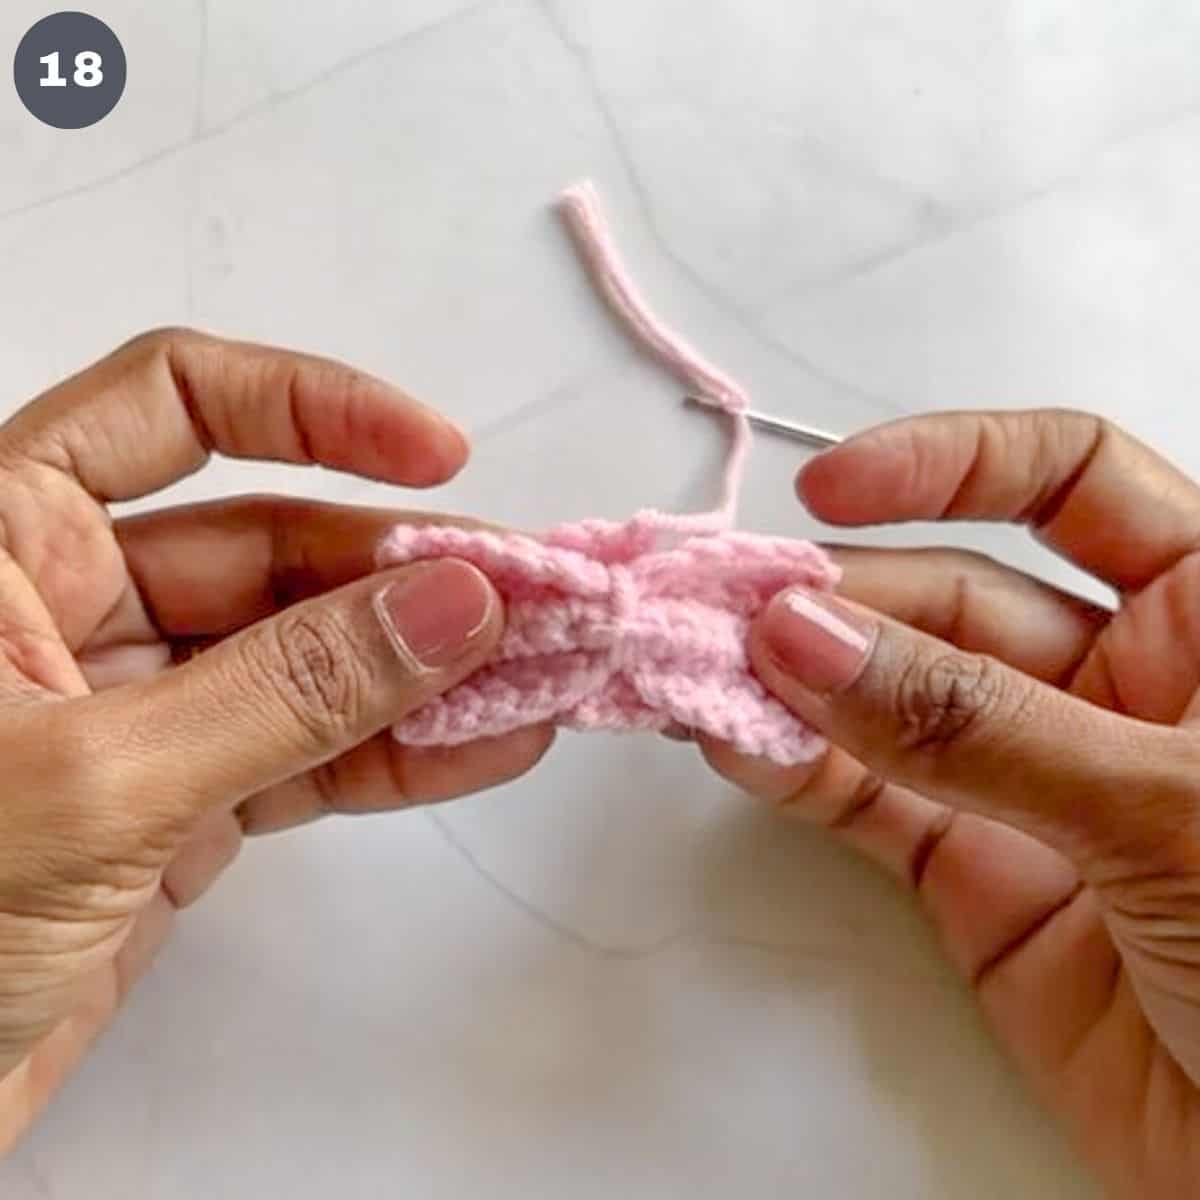
Next, insert the ending yarn into the needle. Place the crocheted piece on a flat surface. Place the bow on top, in the middle. The back of the bow should be facing up (image 18).
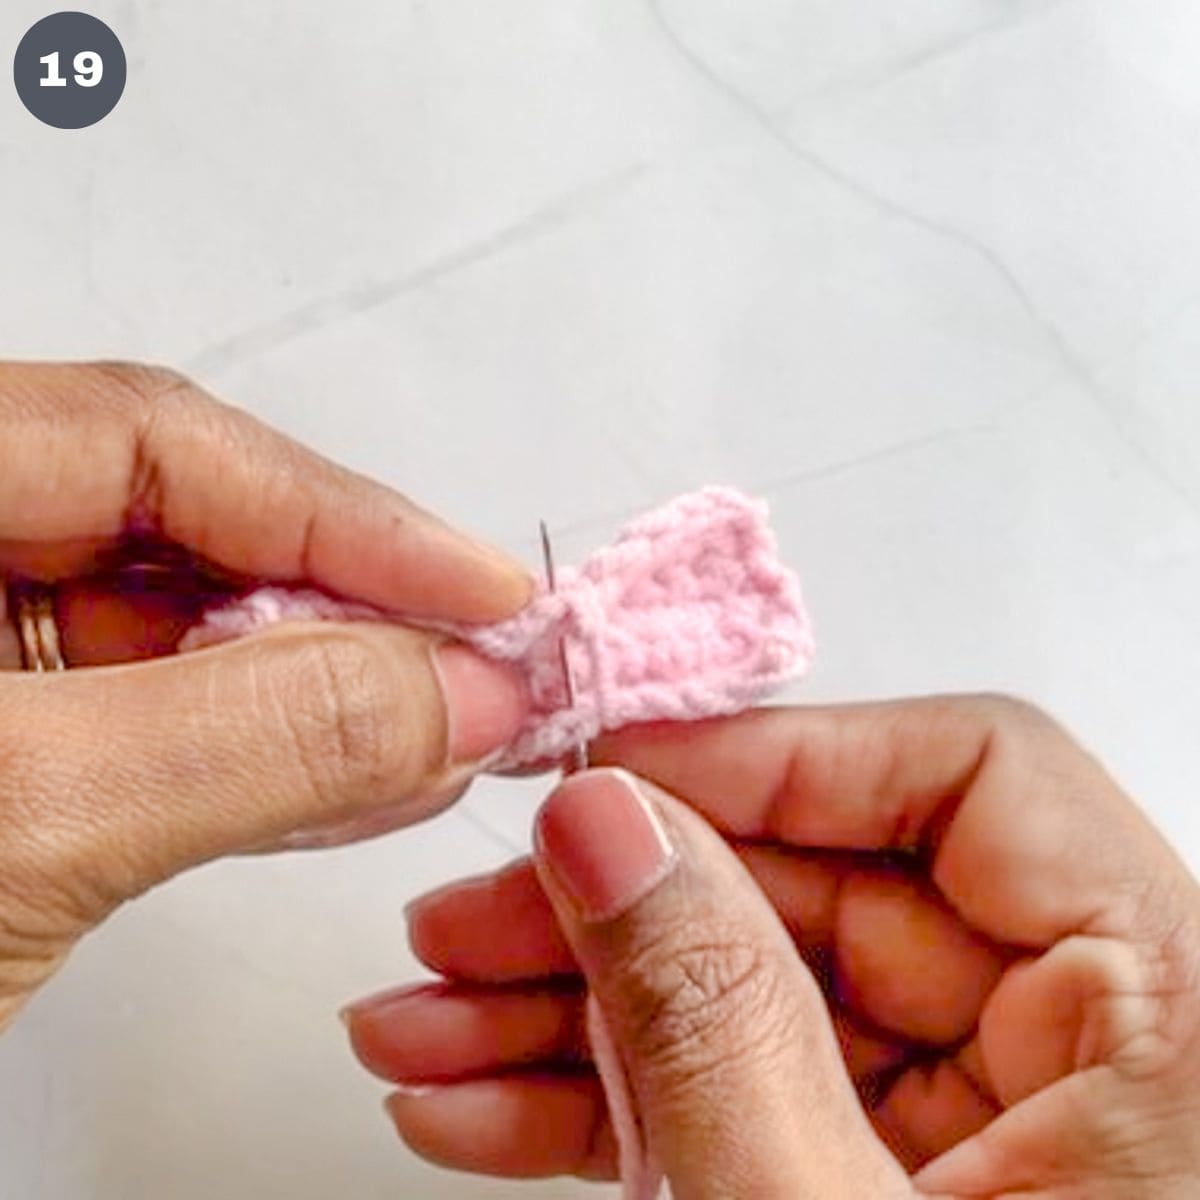
Wrap the bow center to the back of the bow. Stitch both ends tightly (image 19).
Make a simple knot by inserting the needle into a stitch and wrapping the yarn around it before pulling to fasten.
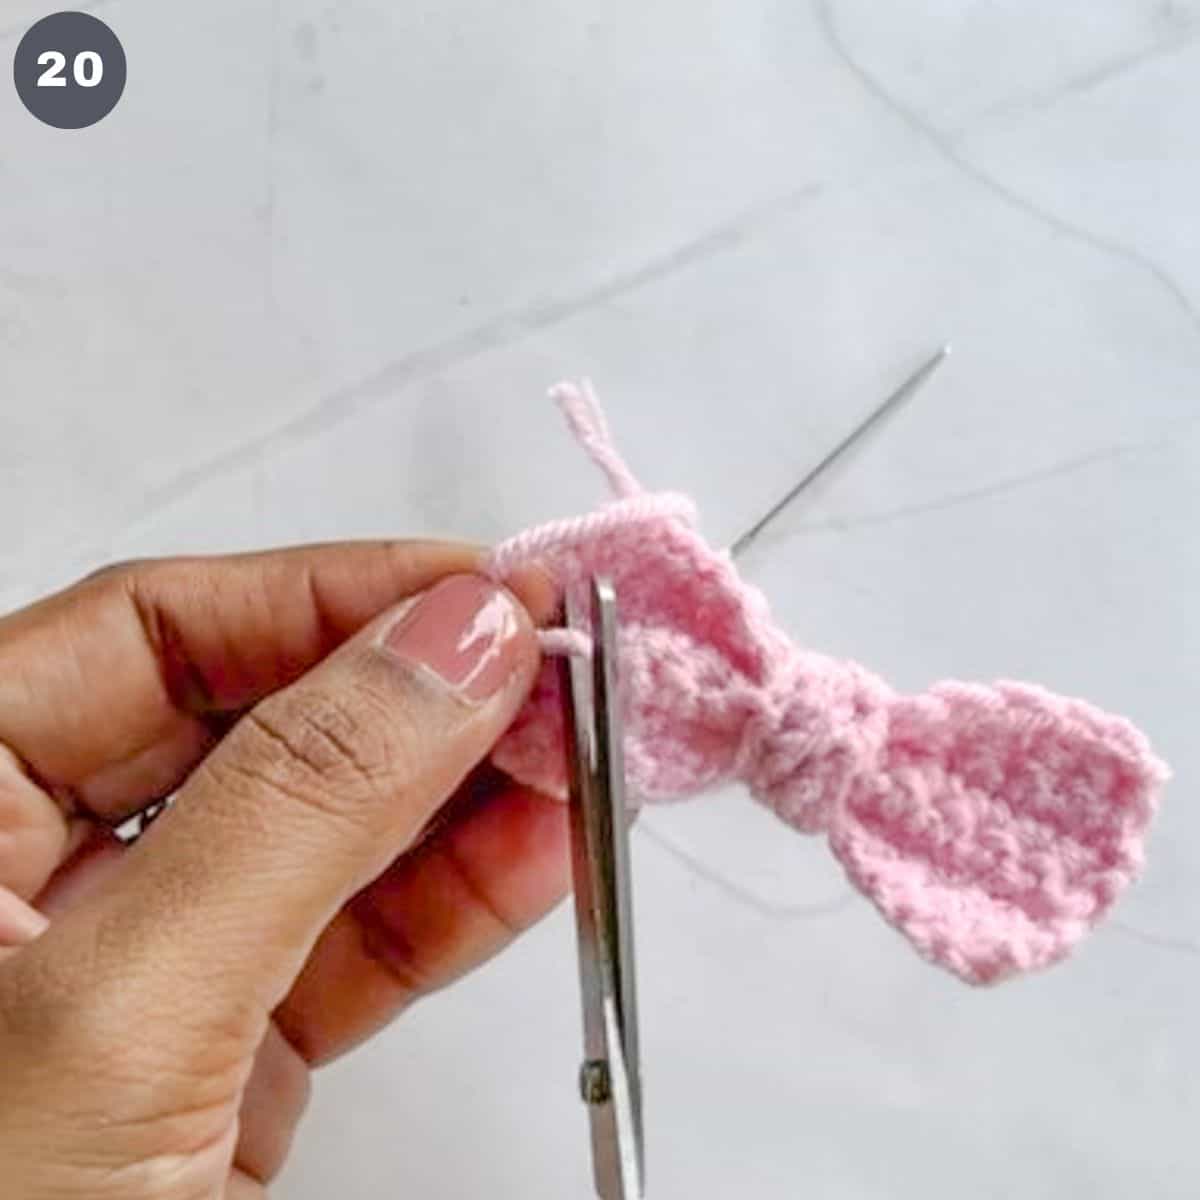
Thread the remaining yarn into a few stitches on the bow before trimming off the excess (image 20).
And that completes the easy crochet bow.
Tips
- To make these bows in a thinner yarn, you can use DK weighted yarn. With the exact same stitch count, the bows made with thinner yarn will be smaller in size. You can also use cross stitch yarn to make these bows. Use a smaller hook.
- To make larger bows with the same worsted weight yarn (about the size of a bow tie), increase the number of starting chains to 20 (for the main part of the bow). Also increase the number of single crochet rows to 8. Test by pinching the center of the rectangle into a bow shape. Add more rows of single crochets if you want a bigger bow, or until you are satisfied with the size of the bow. To make the centerpiece for a larger bow, increase the number of starting chains to 12. Maintain 2 rows of single crochets.
- To make smaller bows, reduce the number of starting chains and number of single crochet rows accordingly, depending on the size of the bow you wish to make.
- When making smaller bows, you can also omit making the center piece and simply wrap the center of your bow with the excess yarn from the main bow. Make sure to leave extra length of yarn for the wrapping. Fasten with a knot at the back of the bow and run the excess yarn into a few stiches on the bow before trimming off the excess end of the yarn.
🖨️Printable Pattern
Click on the image below for the printable pattern in PDF format:
Leave a Reply