
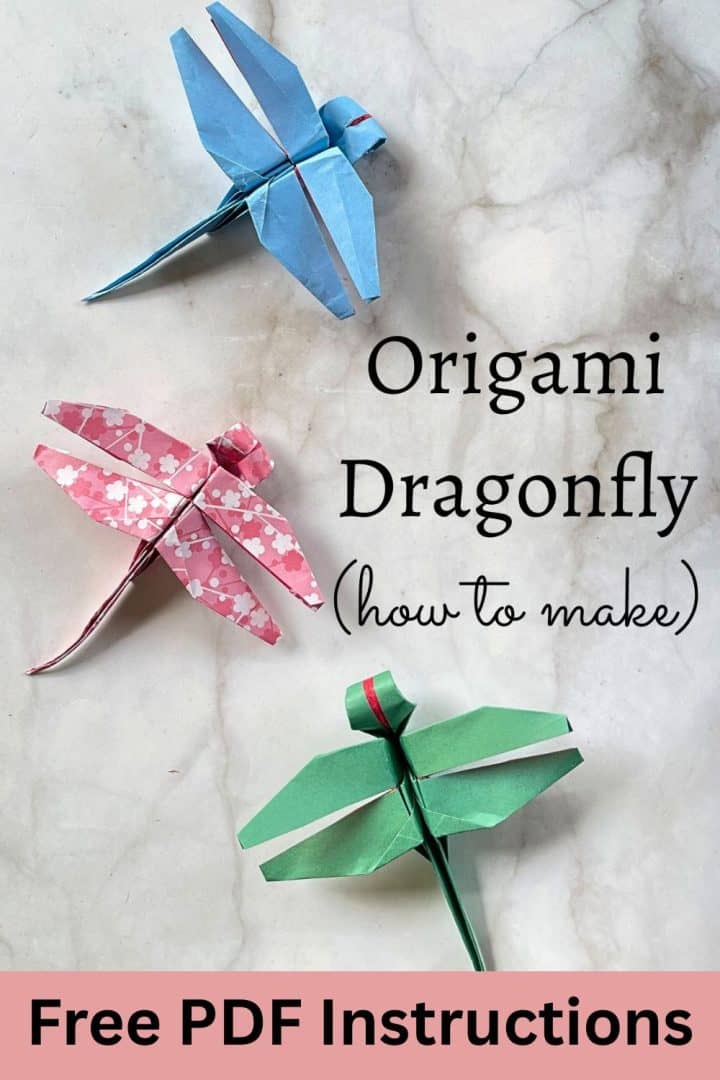
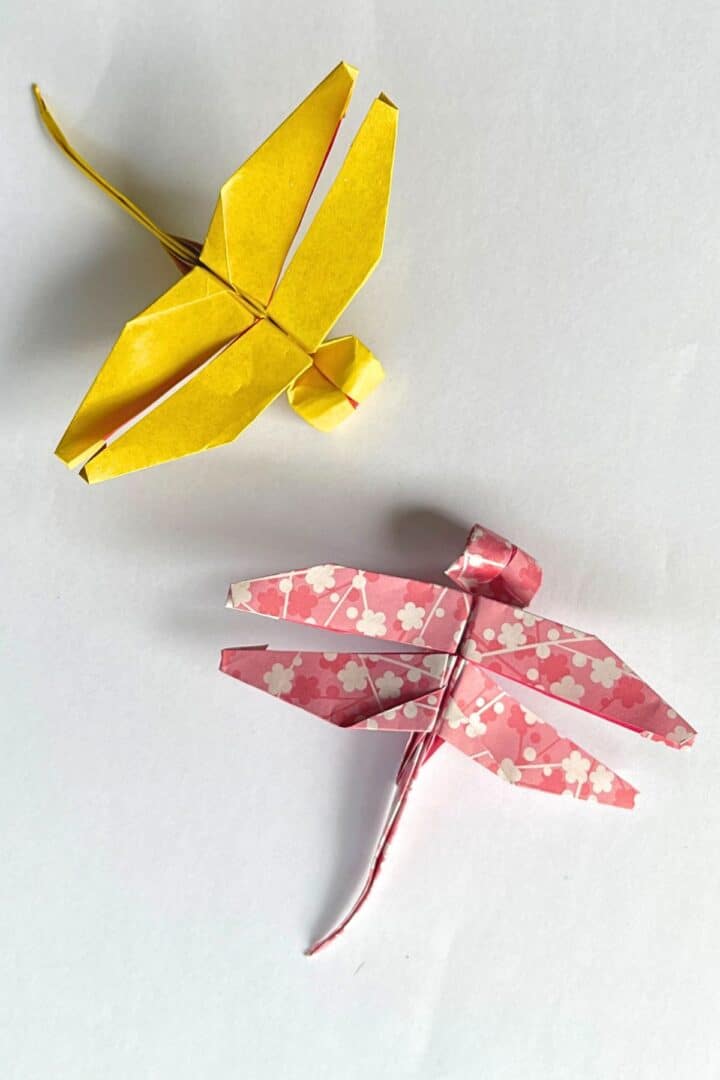
Learn how to make origami dragonfly with this easy step by step tutorial and video guide. With just a few simple folds, you can make these traditional origami dragonfly paper crafts in under 10 minutes!
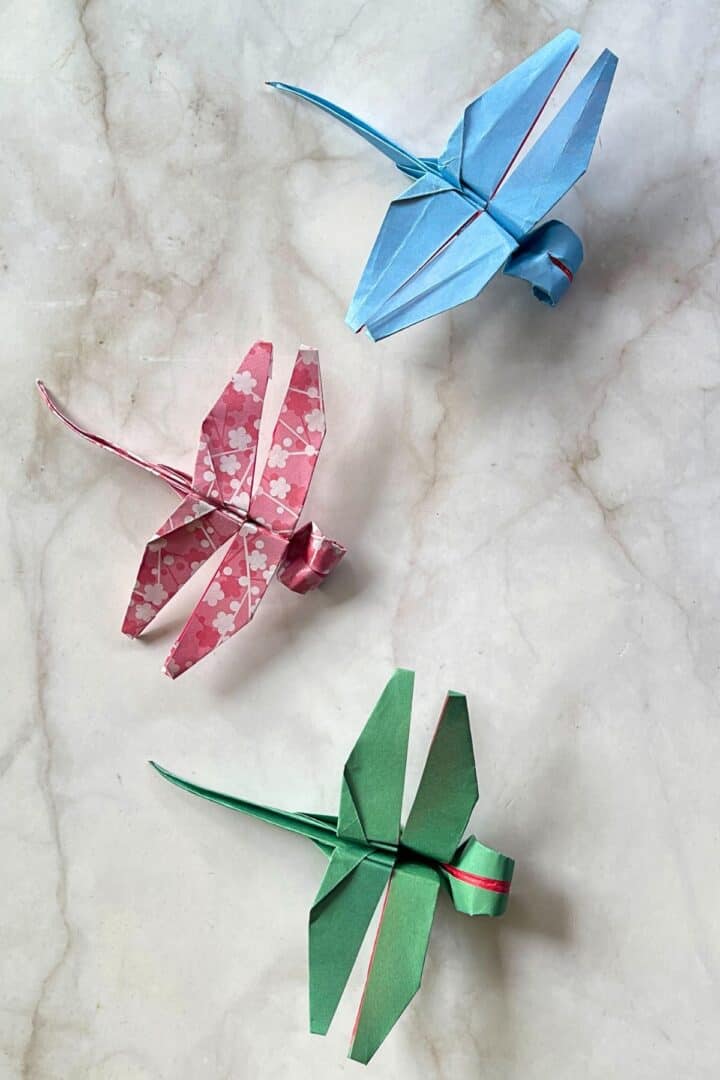
This is an intermediate origami project. The dragonflies are made using a square sheets of pre-cut origami paper measuring 15 cm by 15cm. I used a double sided paper with different color on each side, but single sided paper is all you need as the completed paper dragonflies will only show one side of the paper.
Each origami duck measures 11cm long (from head of the dragonfly to the tip of the tail) and 10 cm wide (measured from one end of the wings to the other end on the other side of the dragonfly).
🎥Video Tutorial
Here is the video tutorial on how to make origami dragonfly. The full list of materials and step by step instructions and images are right below.
🧾Supplies
- Single sheet of square origami paper (measuring 15cm by 15cm). This can be a single sided paper.
- Scissors - to cut the wings
- Toothpick - to roll the paper to make the head of the dragonfly
- Glue - to stick the body (optional)
✂️How to Make
Step 1: Make the base
If you are using double sided paper, place the paper on your table, with the right side facing down. In this tutorial, I am using a double sided paper with yellow on one side and red on the other. I am making a yellow dragonfly, so the yellow side is facing down and the red side of the paper is facing up.
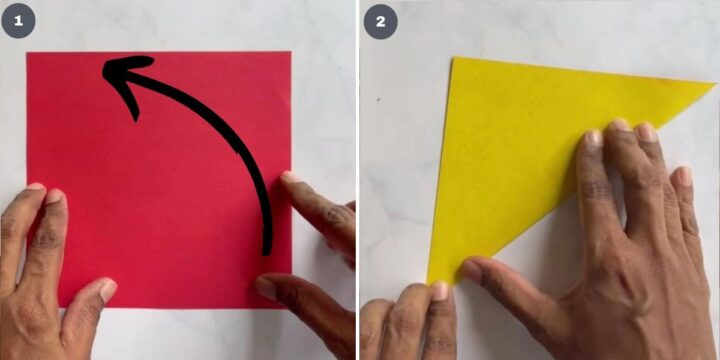
First step is to fold the paper by bringing the opposite corners of the square sheet together. With the red side facing up, fold the paper diagonally by bringing the bottom edge on the right to the top left corner. Make sure the corners are aligned (images 1 and 2).

Unfold (image 3).
Fold it diagonally again. This time bring the top right edge to the bottom left corner (image 4).
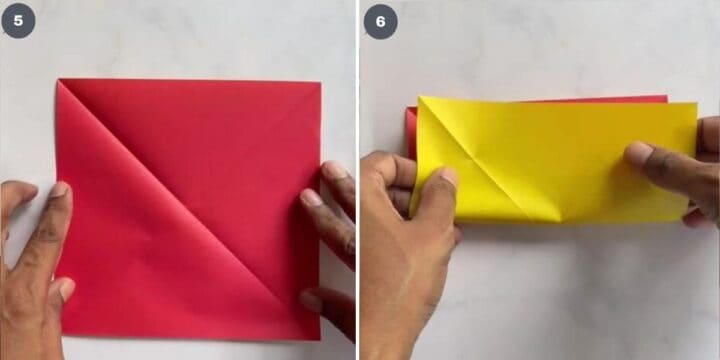
Unfold (image 5). Next, fold the paper into 2 horizontally (image 6).
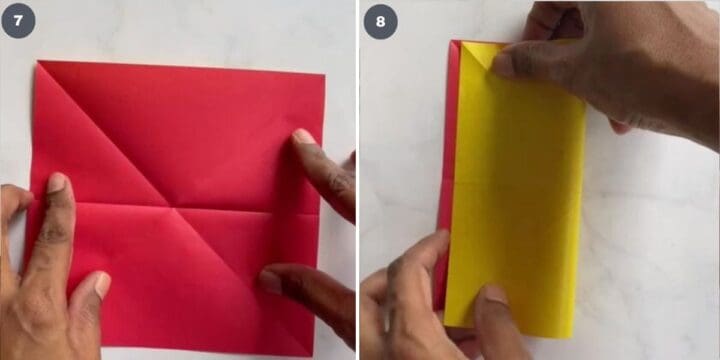
Unfold (image 7). Fold it into 2, vertically (image 8).
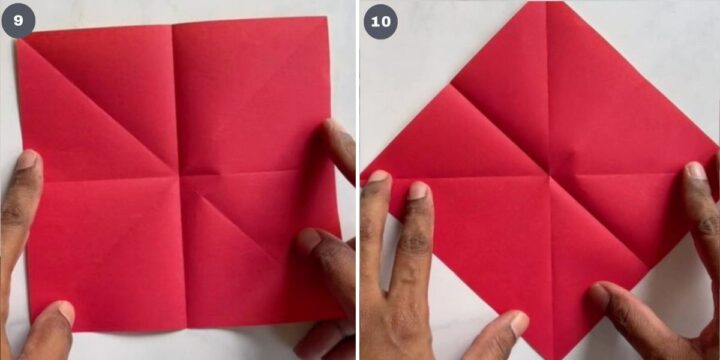
Unfold (image 9). Turn the paper in as shown in the diagram (image 10).
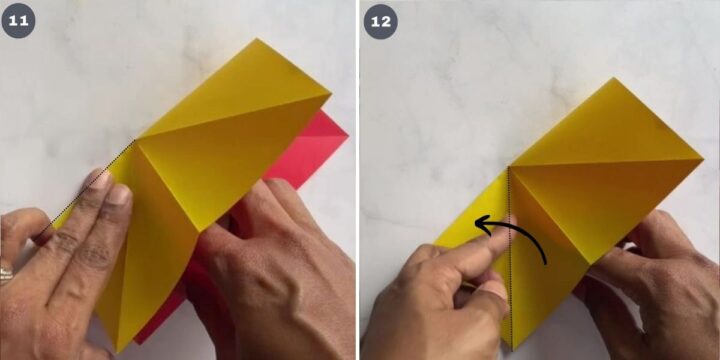
Next, fold the paper out along the lines shown. First fold it inwards (image 11) and then outwards (image 12).
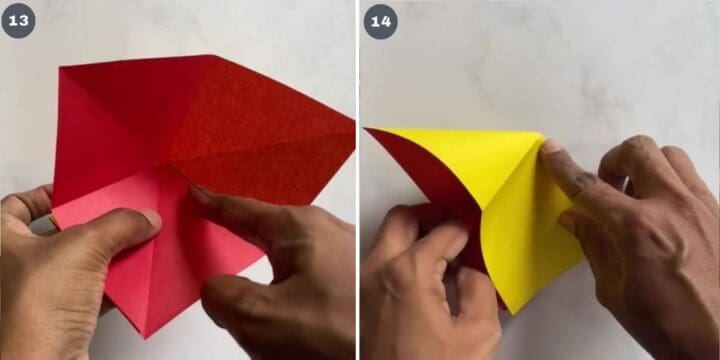
Repeat on the other side of the square. First fold in inwards along the line as shown (images 13 and 14).
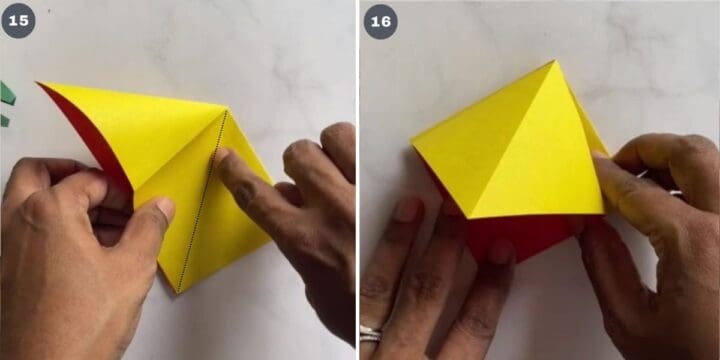
And then fold outwards, following the dotted line (image 15). The folded paper should form a square (image 16).
Step 2: Fold the body
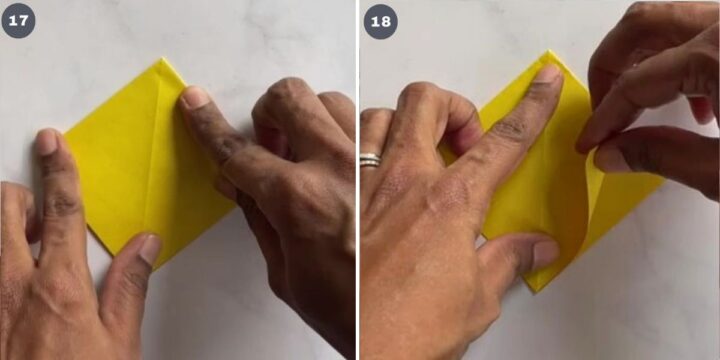
Press the folds firmly (image 17).
Lift the top layer of the paper from the bottom and fold as shown (image 18).
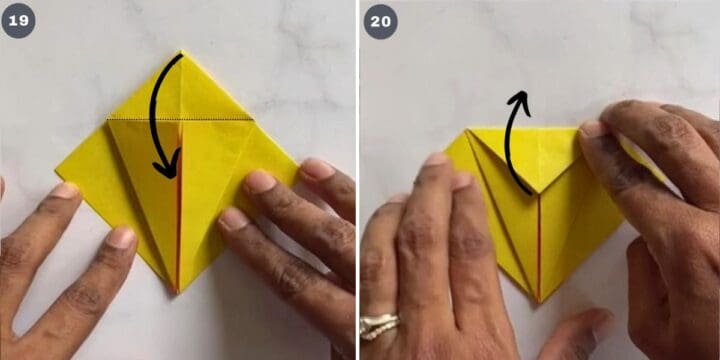
Repeat on the left side. Next, fold the top triangle. And then unfold it (image 19 and 20).
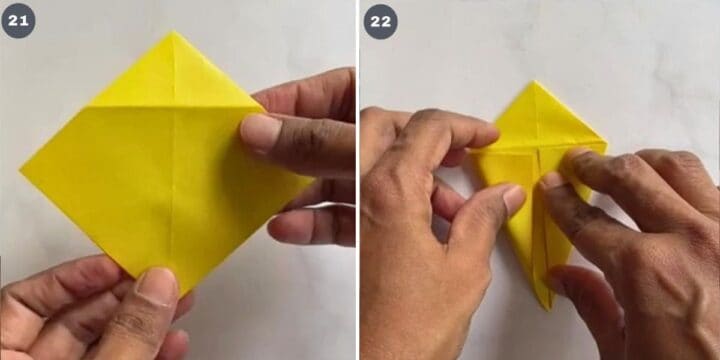
Turn the folded paper over (image 21) and fold the sides as shown in image 22.
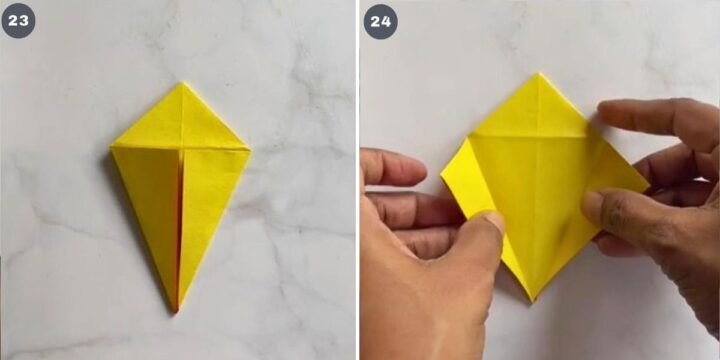
This is how it should look like (image 23). Unfold both sides (image 24).
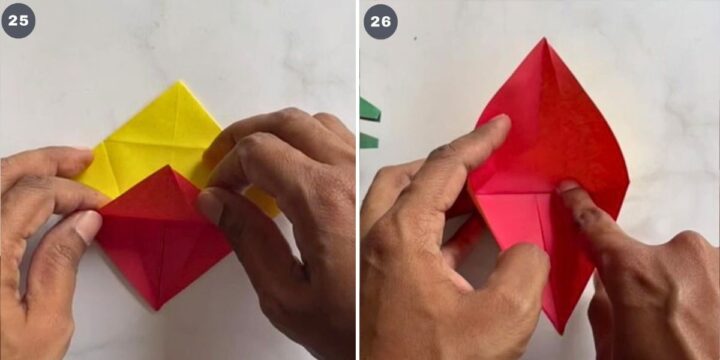
Lift the paper from the bottom and fold it along the horizontal folded line shown (images 25 and 26).
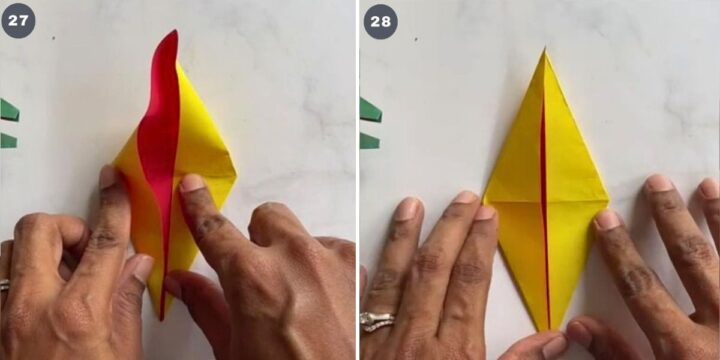
Refold the sides to form a diamond shape (images 27 and 28).
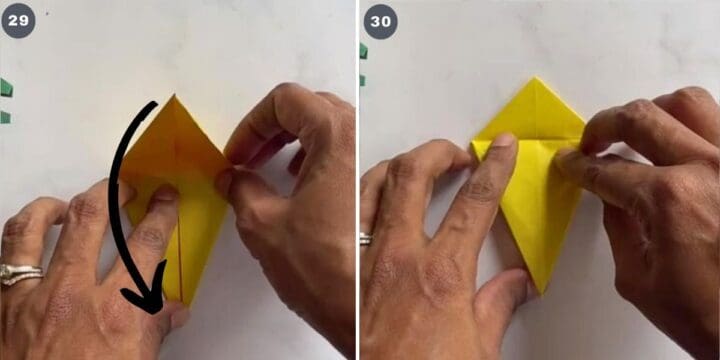
Fold the diamond by bringing the top and bottom points of the diamond together (image 29). This is how it should look like after folding (image 30).
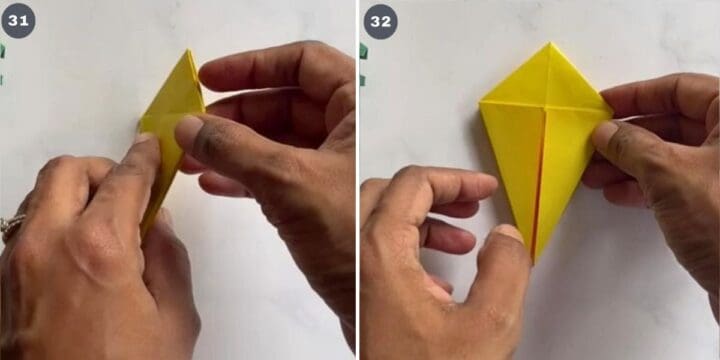
Turn the paper over (images 31 and 32). Unfold the sides.
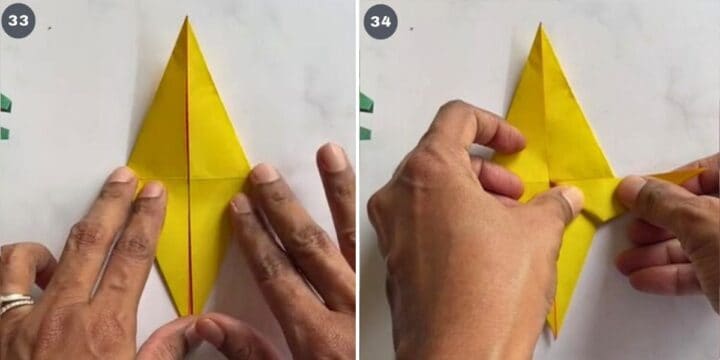
Fold the sides to form a diamond, similar to images 25 to 28 above.
Lift the bottom right flap and fold as shown in image 34.
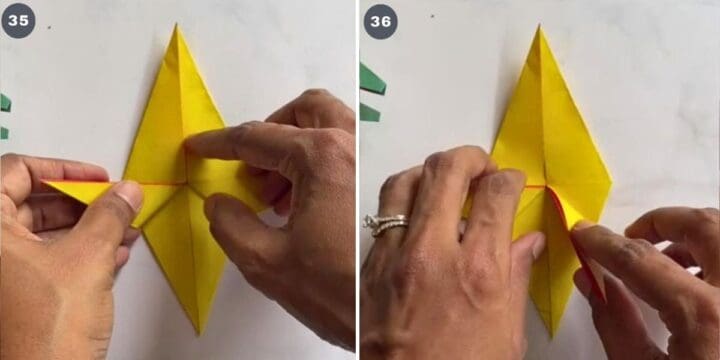
Repeat with the left flap (image 35).
And then, unfold the right flap (36).
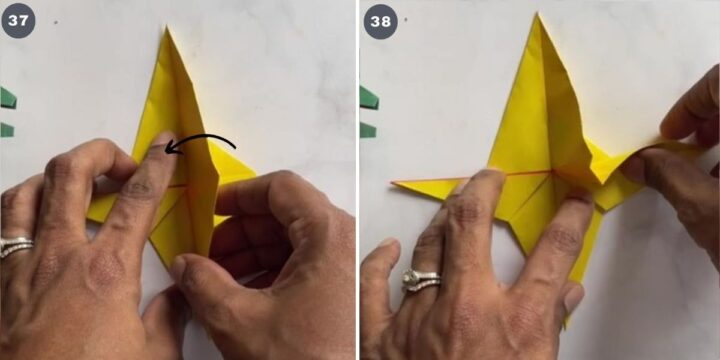
Lift the right side of the diamond shape. Fold refold the bottom flap following the folded lines earlier (images 37 and 38).
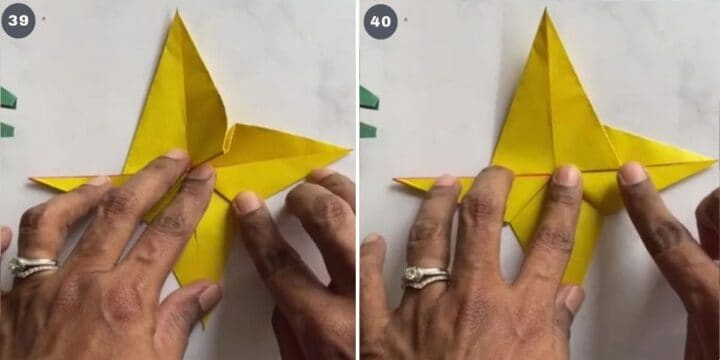
Press the folds firmly as shown in images 39 and 40.
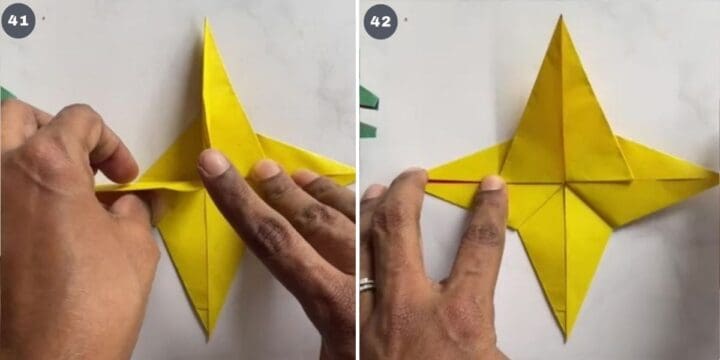
Repeat on the left side (image 41). The folded paper should look like a star as shown in image 42.
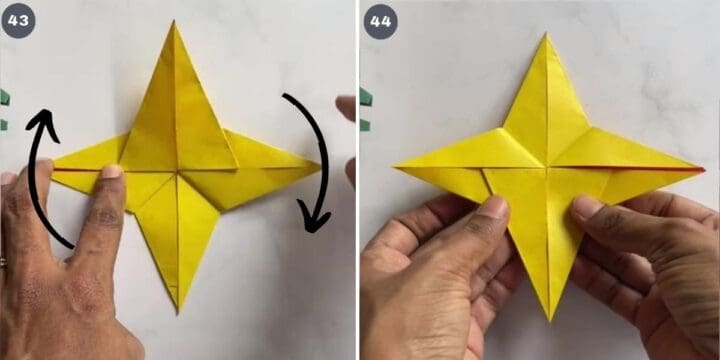
Turn the star such that the top pointy end is positioned at the bottom and vice versa (image 43 and 44).
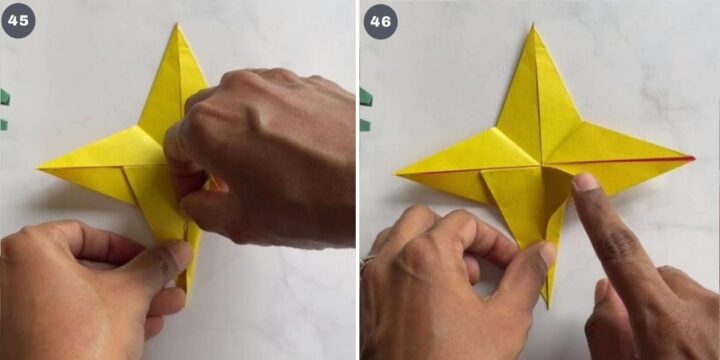
Fold the bottom part of the star as shown (image 45).
Lift the side and bring the pointy end to the center of the star (image 46).
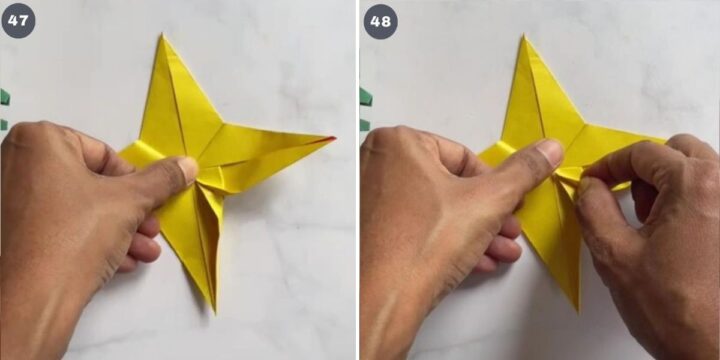
Press the fold down firmly (image 47).
Next, press the small flap as shown (image 48).

This is how the fold should look like (image 49). Finally, adjust the fold so that it is aligned to the center line of the star (image 50).
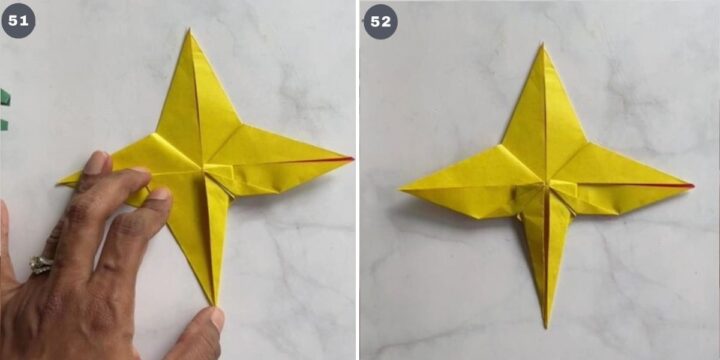
Repeat the process with the other side. This is how the shape should look like (image 52).
Step 3: Fold the wings
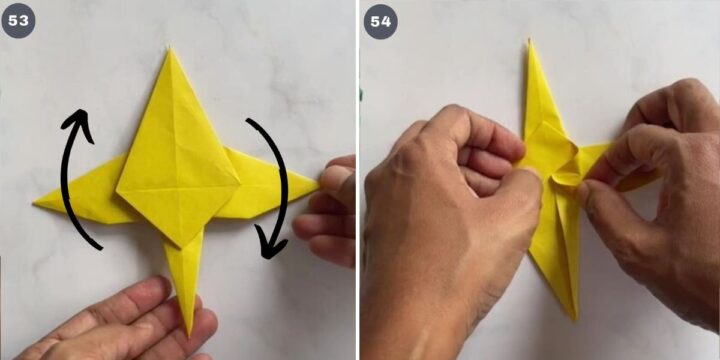
Next, flip the paper over. And then turn in around so that the top pointy end moves to the bottom, vice versa (image 53).
Fold the right side of the star as shown in image 54.
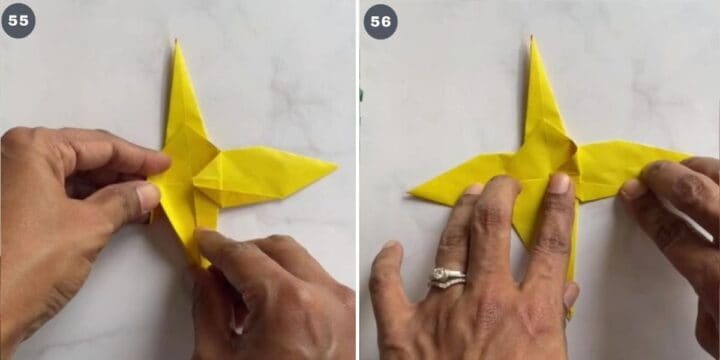
Start with the bottom (image 55), followed by the flap. Press down firmly (image 56).
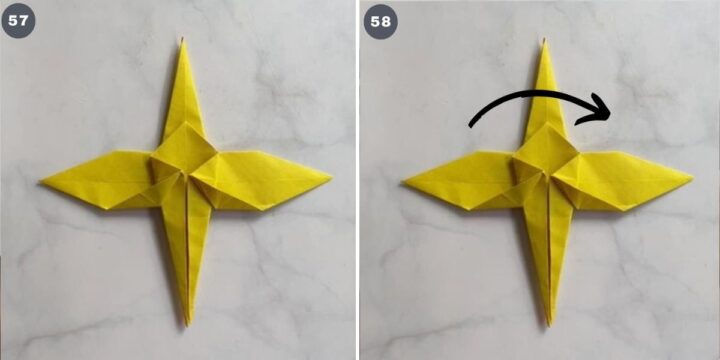
Repeat with the other side. This is how it should look like. Turn the shape around (images 57 and 58).
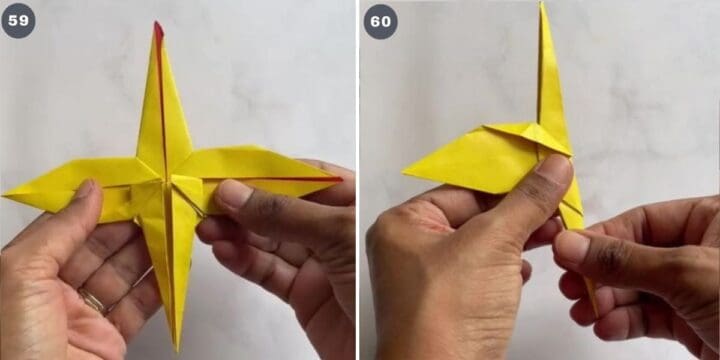
Hold it as shown (image 59).
Fold it along the center line to bring the wings together (image 60).

Fold the tip of each wing (image 61). Unfold, open up the folded tips (image 62).
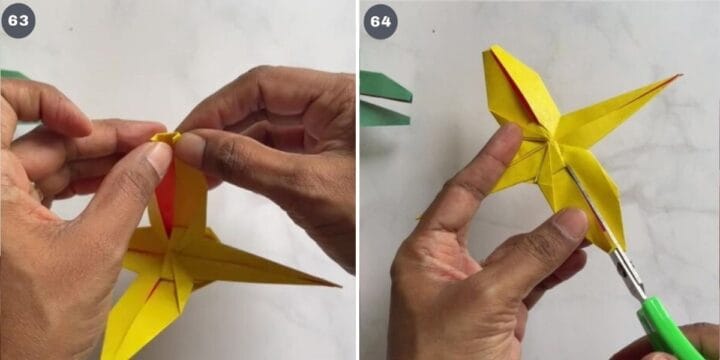
Tuck the tips inside along the folded lines (image 63). Repeat for other side of the wing.
Next, cut each wing into 2 (image 64).
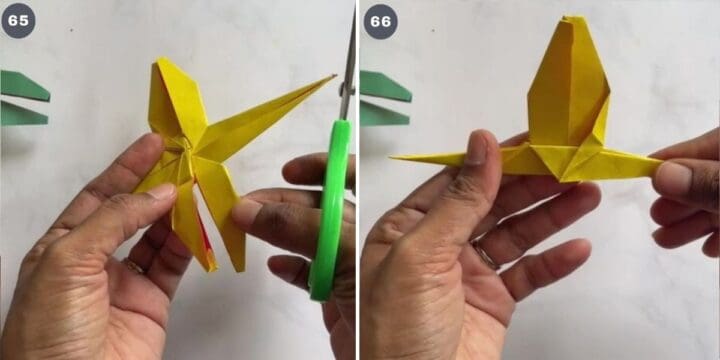
This is how the cut wings should look like (image 65).
Bring the wings together by folding the body of the dragonfly (image 66).
Step 4: Shape the head and eyes
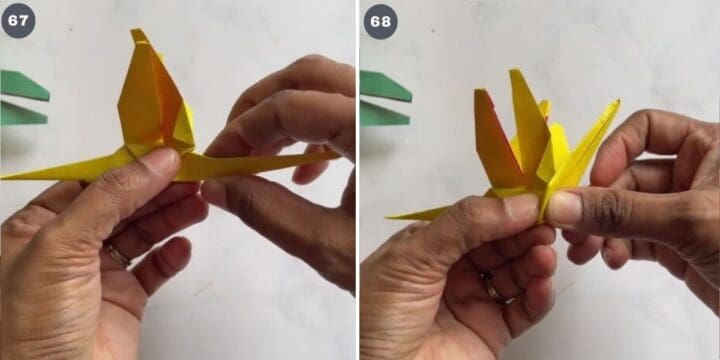
To make the head, press the pointy end of the shape as shown (images 67 and 68).
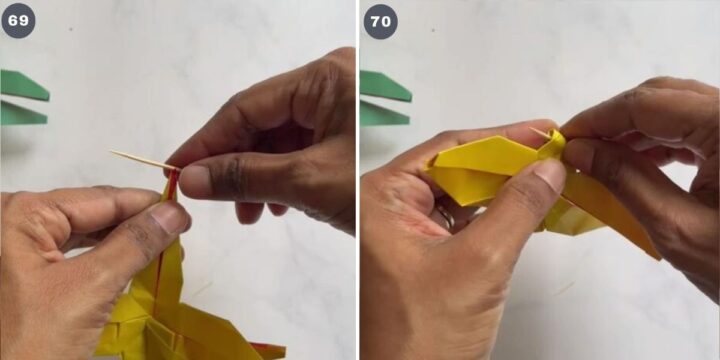
Use a toothpick to roll the piece all the way to the center (images 69 and 70).

Remove the toothpick and press the rolled section lightly to hold it in place (image 71).
Next is shaping the wings. Keeping the body of the dragonfly folded, fold the wings to the side.
Start with the top flap. Fold and aligh both sides of the flap to align them.
Repeat with the bottom flaps. Leave a slight gap between the top and bottom flap when folding them (image 72).
Step 5: Shape the tail

Press the folds firmly to hold the shape of the wings (image 73).
To shape the tail, press along the folds firmly and curve the end slightly (image 74).
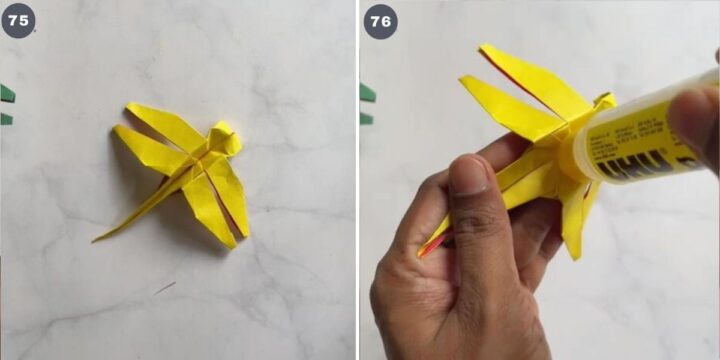
And that completes the origami dragonfly (image 75). You can stop here and use the origami dragonfly as intended.
To keep the body of the dragonfly well folded and to keep the head closely attached to the body, you can use glue.
Spread a thin layer of glue as shown. Press the sides of the body as well as the head to stick them together (image 76).
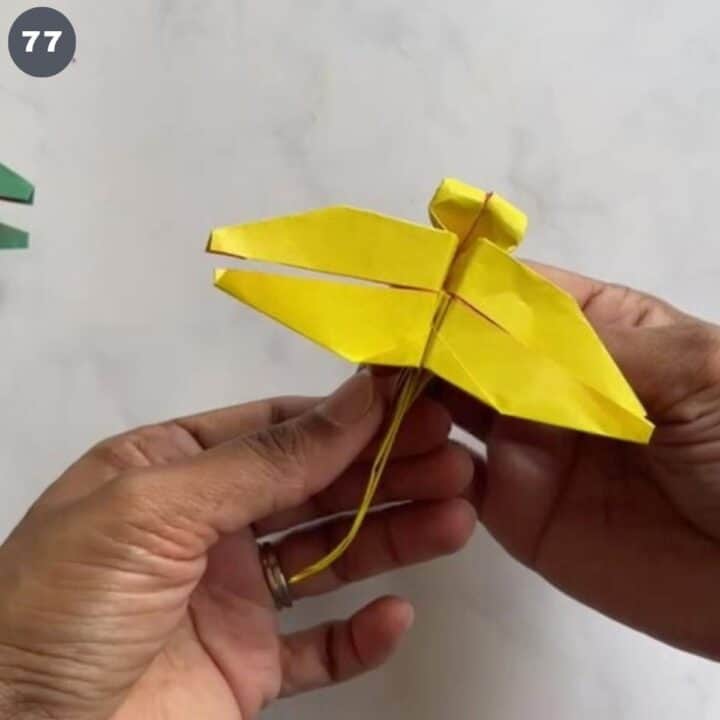
And that completes the origami dragonfly.
Printable Instructions (Free PDF)
Click on the image below to download your free PDF instructions to make the origami dragonfly:
Happy Folding 🙂
Expert tips
- Use a square paper. The measurement of the paper must be exactly the same on all sides. I used 15cm by 15cm. Larger squares will make larger dragonflies and smaller ones will make smaller dragonflies.
- The paper can be single sided. This is a single colored origami craft (unlike my origami koi fish here which is dual colored).
- Any type of paper will work for this craft, so long as it can be folded and is firm enough to hold the shape. I used pre-cut origami paper, you can always make these dragonflies in any other craft paper or even wrapping paper.
Leave a Reply