
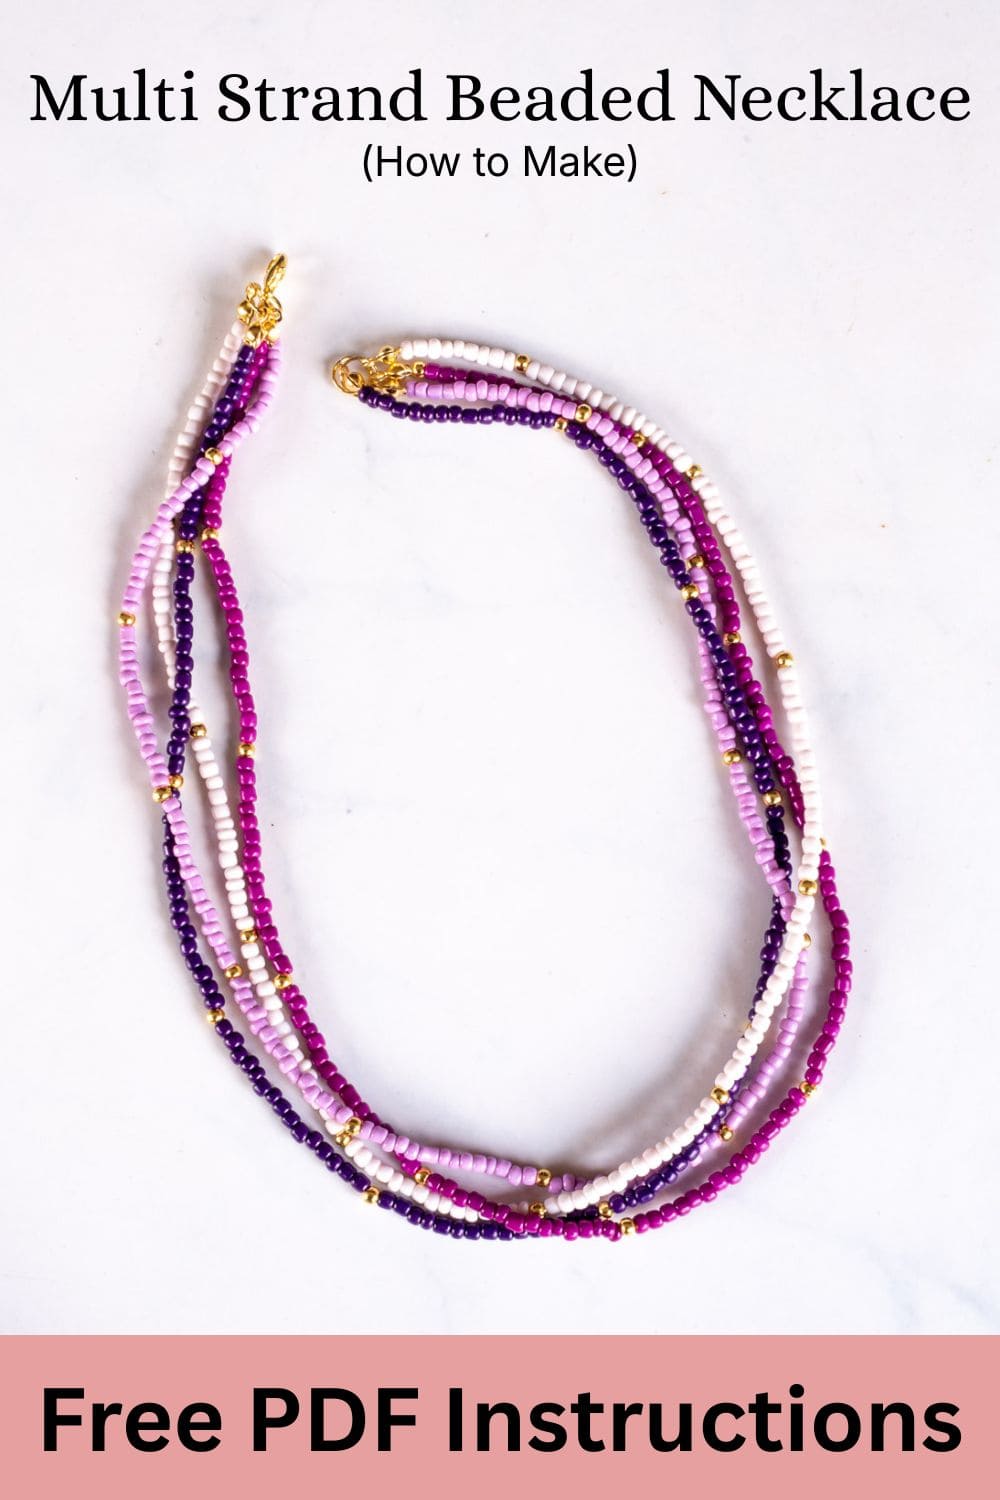
Learn how to make a multi strand beaded necklace with this easy to follow, step by step tutorial and video. Made using seed beads in 4 complementing shades of purple and accented with gold beads, this multi strand necklace is not just pretty, it is quick to make with simple techniques . And you can even style it in 2 different ways!
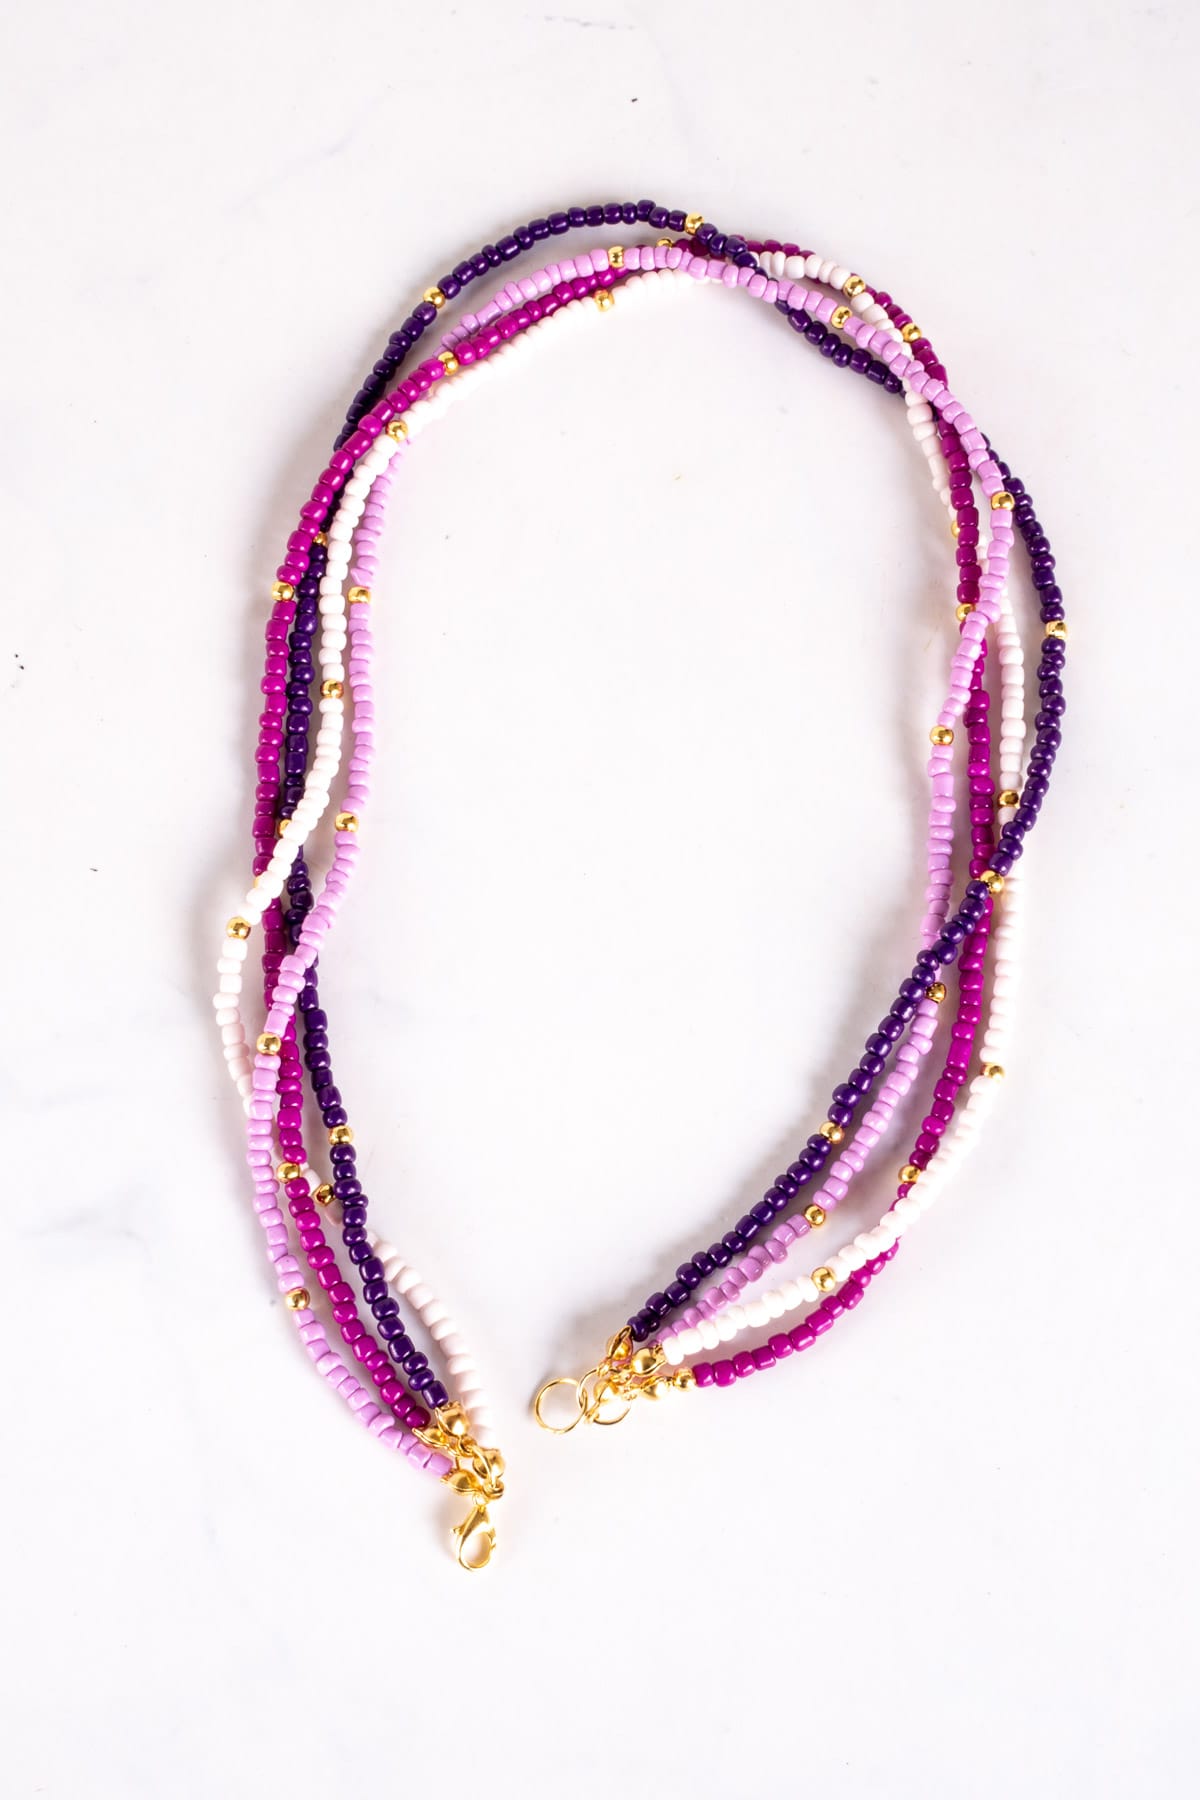
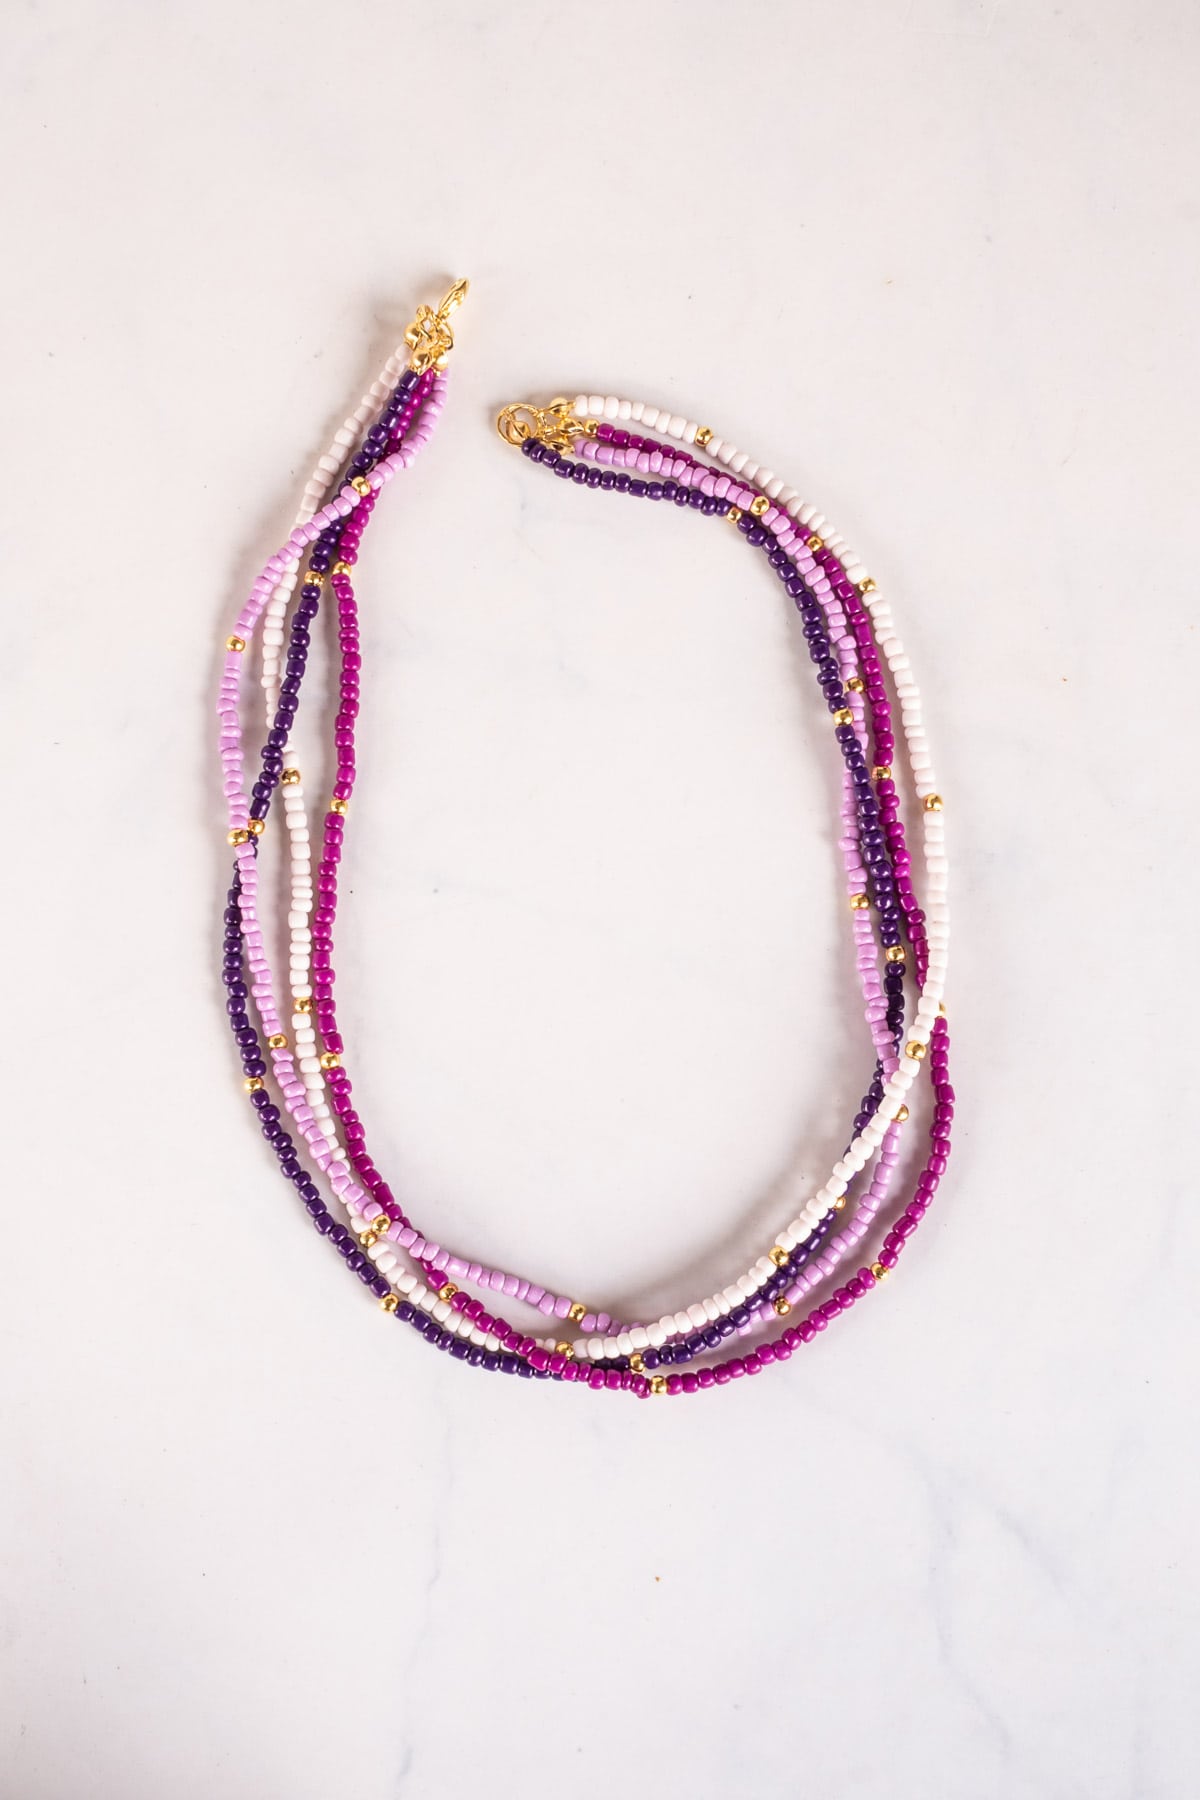
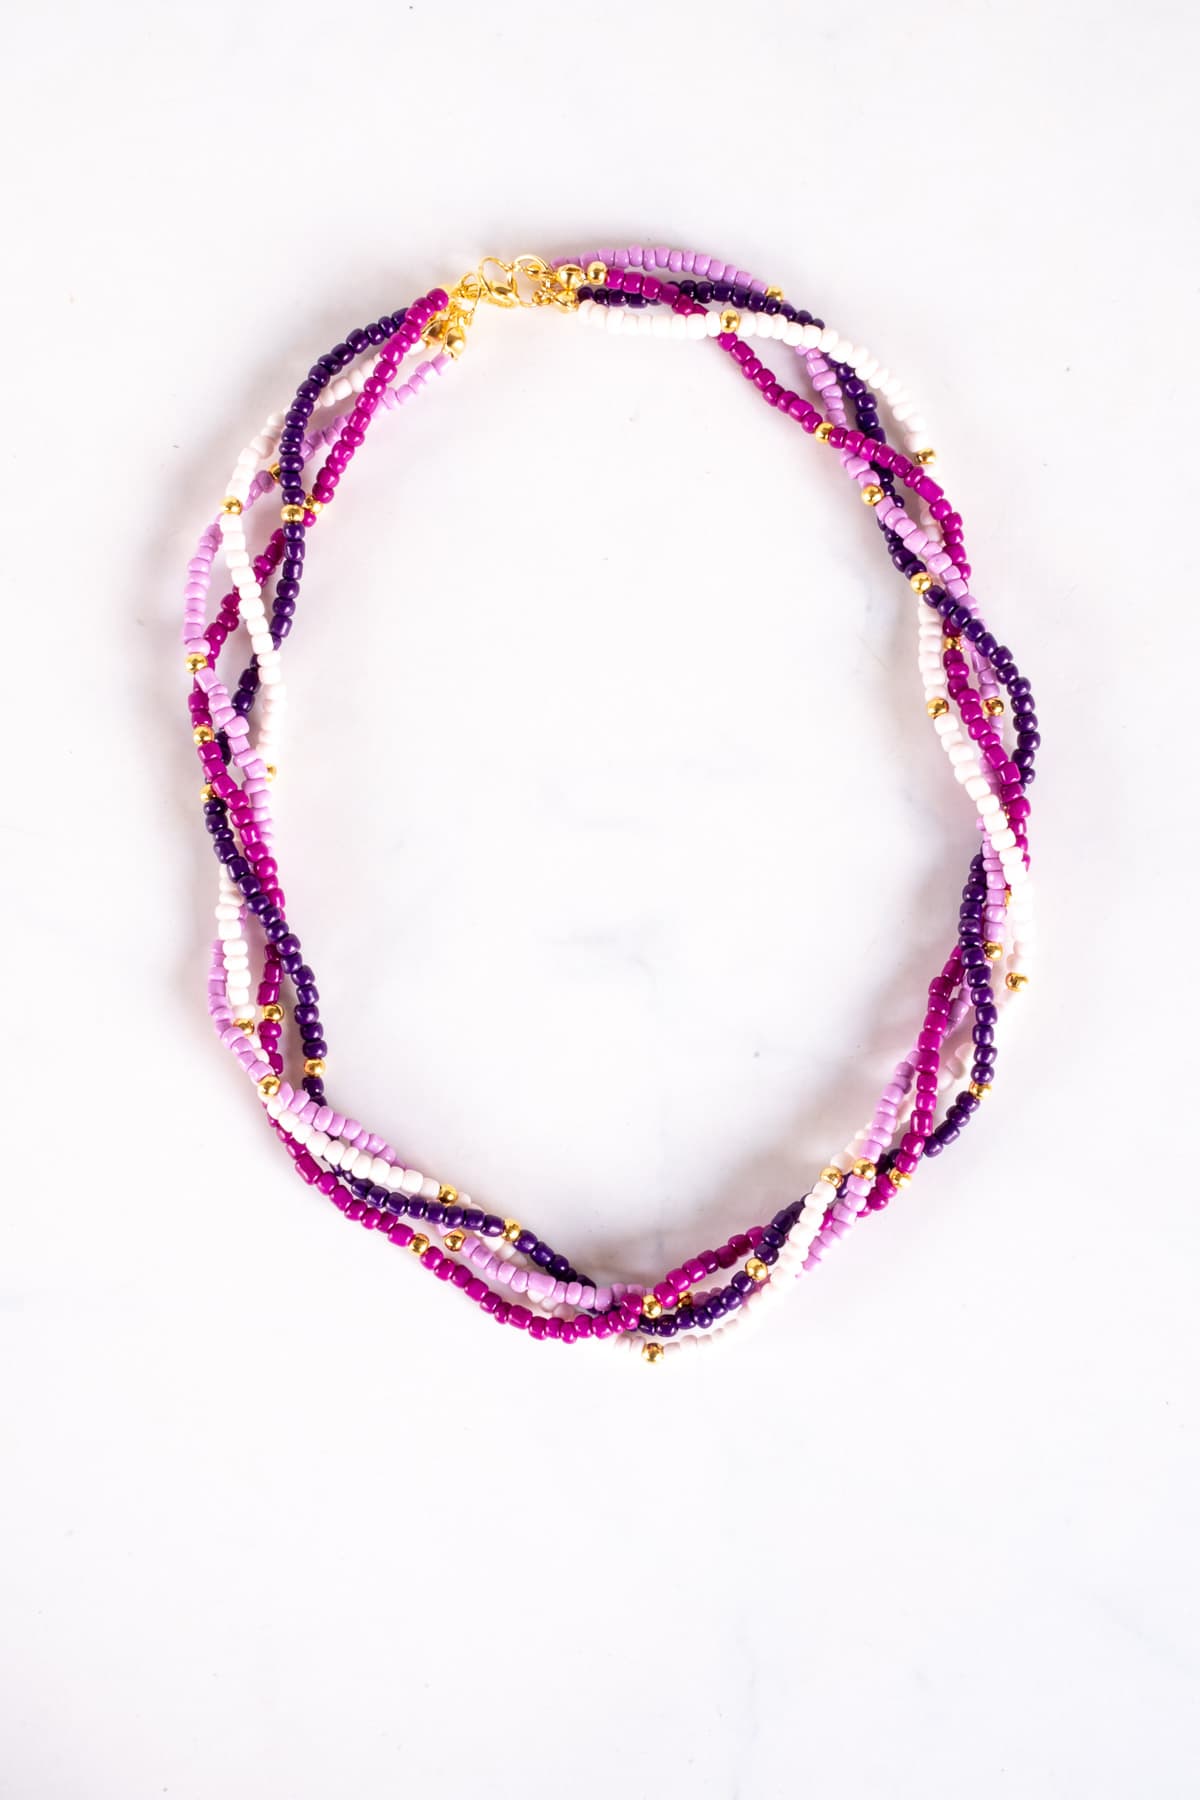
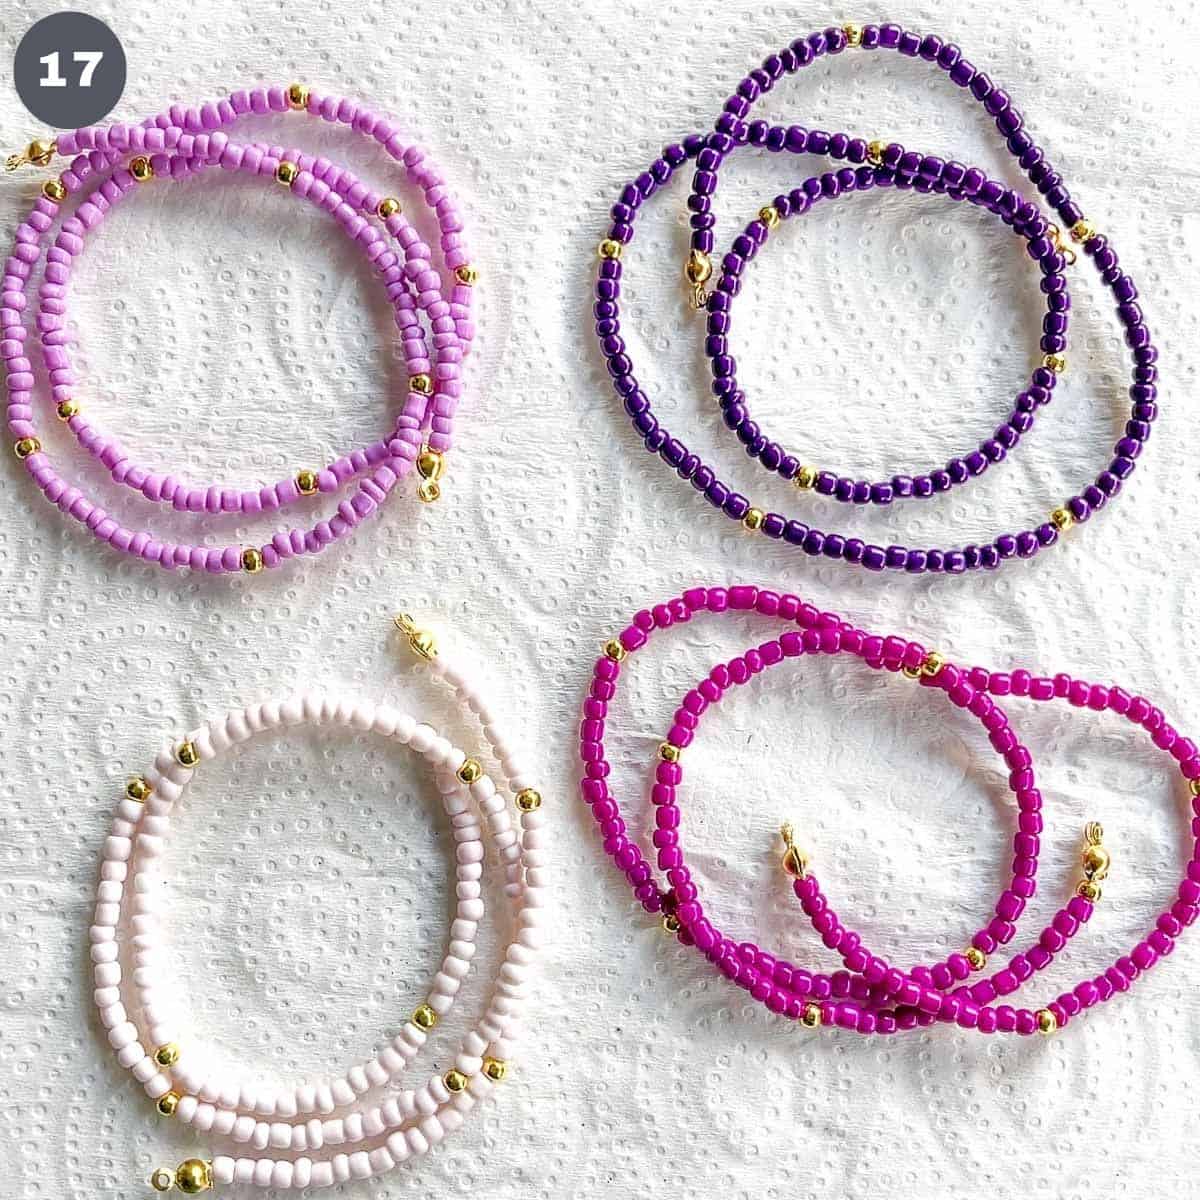
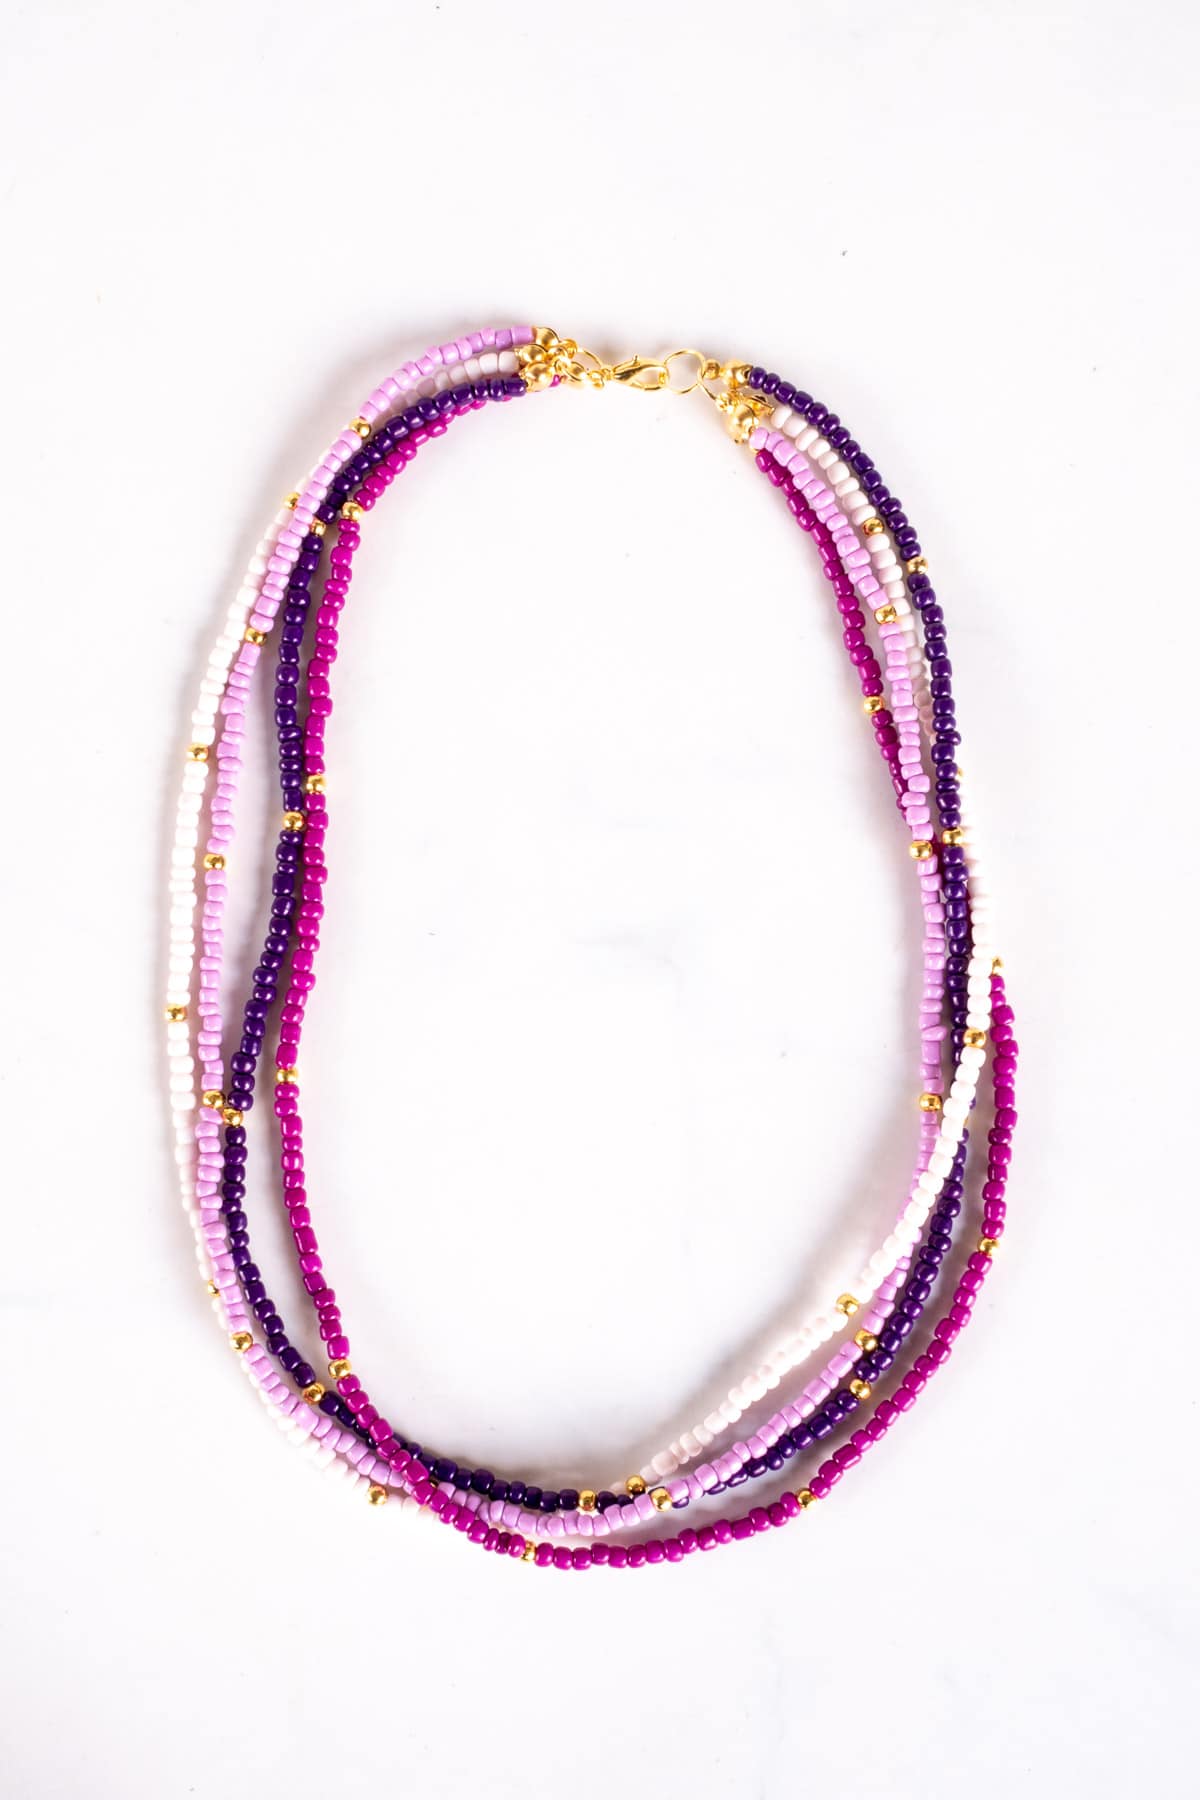
This is a short seed bead necklace. It measures 43cm (17 inches) in length from end to end. When worn, it sits right at the base of the neck. The necklace consists of 4 stands of seed beads in 4 complementing shades of purple. Each bead is 3mm in size and each color strand is accented with gold beads, also 3mm in size. The strands are held together with jump rings (via bead tip knot covers) on both ends and fastened to a lobster claw clasp.
You can wear the necklace as it is or twist the strands into a twisted bead necklace.
For my other jewelry designs and beading tutorials, check out how to make earrings for beginners with my 2 very simple and quick designs and my other earring designs like seed bead hoop earrings, teardrop earrings, DIY dangle earrings with chain and faux leather earrings without Cricut.
Jump to:
🎥Video tutorial
Here is the full tutorial (video) on how to make this multi strand beaded necklace. Full list of supplies, and detailed instructions with step by step images are right below the video.
🧾Tools and supplies
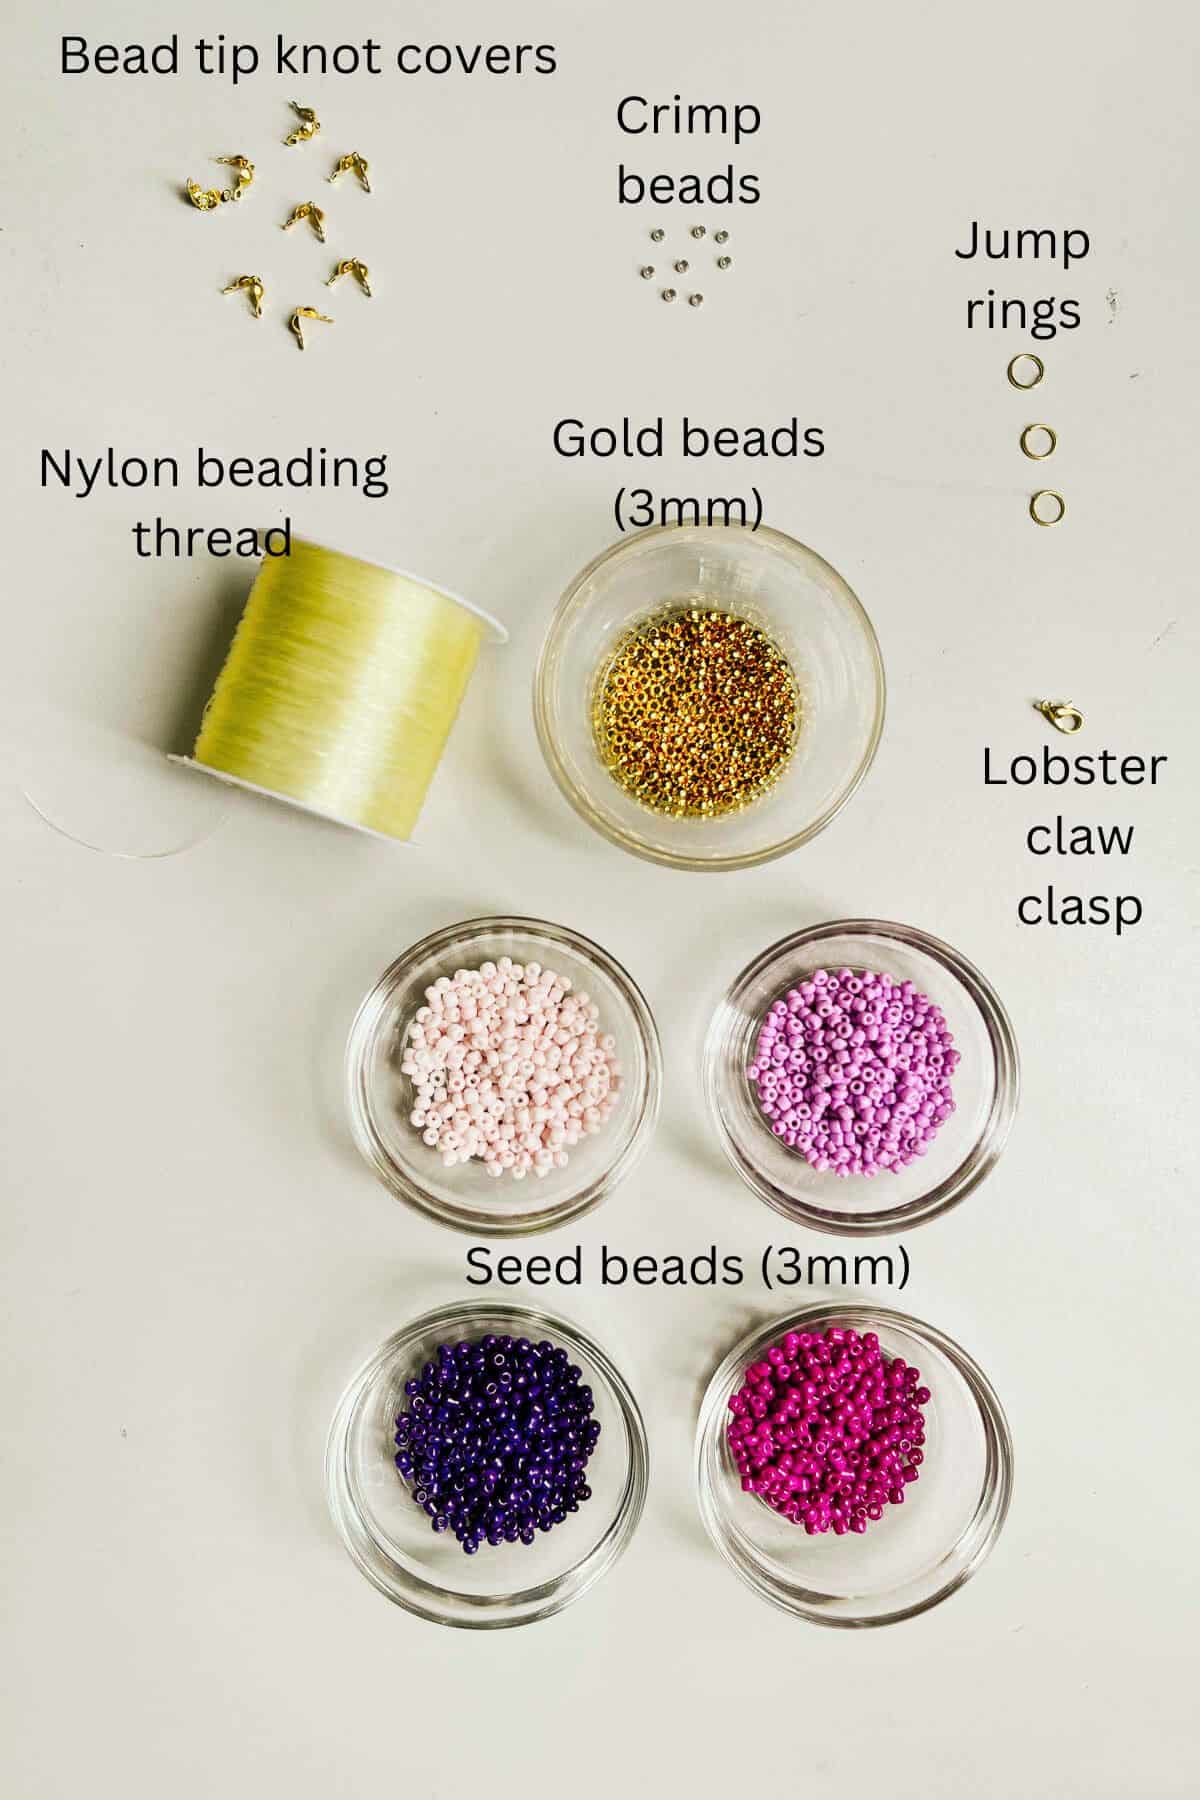
- Seed beads in 4 shades of purple (approximately 150 to 180 beads in each color with each bead measuring 3mm in diameter. Each strand will require varying count of beads due to the inconsistency in the thickness of the seed beads).
- Gold accent beads (approximately 40 to 42 beads measuring 3mm in diameter each)
- Nylon beading wire (0.35mm thickness) in clear color (4 strands of 18 inches ((46cm) long wire)
- 8 crimp beads
- 3 jump rings in gold (measuring approximately 0.8mm in diameter)
- 8 bead tips knot covers in gold (also known as crimp bead covers)
- 1 lobster claw clasp in gold.
- Scissors
- Flat nose pliers
- Measuring tape
✂️How to Make
Step 1: Cut the wire
Measure and cut 4 strands of wire measuring 18 inches (46cm) each.
Step 2: Fasten the end of the wire
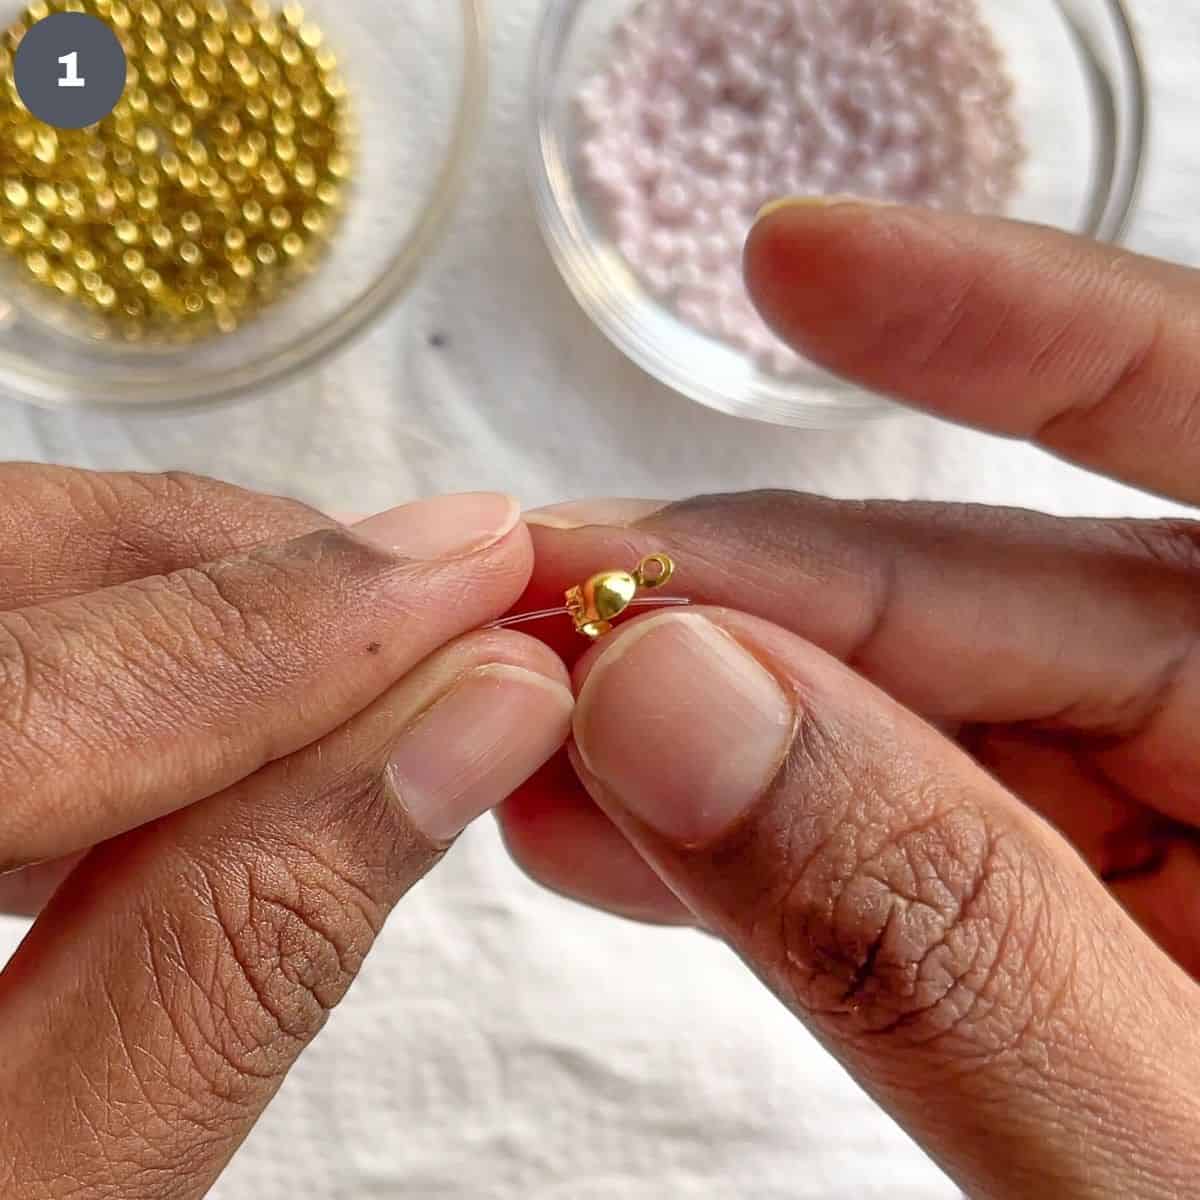
Work with the cut wires one by one. On the first strand, insert a knot cover (crimp cover) (image 1).
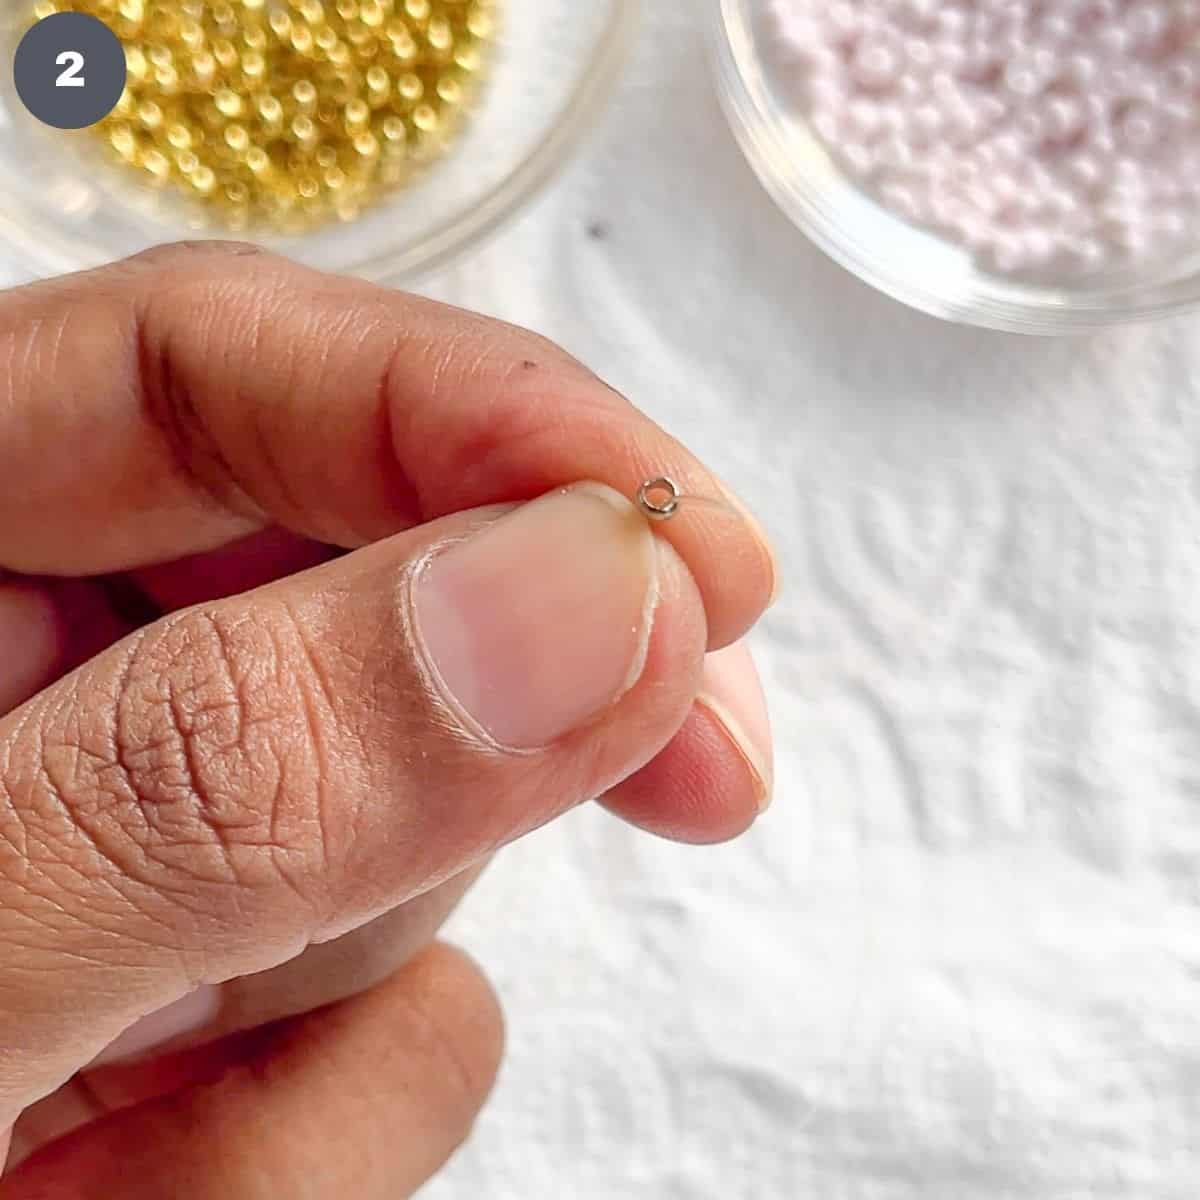
Next, insert a crimp bead (image 2). Hold it close to the end of the wire (about 1 cm from the end) and crimp it with a plier.

Press firmly to secure it to the beading wire (image 3).
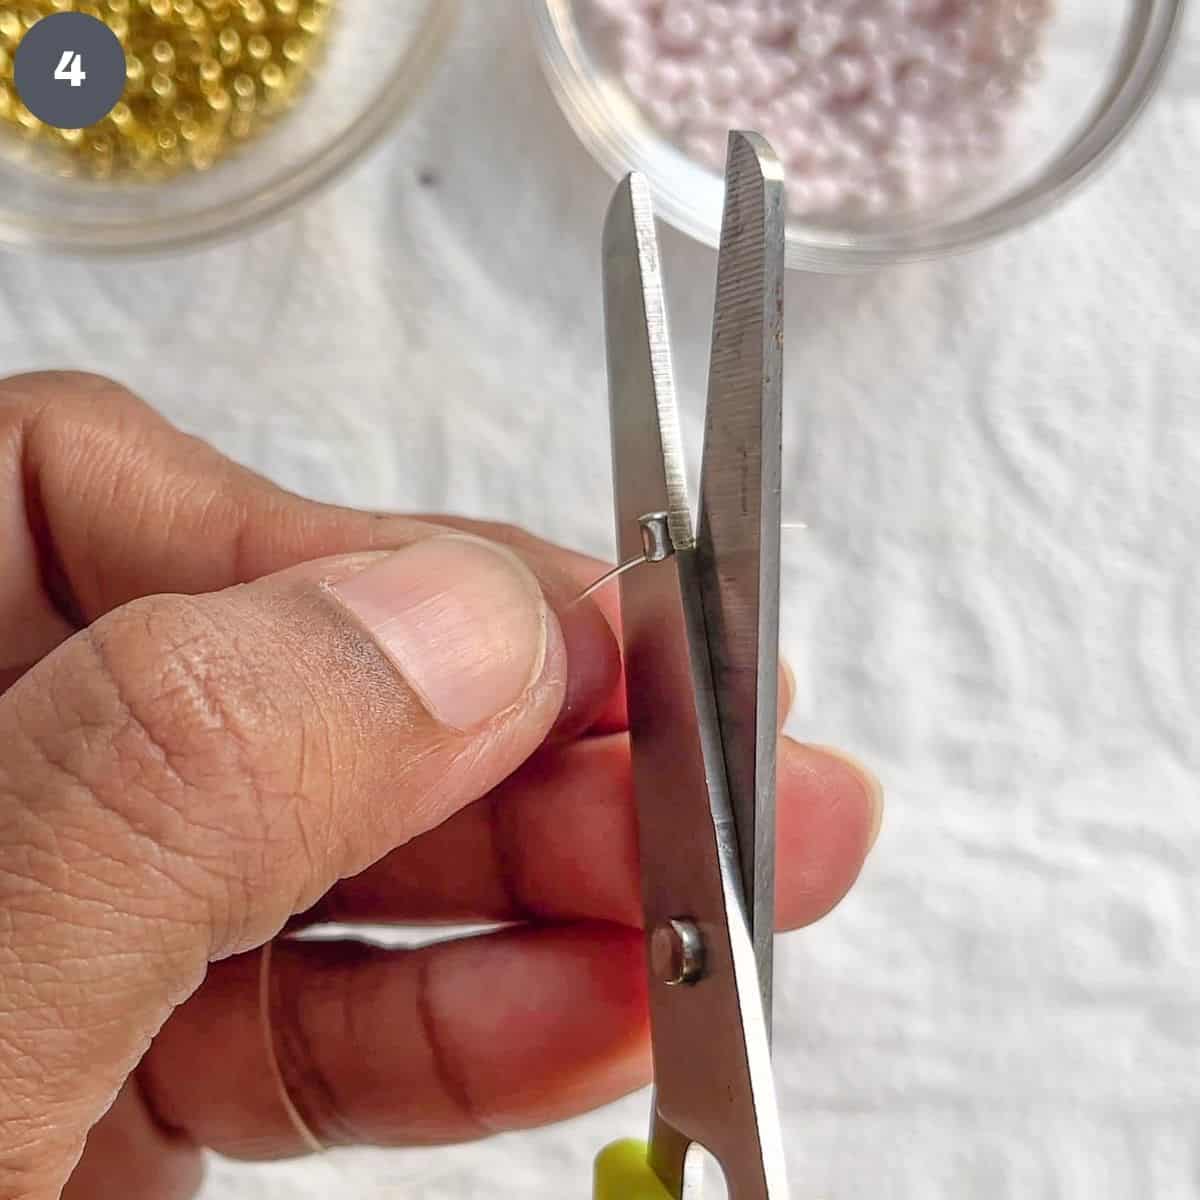
Push to check if it stays in place. If not, press again until it does not move. Cut off the excess wire (image 4).
Push the knot cover to the crimpled bead (image 5).

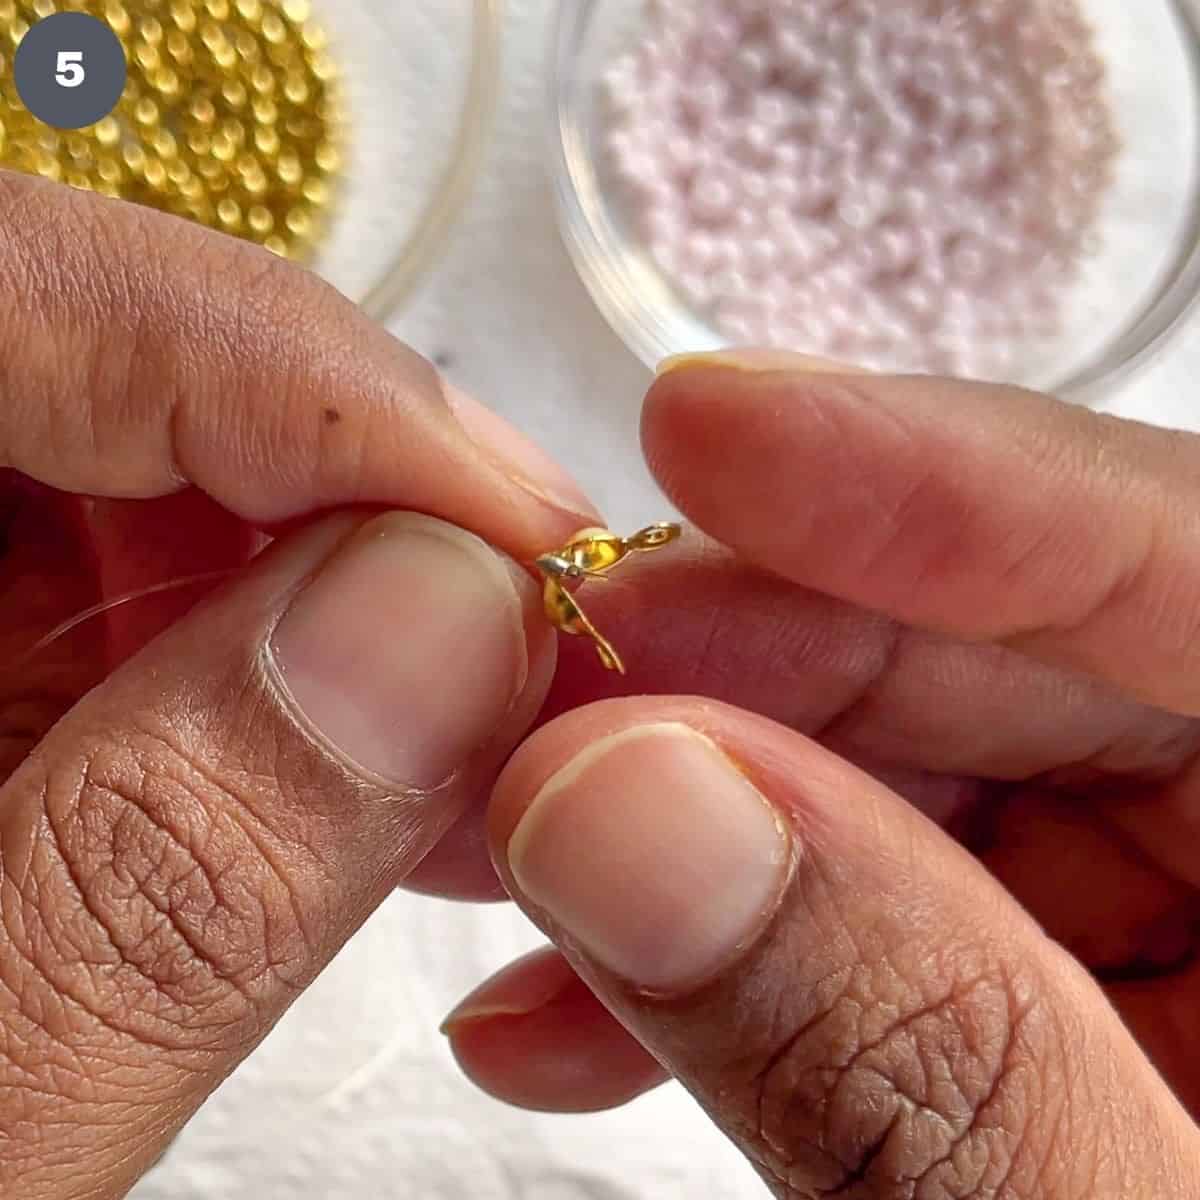
Close the cover with the crimped bead inside (image 6). Use your fingers or a plier to press the cover.
Step 3: String the beads
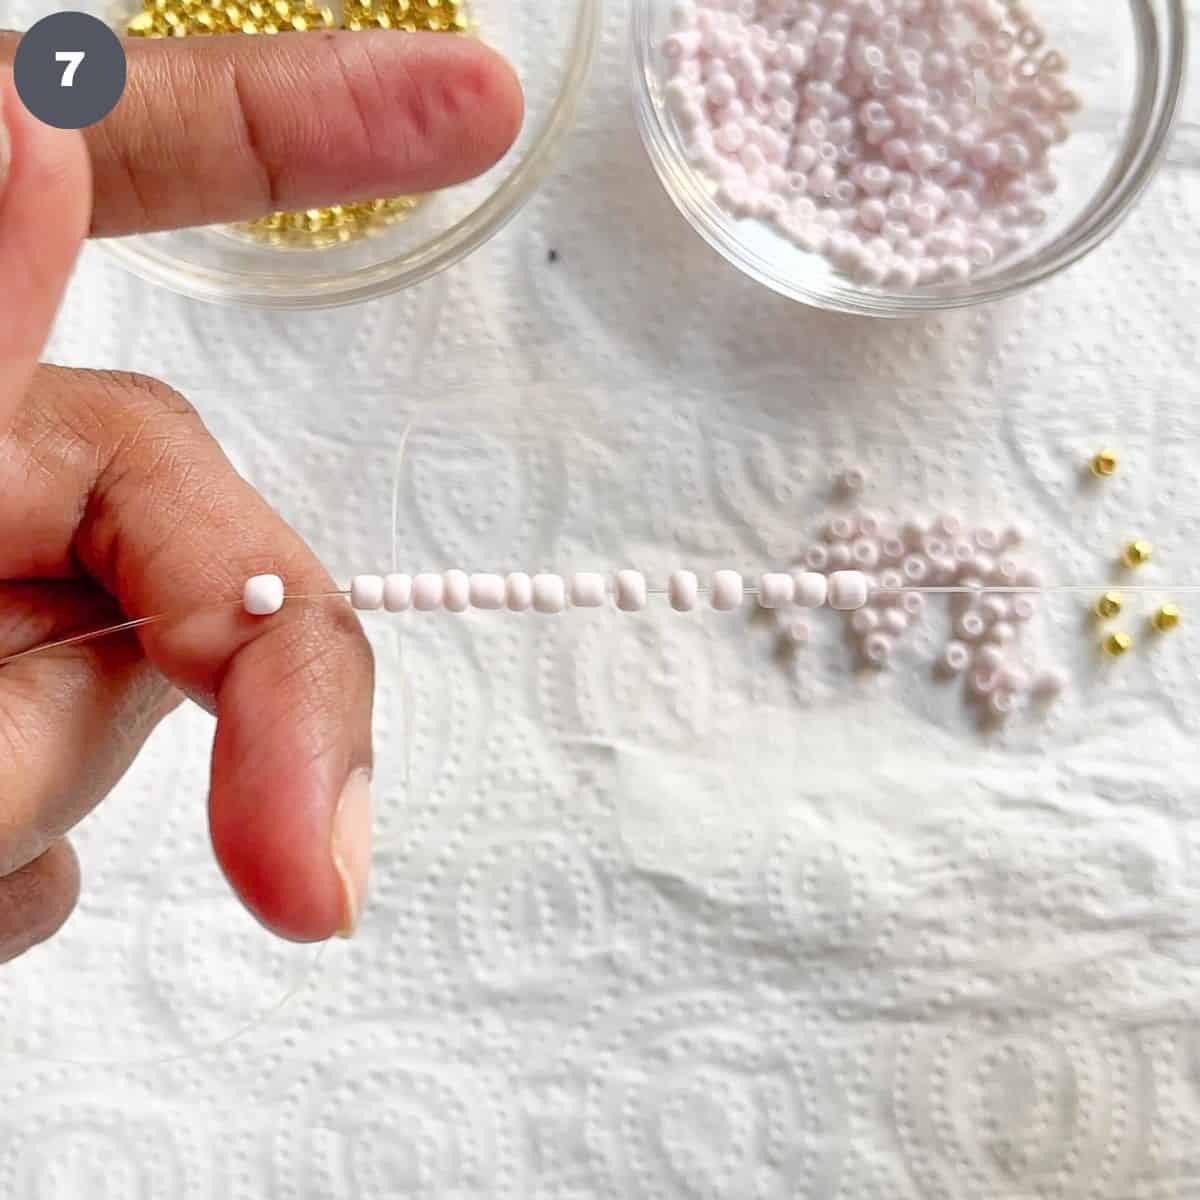
Move to the opposite end of the wire. Insert it into 15 seed beads of the same color (image 7). Count to make sure the number is correct.
Next, insert a gold bead (image 8).
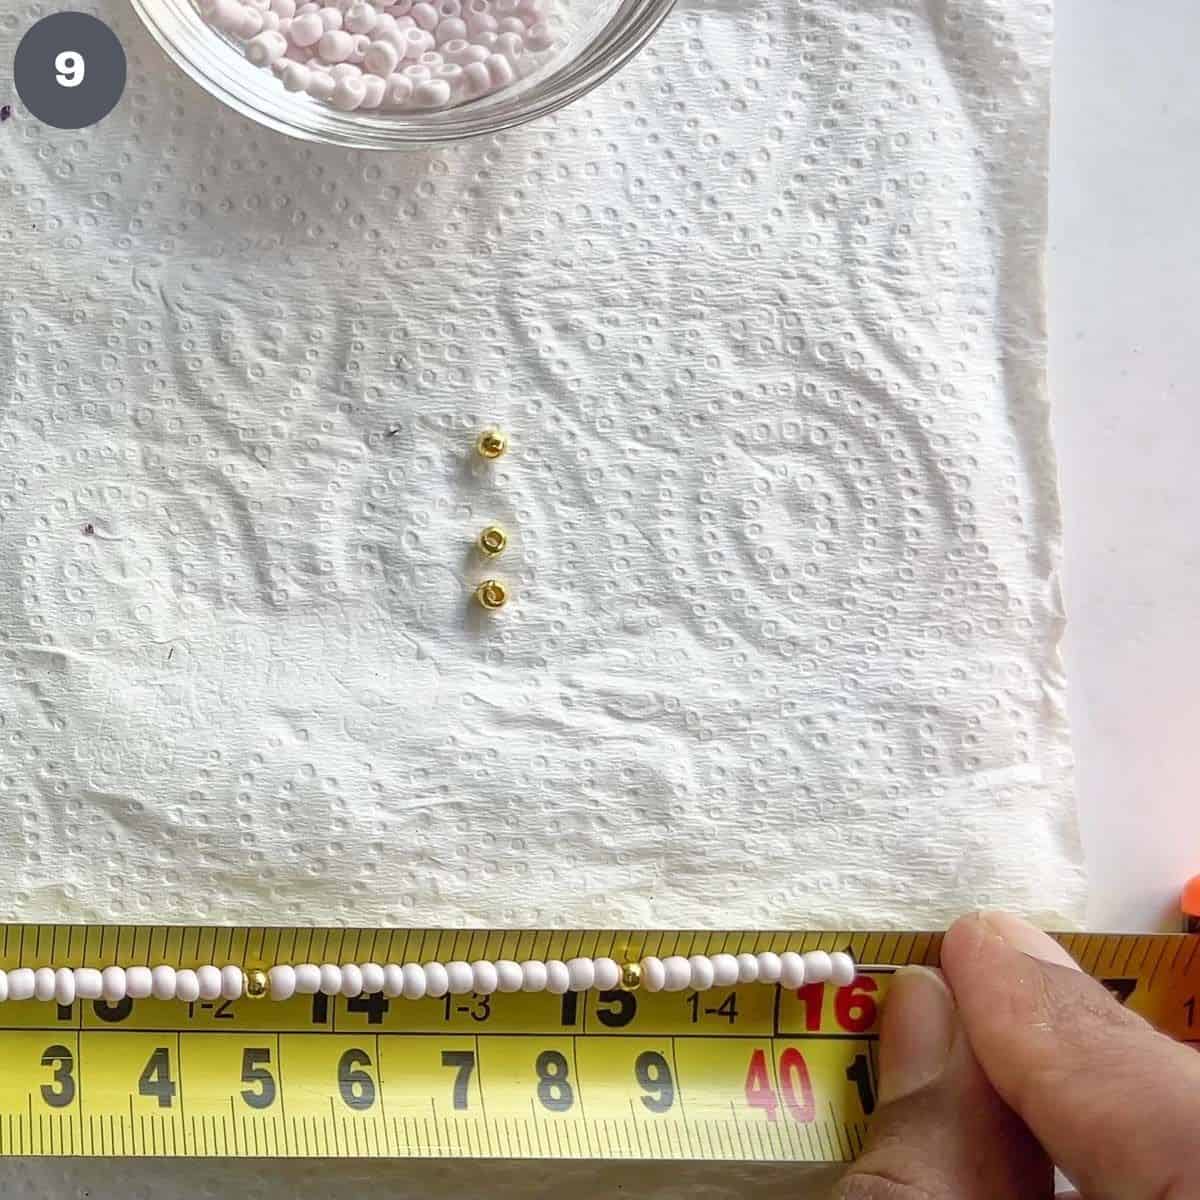
Repeat the process with one gold bead after every 15 seed beads until the beads cover the wire up to 16 inches (41 cm) long (image 9).
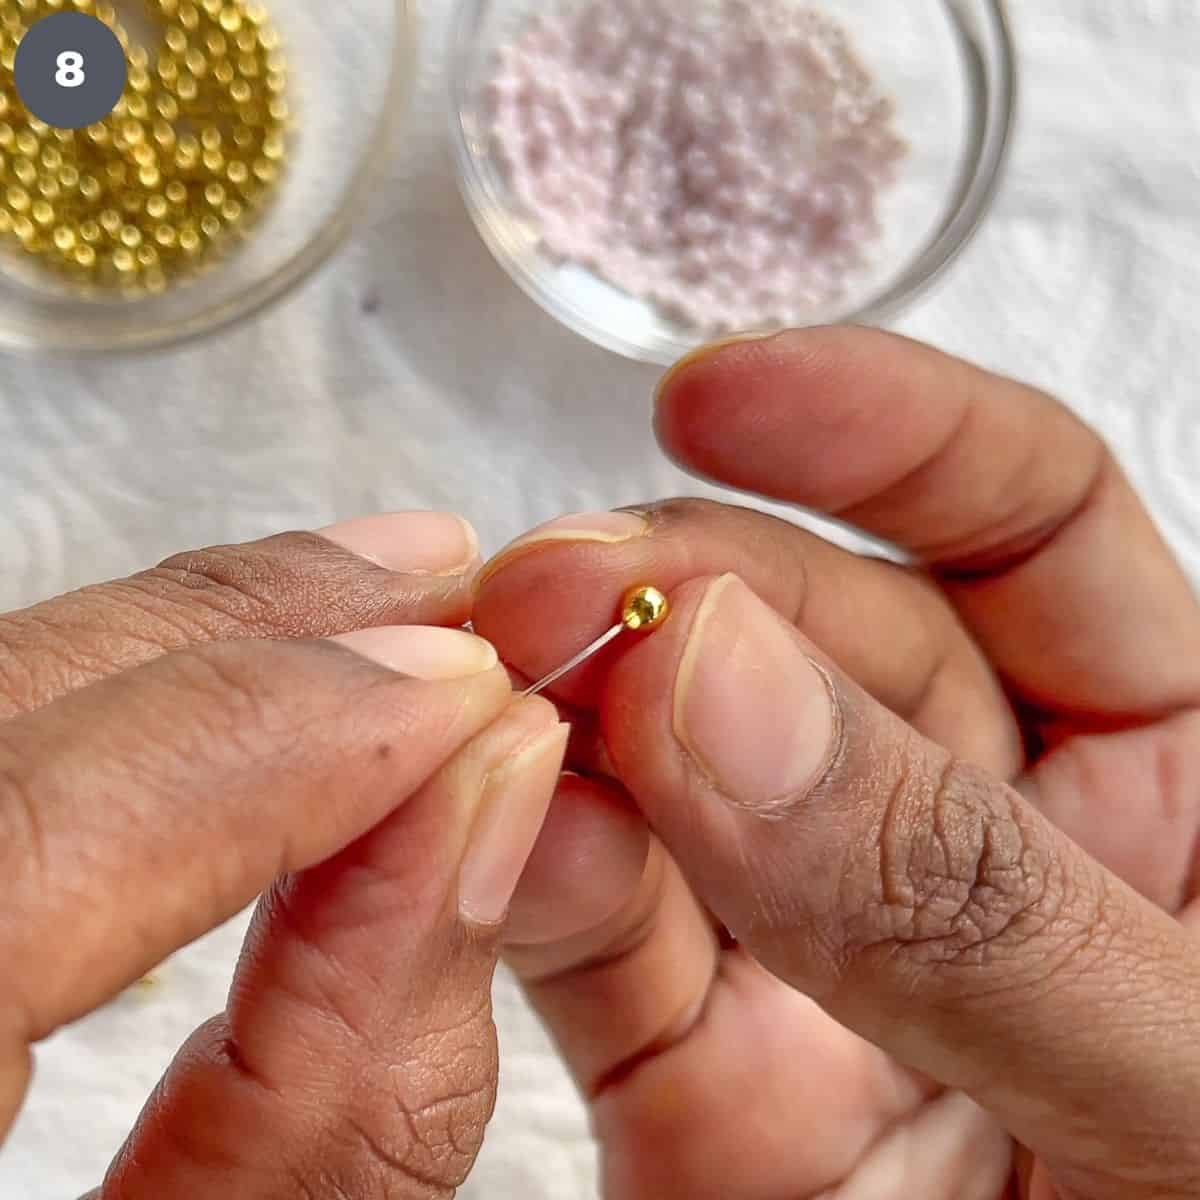
To fasten the strand, insert a bead knot cover (image 10).
Follow with a crimp bead (image 11).
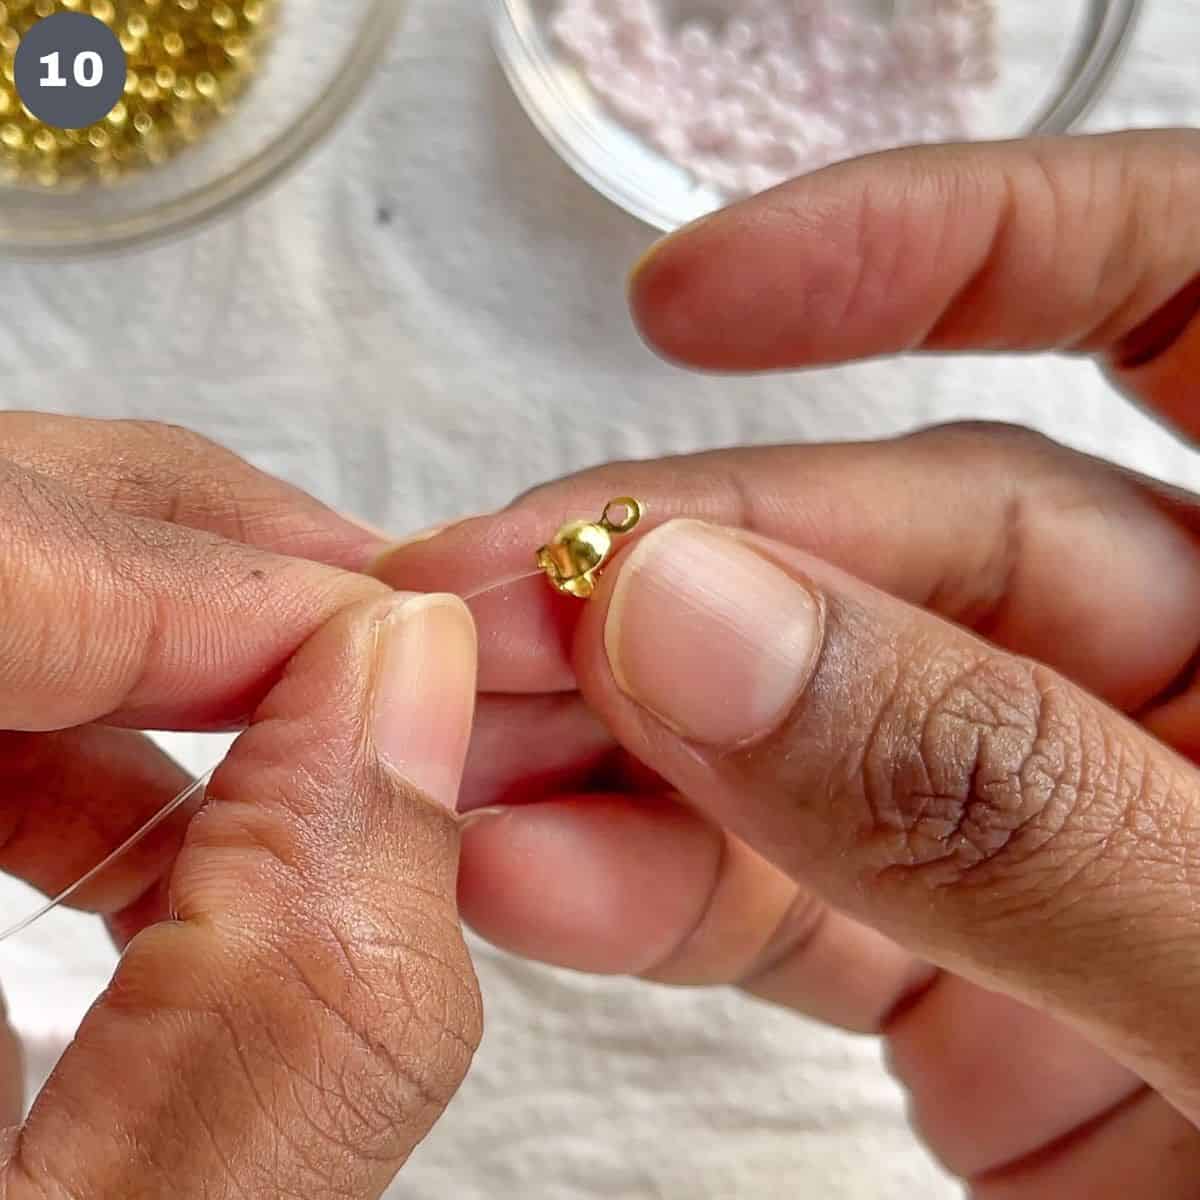
Adjust the opening of the bead knot cover to make it flat (image 12).
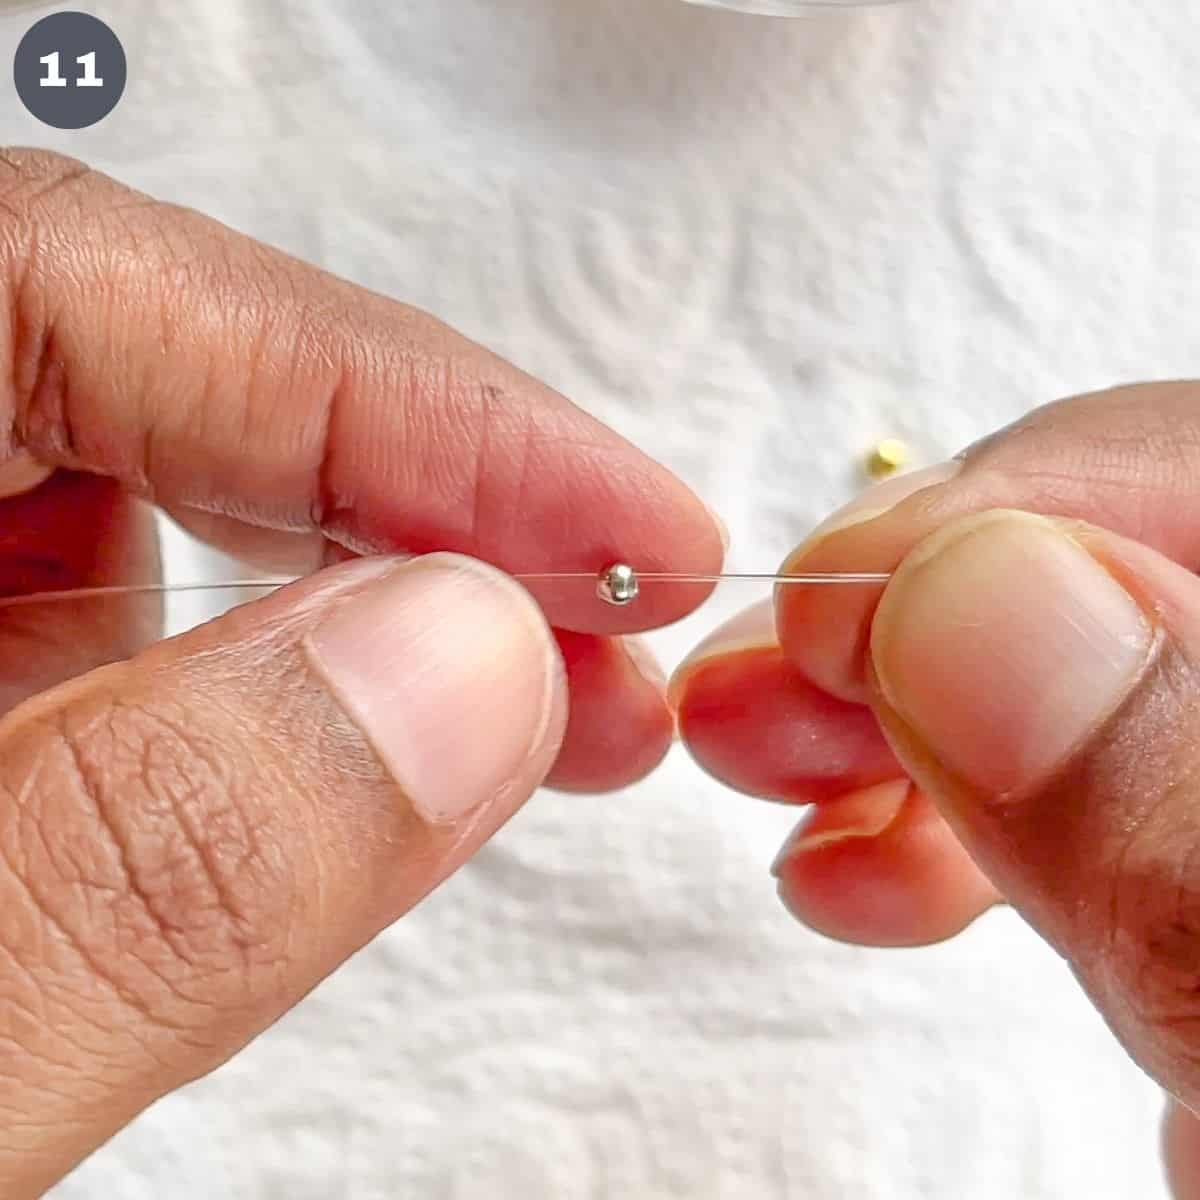
Hold the wire up so that the crimp bead slides down to the top of the knot cover and the other beads on the string and there is no gap between the beads in the strand (image 13).
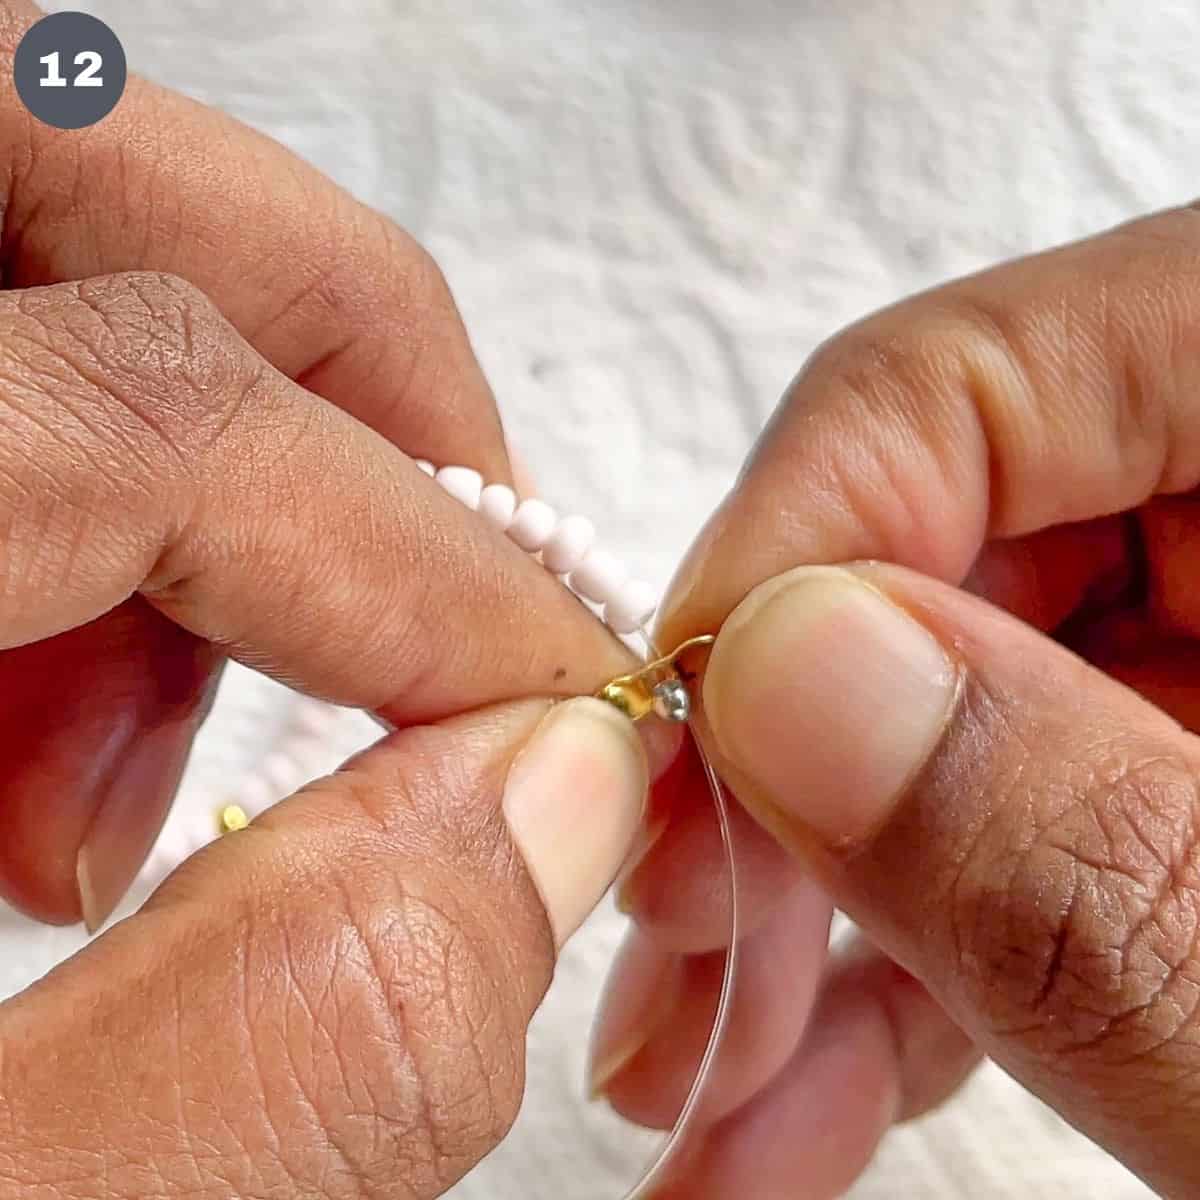
Using a flat nose plier, crimp the crimp bead without leaving any gap between the last bead on the strand and the knot cover. Press firmly to make sure the crimp bead is secured in place (image 14).
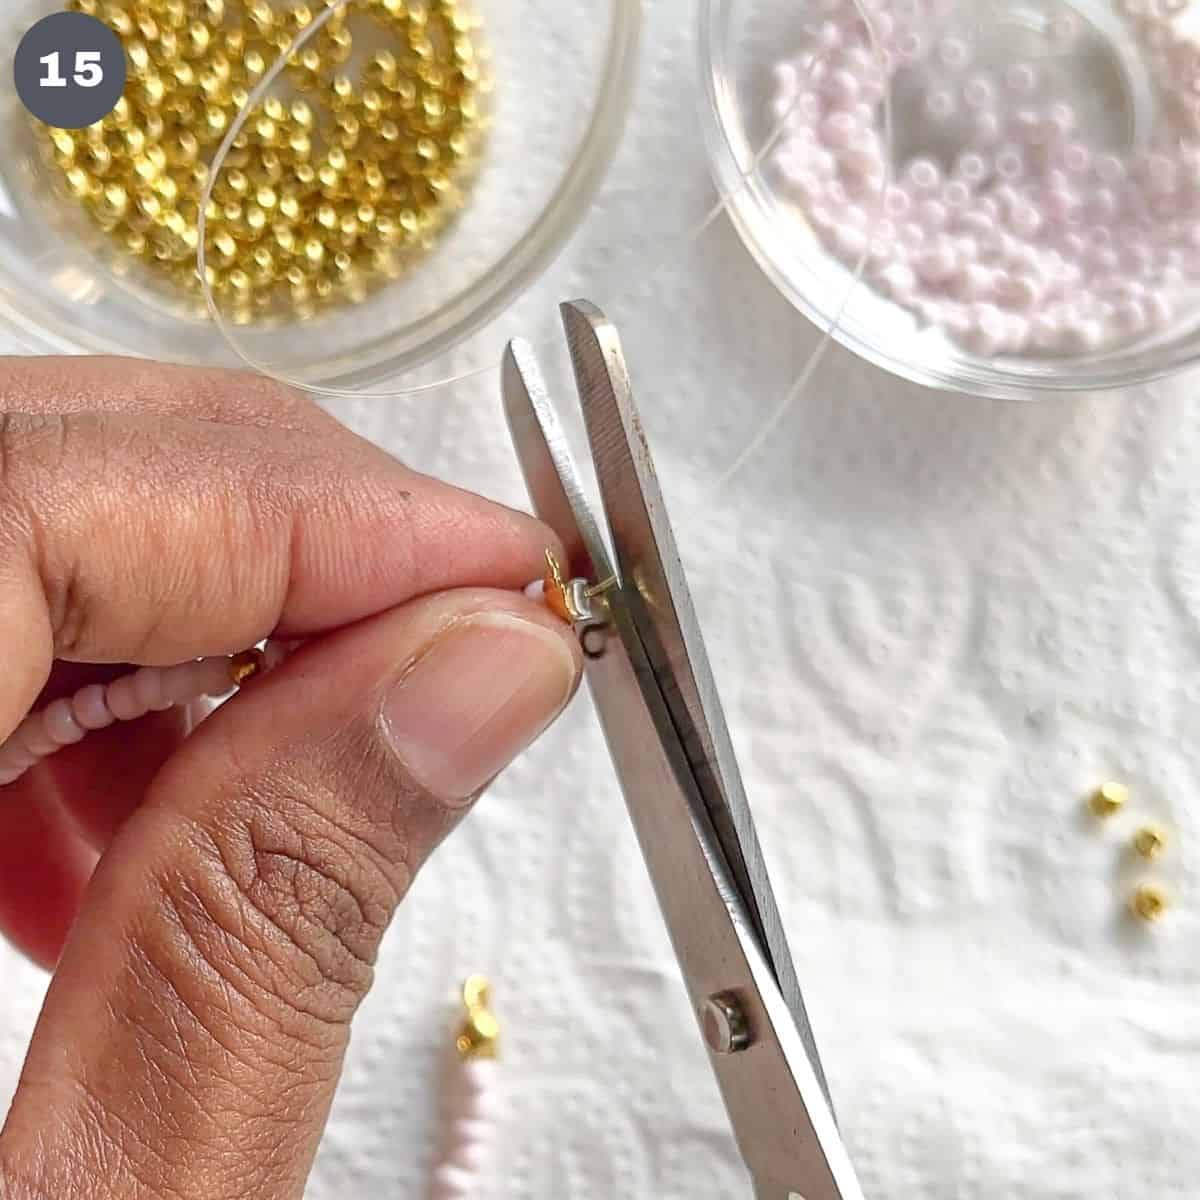
Trim off excess wire (image 15).
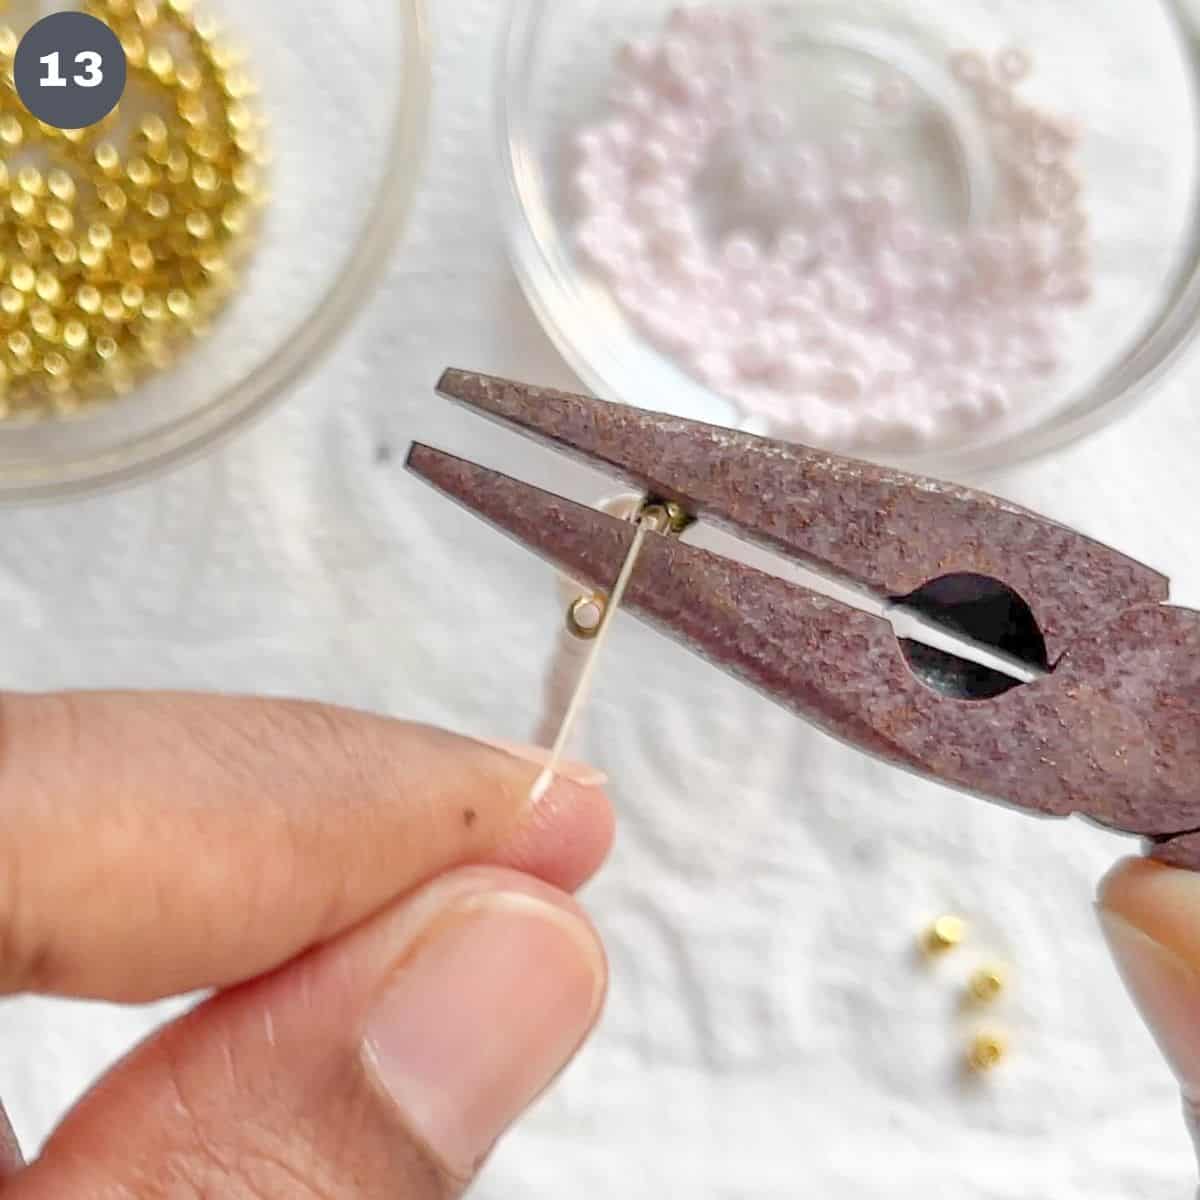
Close the knot cover (image 16).
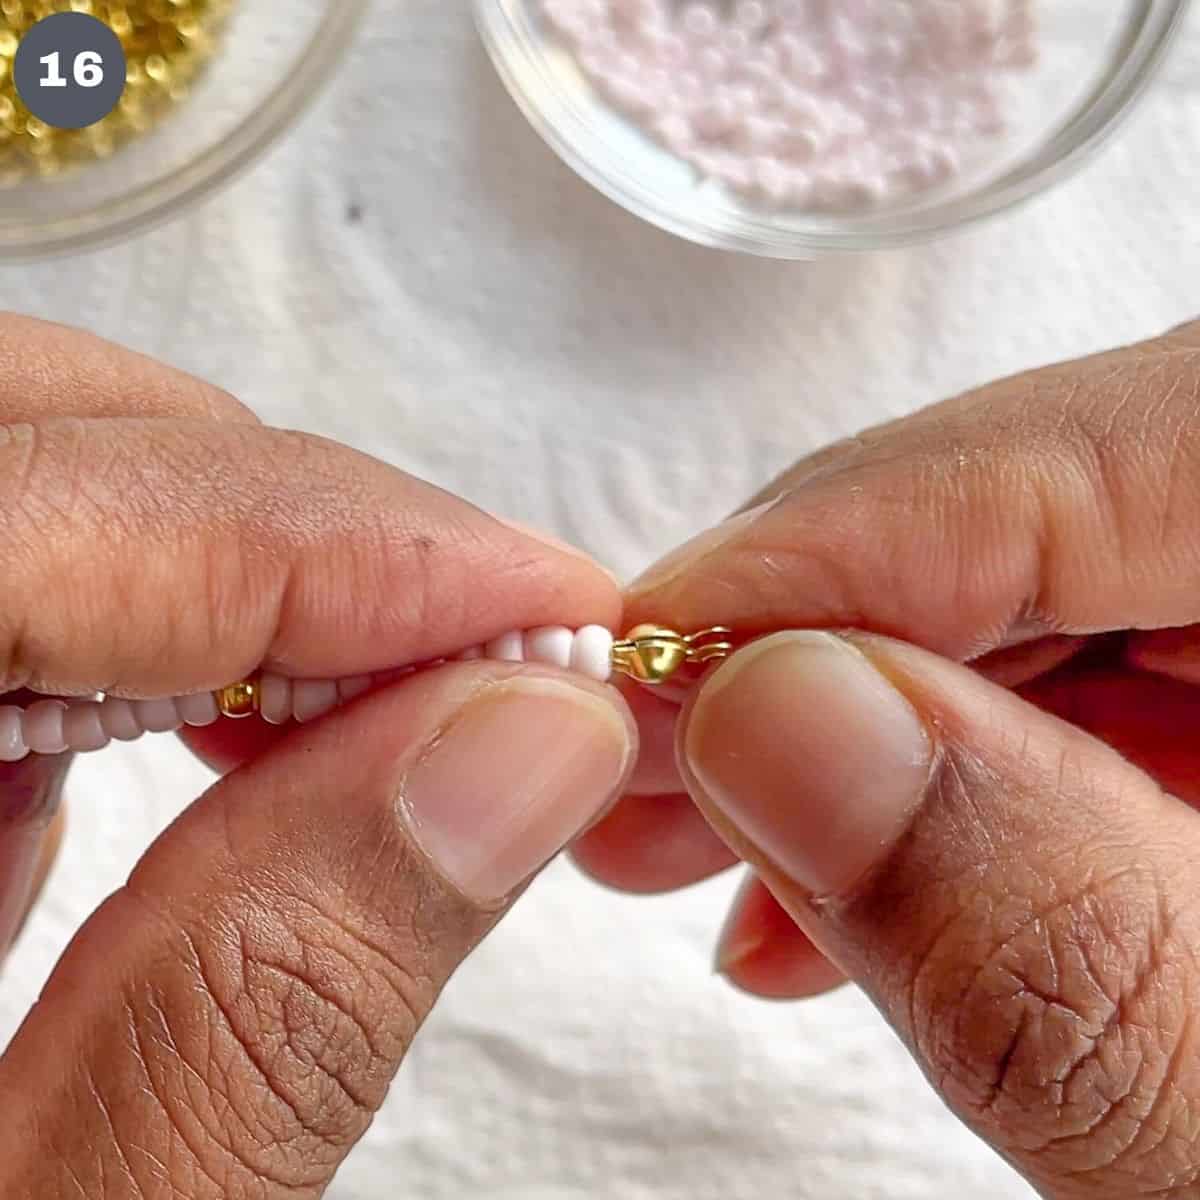
Repeat the above steps for the remaining 3 strands of beads (image 17).
Step 4: Attach the strands to jump rings and the lobster clasp
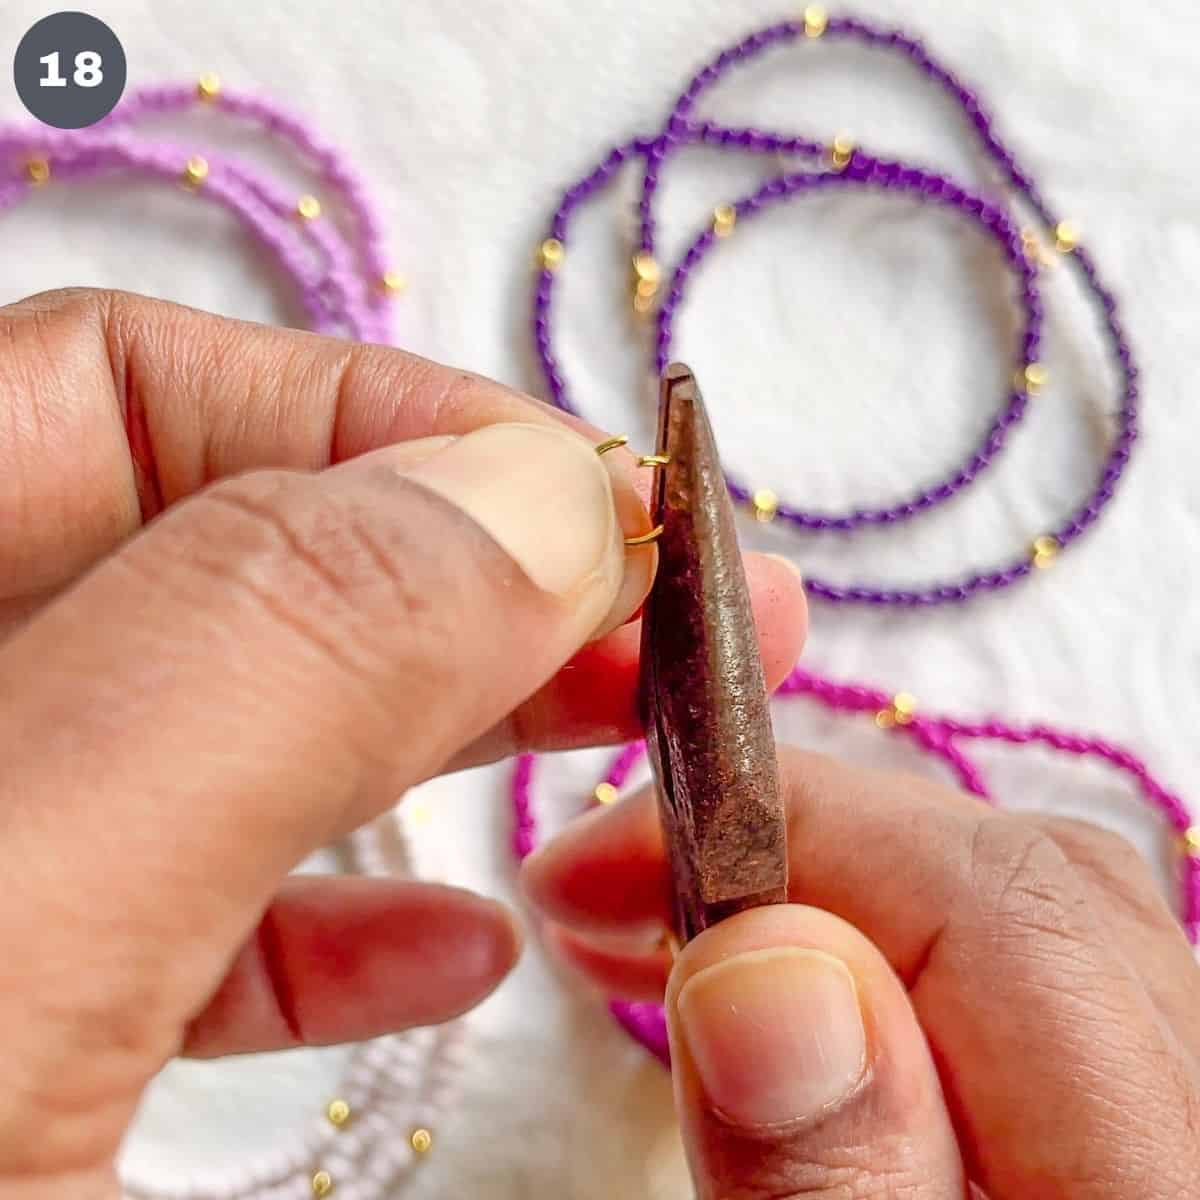
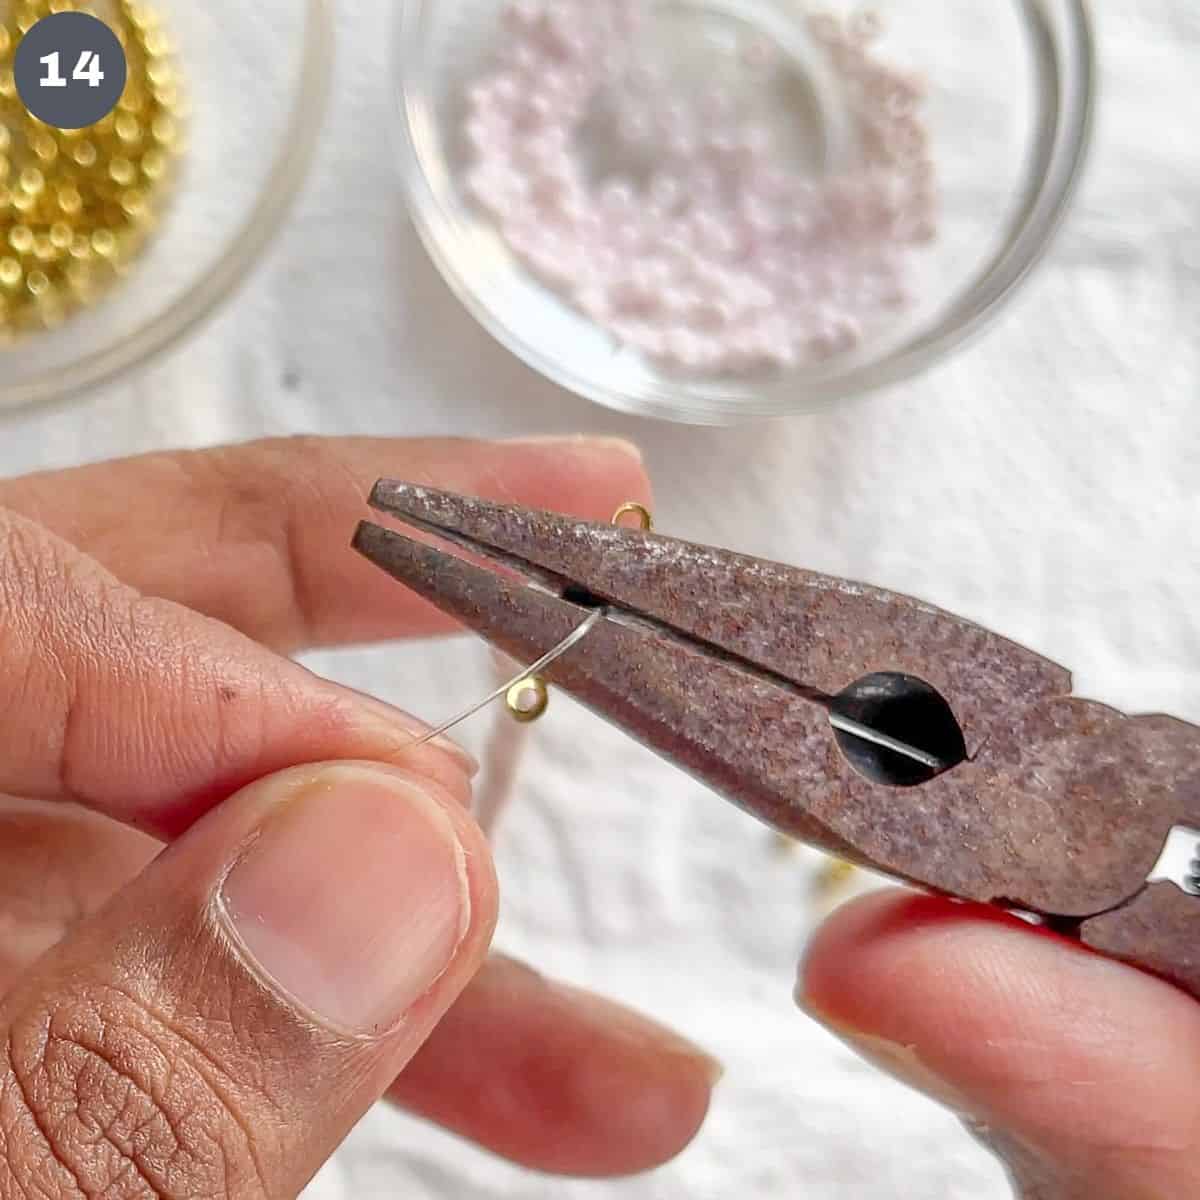
Hold the jump ring in one hand (with the joint facing up) and use the flat nose plier to gently push it open (image 18). Do not press too hard with the plier or you will leave dent marks on your jump ring.
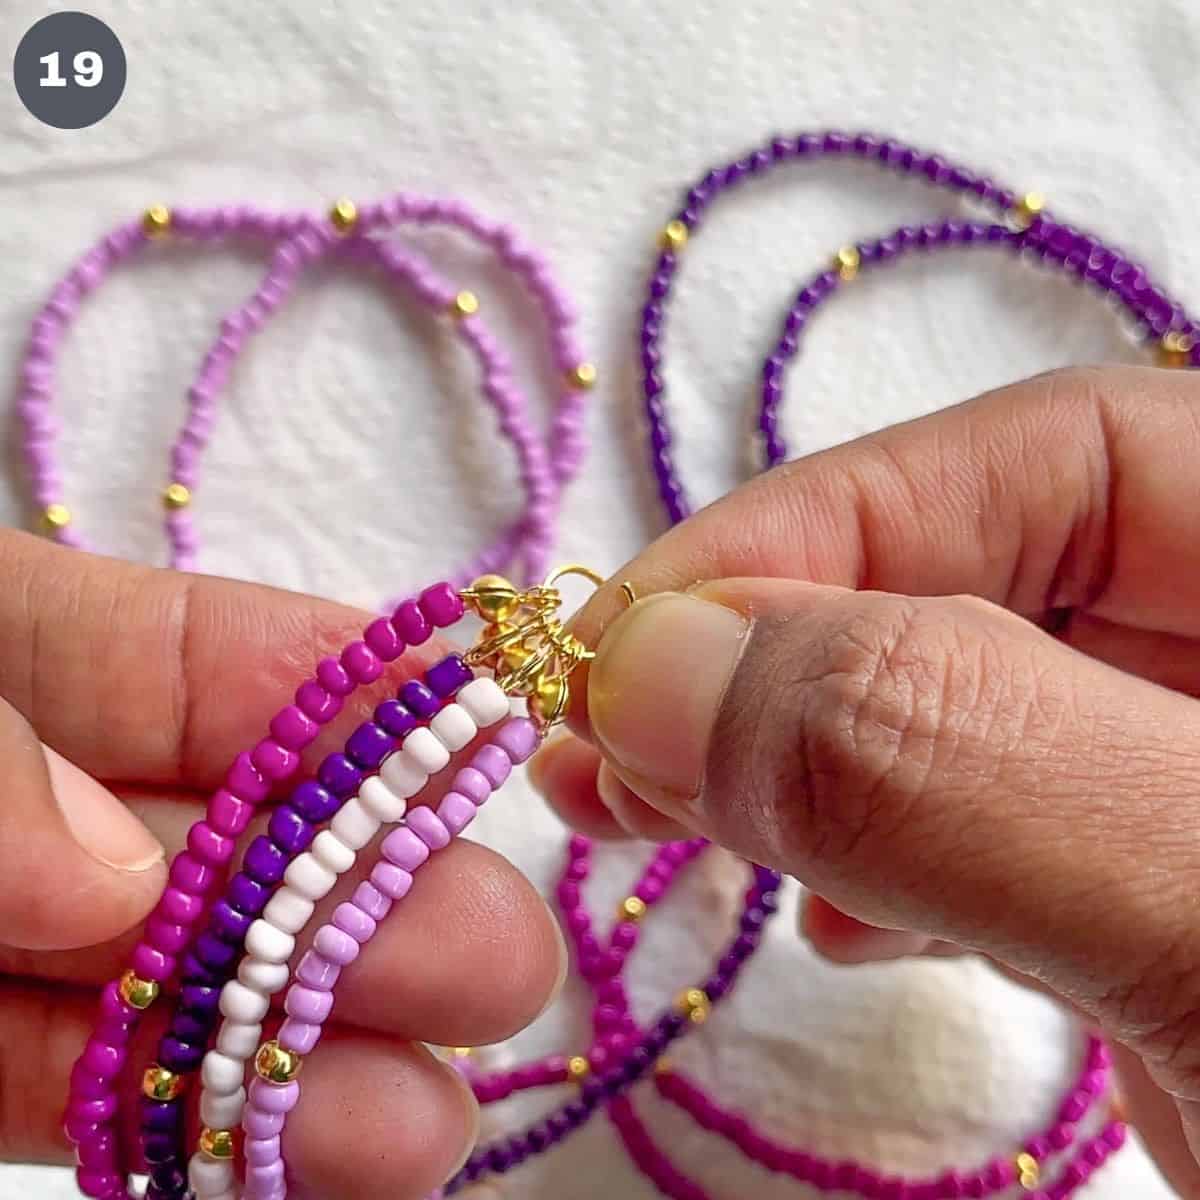
Insert all the 4 bead strands into the jump ring (image 19).
And then insert the lobster claw clasp (image 20).

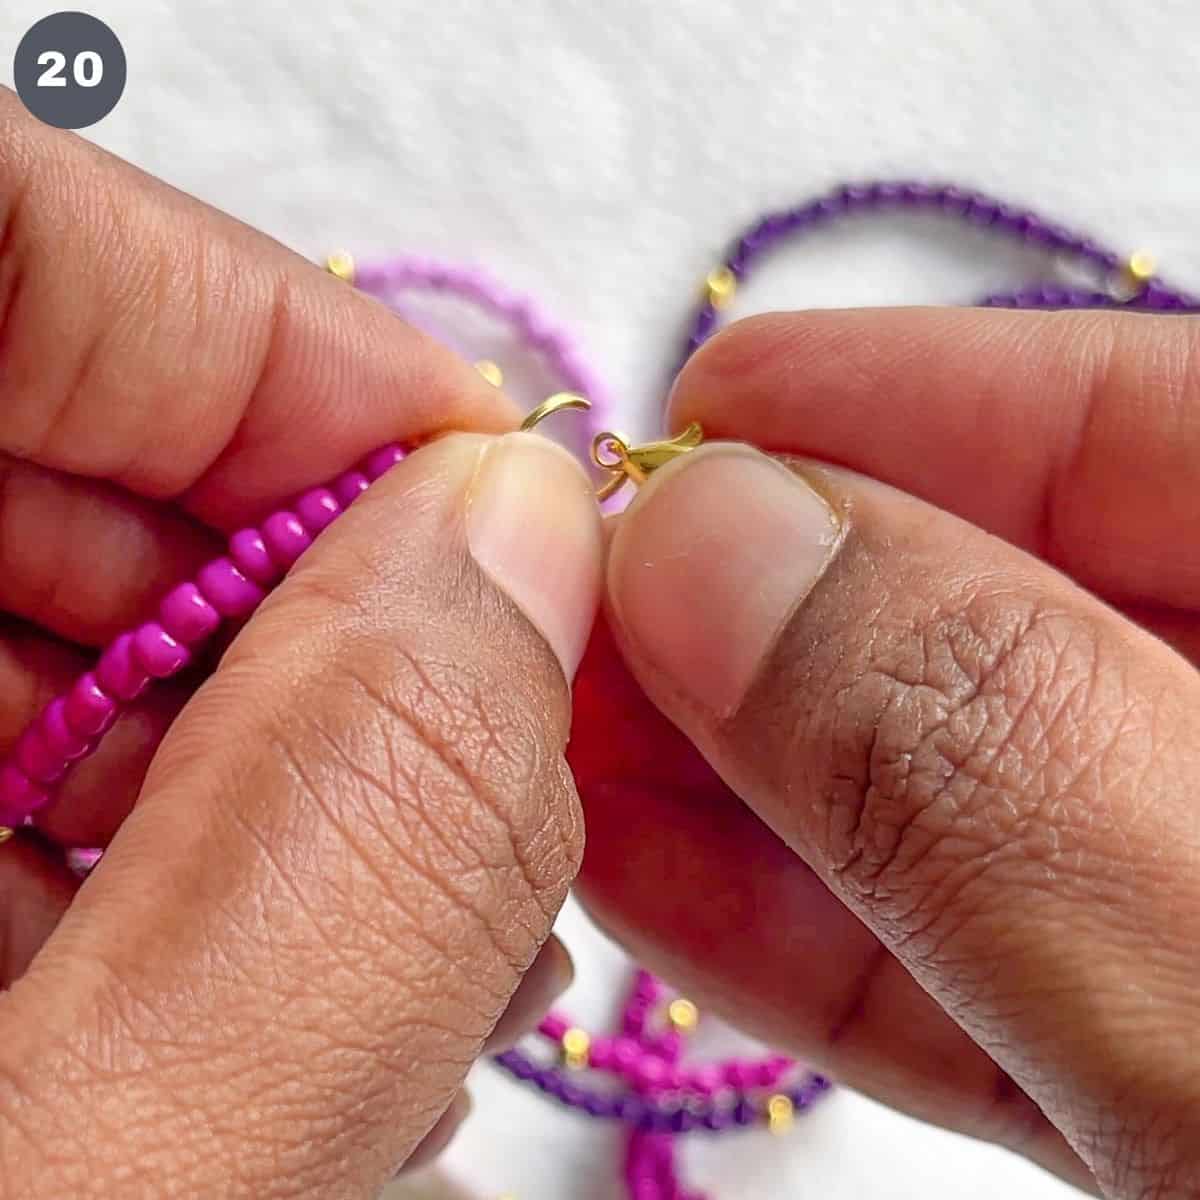
Close the jump ring (image 21).
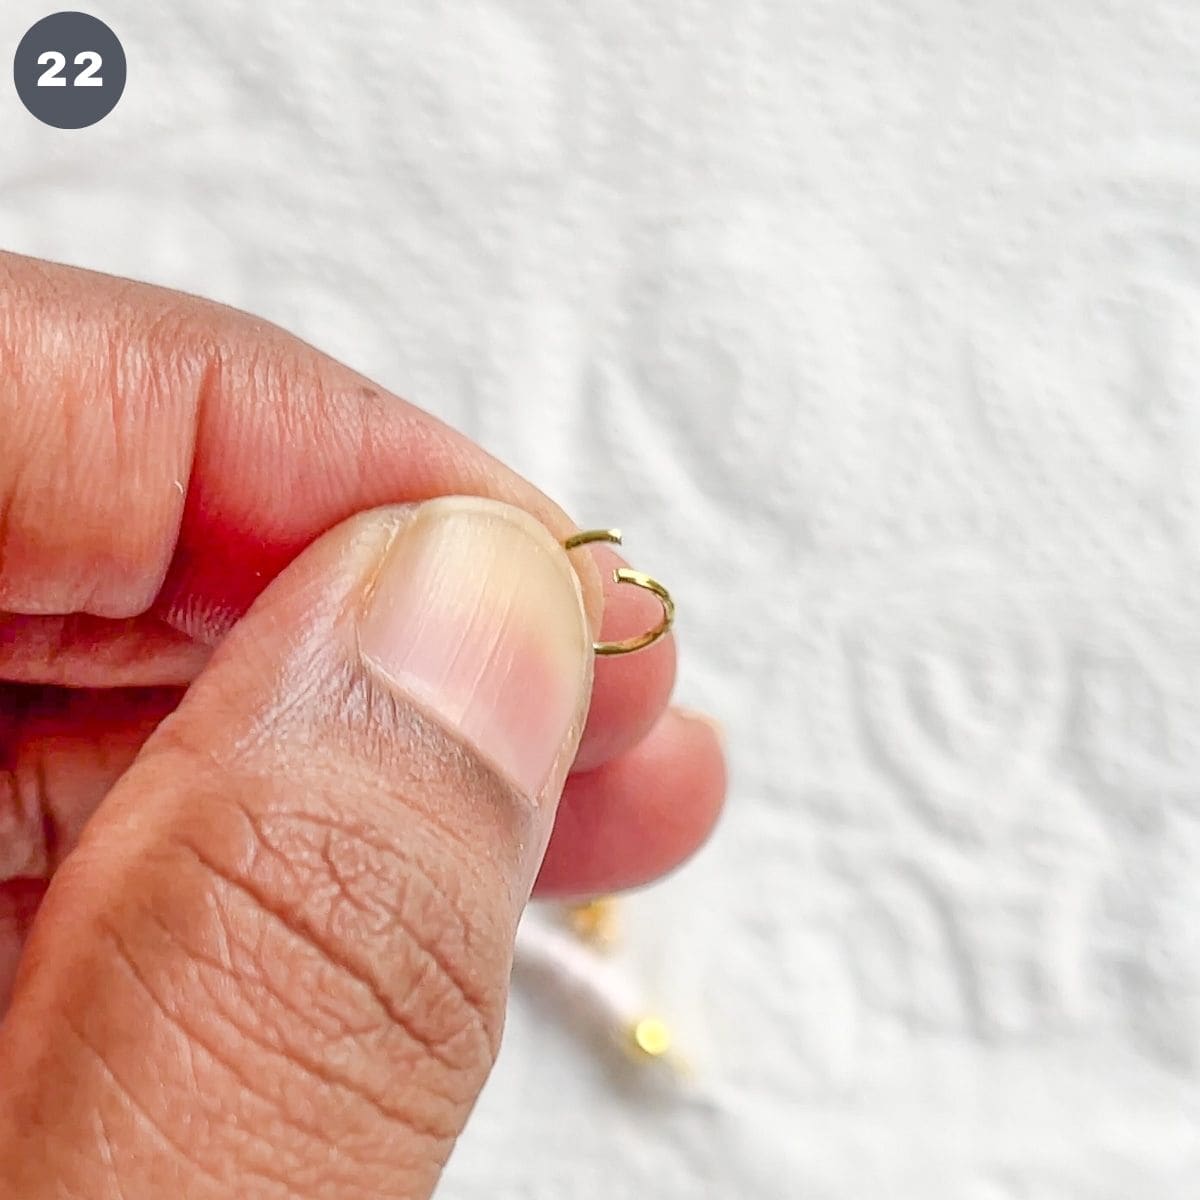
Next, you need to complete the end of the necklace. Hold the second jump ring and open in up slightly as the above step (image 22).
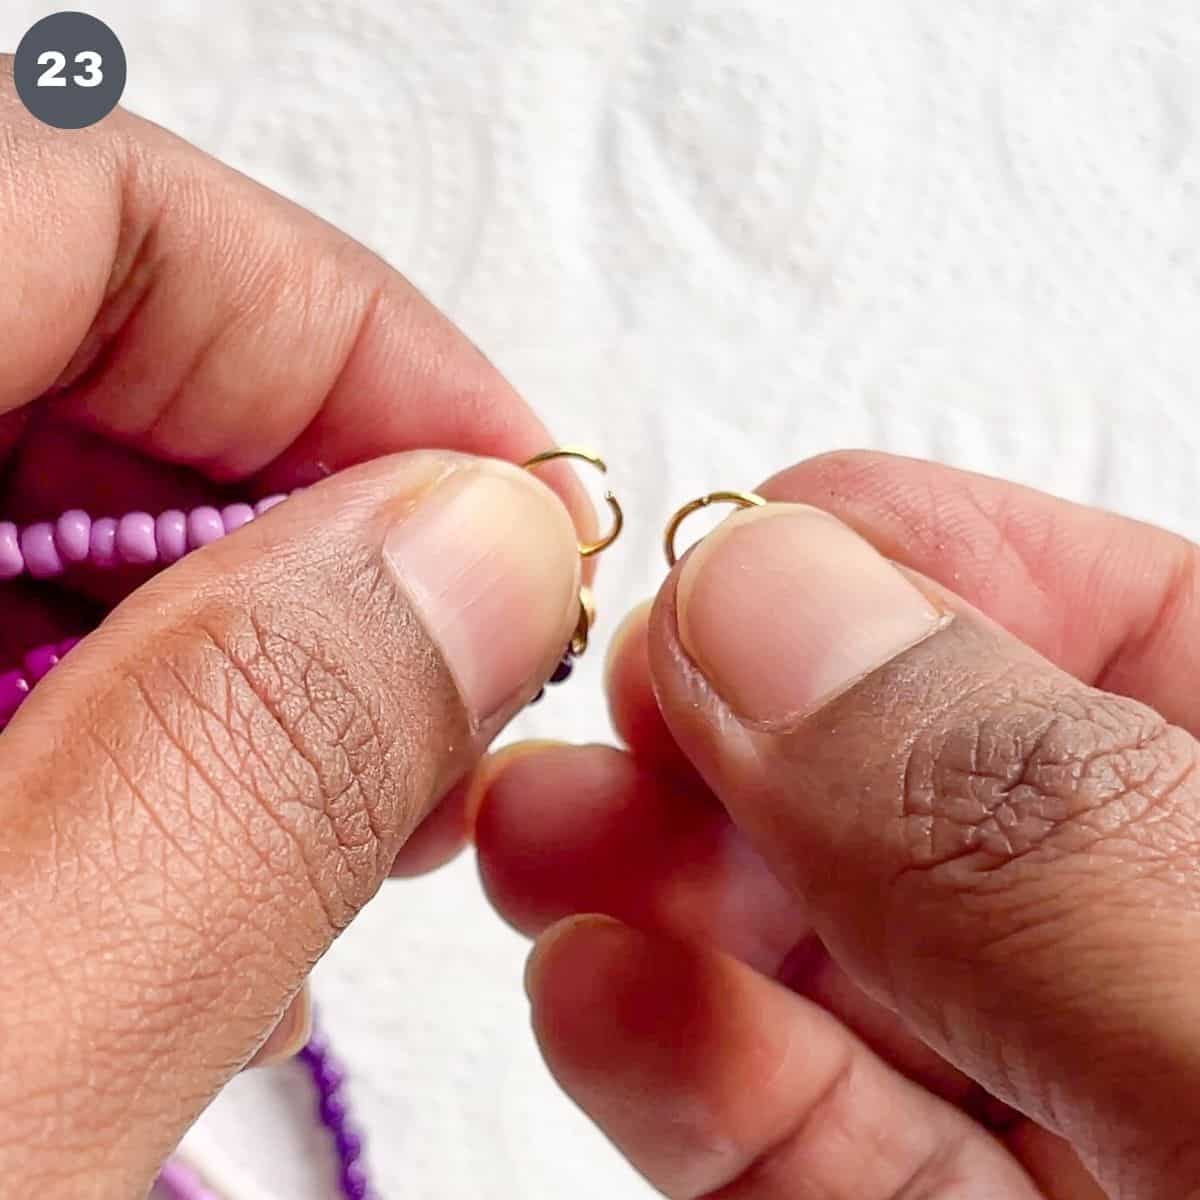
Insert the other ends of all the strands of beads followed by a jump ring (image 23).
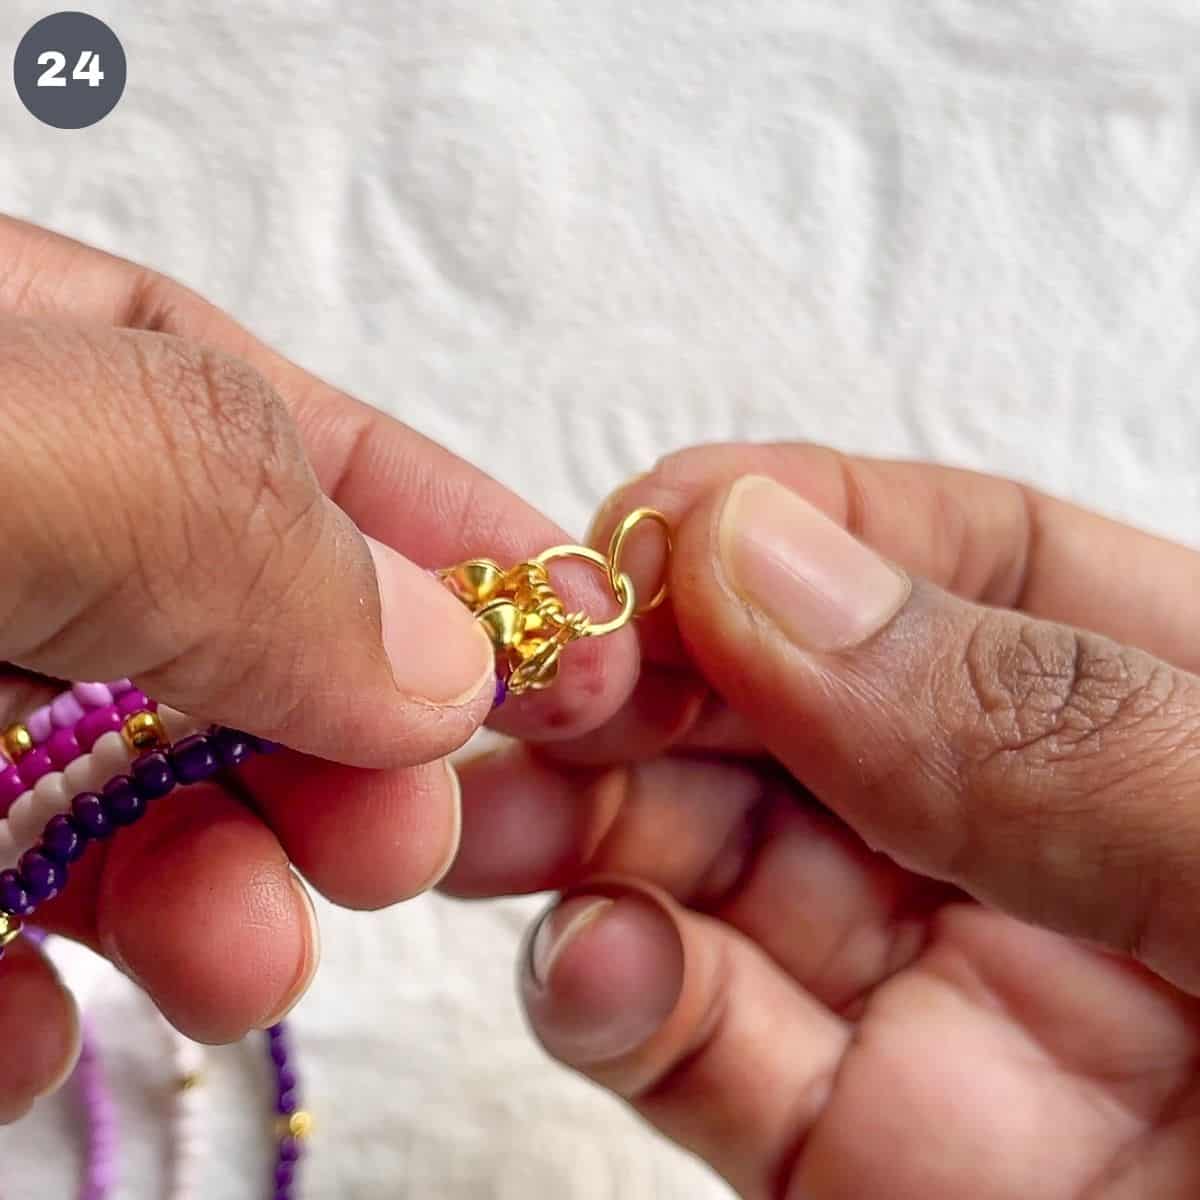
Close the jump ring (image 24). And that completes the multi-strand bead necklace.
To wear the necklace, simply put it around your neck and fasten by inserting the jump ring to the clasp. Another way to wear this multi-strand necklace is to twist the strands before wearing it for a twisted bead necklace.
Options:
- Metal color: You can make this necklace in silver by changing the gold beads, necklace clasp, and bead knots covers to silver.
- Size of the beads: Use 2mm small beads instead of 3mm beads for a thinner necklace. You can also use 4mm or 5mm beads for a bulkier necklace.
- Color of beads: I used solid colored seed beads, and you can always use different colors.
- Length of the strands: If you wish to make a longer necklace, make longer strands of beads or attach a gold chain to the necklace to increase its length to your desired length.
- Adjust the length of the bead strands - Instead of making all the strands same length, you can make them in different lengths so that they appear in 4 distinct layers when worn. If you do this, take note to insert the bead strands into the jump rings on both ends in the same order. Start with the forth and longest strand, followed by the third strand, second strand and then first strand. The first strand should be the shortest strand.
Tips:
- Line your workspace with kitchen towel or cloth when working with beads – the cloth will prevent any stray beads that fall off your hand as you string them from bouncing or rolling off the workspace.
- Measure the length of each strand of beads with a measuring tape instead of by count of beads - this is because the thickness of seed beads tends to be different and this can have any impact on the length of your chain.
- Using a needle to string the beads – The nylon wire used to make this necklace is fairly stiff, and it is quite easy to string the beads directly into it. You can also use a needle to string your beads, but make sure your needle is sufficiently thin to pass through the beads. Also, if you choose to use a needle, make sure your string is slightly longer than mentioned above.
Printable Instructions (Free PDF)
Click on the image below to download your free PDF instructions to make the necklace:


Leave a Reply