
This crochet rainbow pattern makes cute little rainbows in bright colors. It’s a quick and beginner-friendly project that uses simple stitches and scrap yarn, making it a great way to use up leftovers while creating something adorable. Plus, you can download and print the full pattern for easy reference while you crochet.

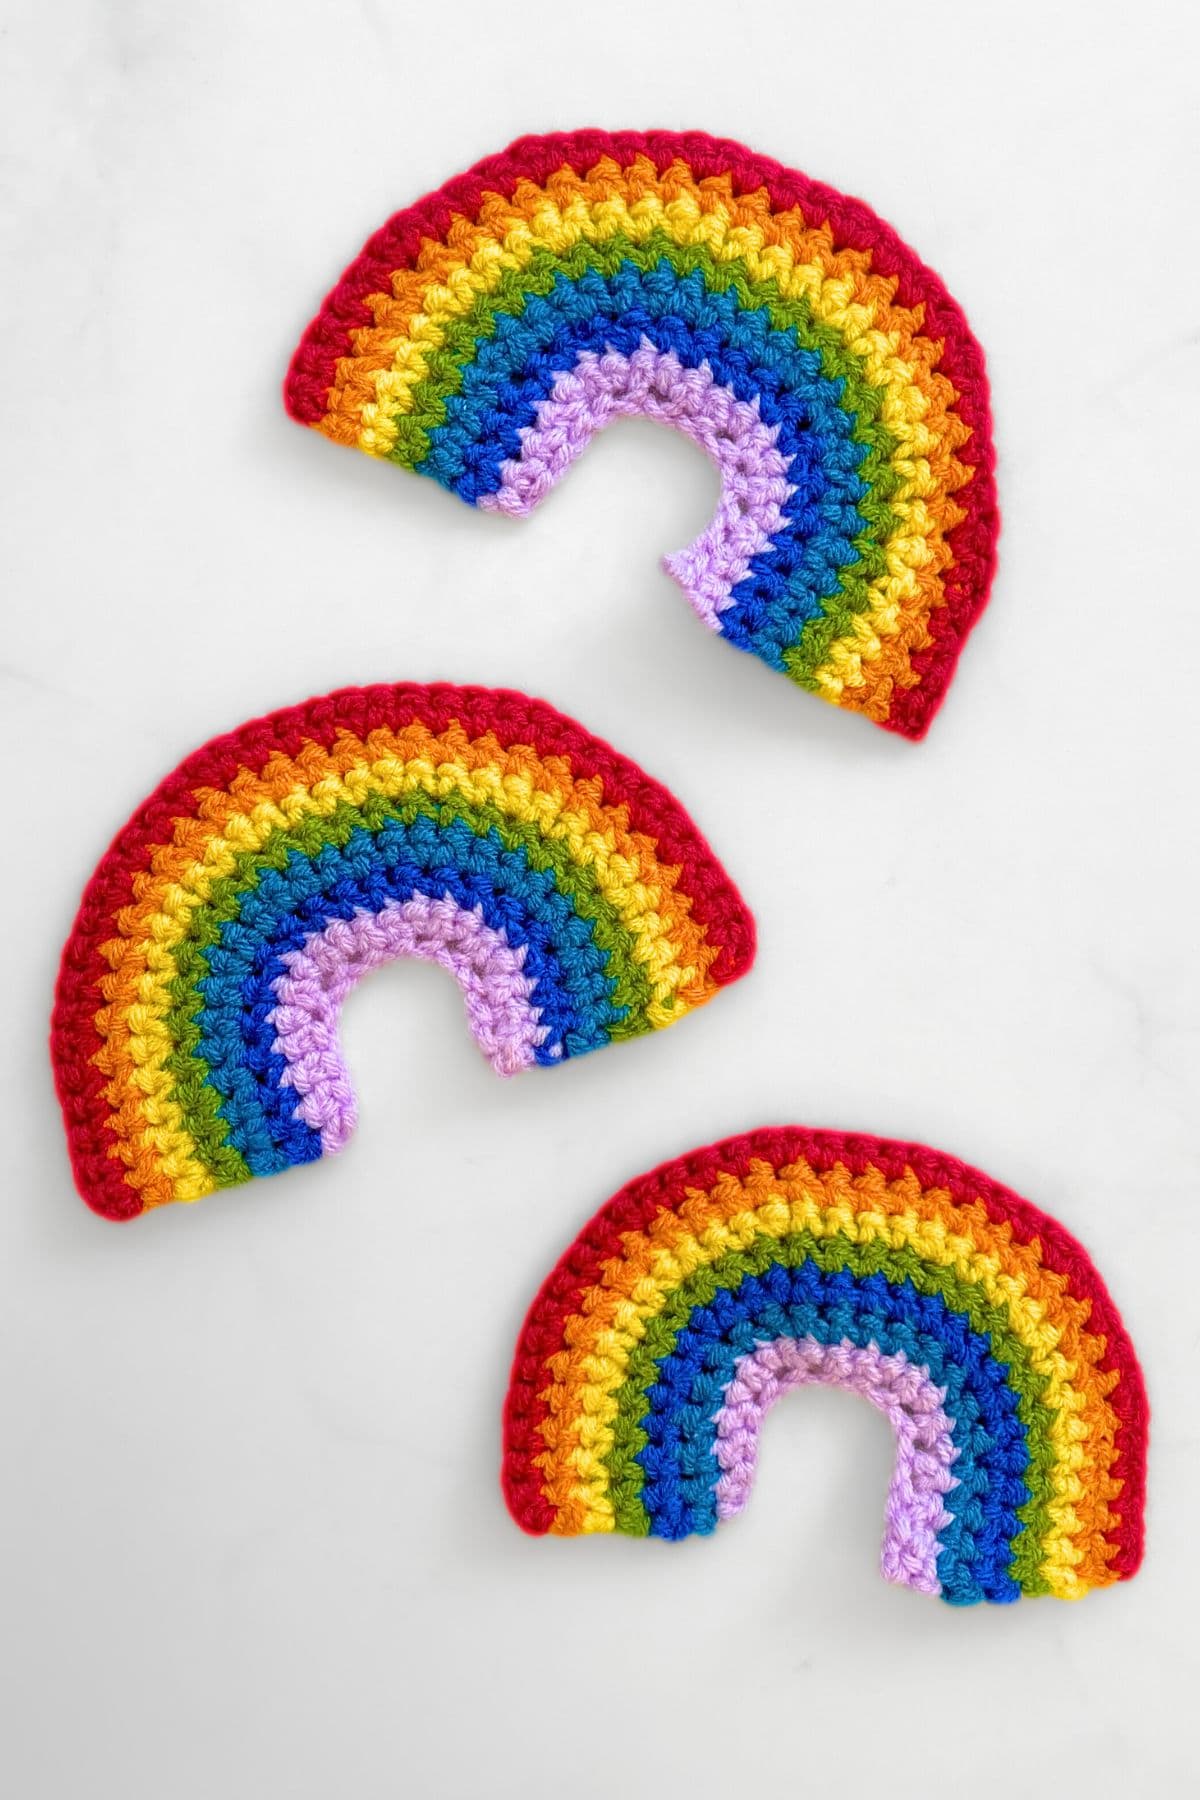
Each crochet rainbow is made up of 7 rows of rainbow colors - red, orange, yellow, green, cyan, blue and purple. The starting row is stitched into a half circle and each row of the rainbow is then stitched upon the semi circle base, all with single crochet stitches, creating a pretty, perfectly arc-shaped rainbow. You can always use this free crochet rainbow pattern to create crochet rainbows is any other different colors you like.
Made using worsted weight yarn, each crochet rainbow measures approximately 6.5cm high and 10cm wide. You can make smaller rainbows by using thinner yarn or reducing the rows in the rainbow. Similarly, if you wish to make larger rainbows, you can use thicker yarn or a larger hook.
Jump to:
If you are looking for more beginner friendly crochet patterns, do check out my easy to make crochet bows which you can use to make your own hair accessories and a bow with tail, as well as these sunflower applique pattern which you can easily adapt to make pretty sunflower coaster.
🎥Video Tutorial
Here is the full step by step tutorial video for making the crochet rainbow pattern. The full list of supplies, stitches used, detailed instructions with step by step images and the free crochet pattern are right below.
🧾Tools and supplies
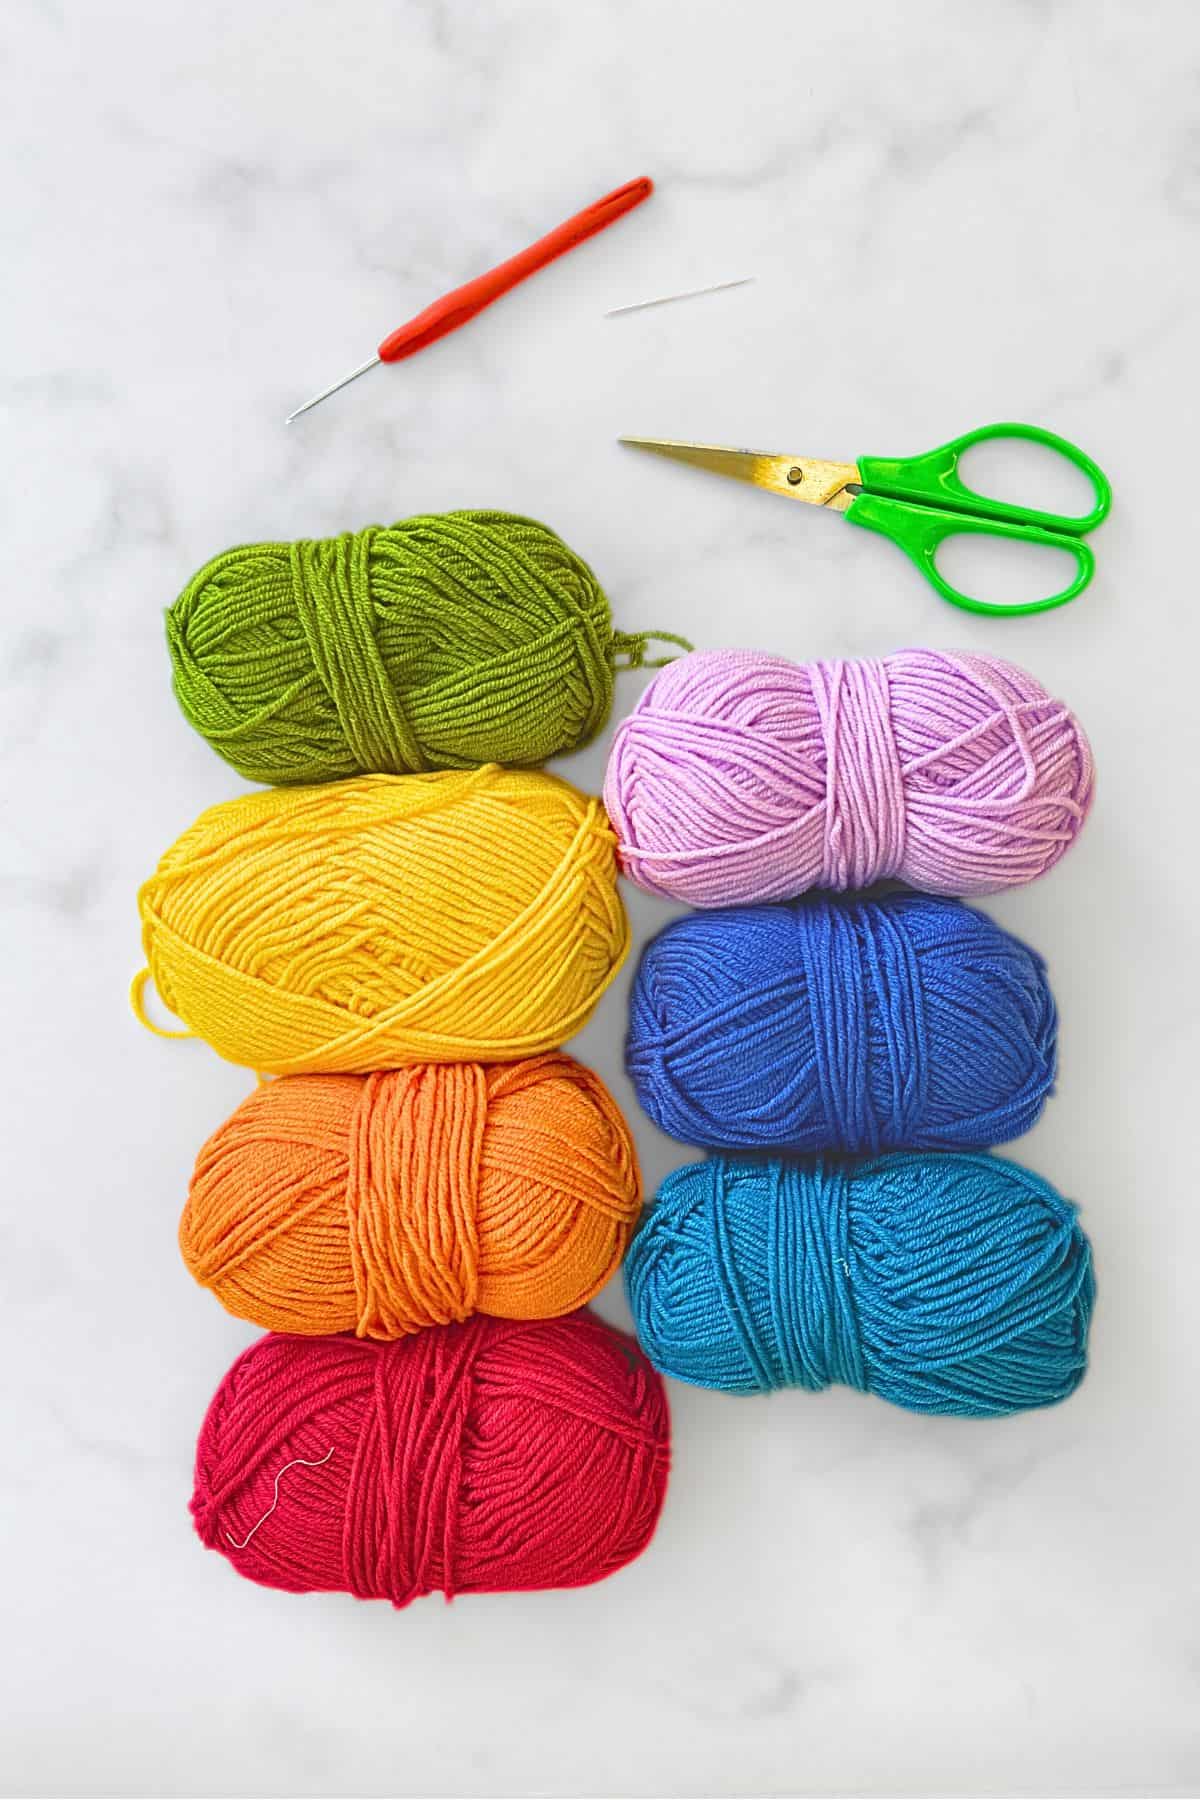
- Medium weight yarn (worsted weight yarn) in 7 colors of the rainbow. You can easily change the colors to any shade you like.
- 2.5 mm crochet hook (use a larger mm hook size if are more comfortable with one, but do note that a larger hook will give you a larger rainbow)
- Tapestry needle
- Scissors
- Stitch marker (optional)
🪡Stitches Used (Us Terms)
- Single crochet (sc)
- Chain stitch (ch)
- Single crochet increase (sc inc)
✂️How to Make
Note: Before you start, take note to leave a fairly long tail of yarn both at the start and end of each new color. The extra yarn tail will make it easier to fasten the excess yarn later.
Step 1: Make the foundation chain
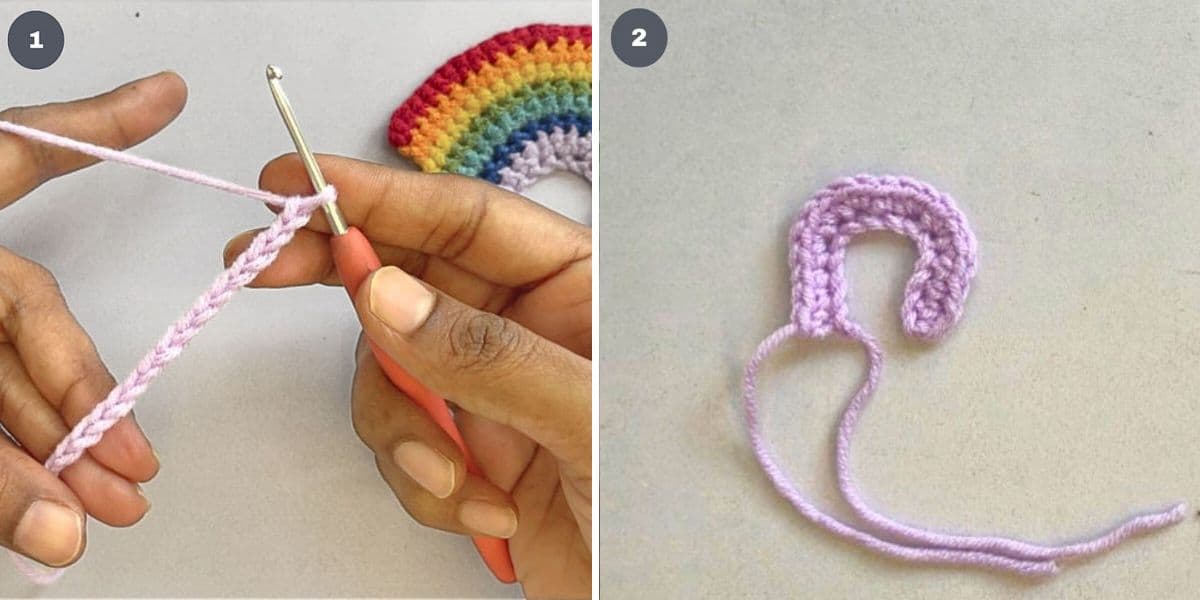
- Start with the purple yarn. Make a slip knot, leaving a fairly long tail at the beginning.
- Ch 14 (image 1).
Step 2: Make the rainbow rows
Row 1:
- One sc into the 2nd chain from hook.
- One sc each into the next 2 stitches.
- Sc inc in the next 3 stitches (3 times).
Note: An sc inc is making two single crochets into the same base stitch.
- One sc into the next stitch.
- Three sc inc in the next 3 stitches.
- One sc each into the next 3 stiches.
- Pull the loop and cut yarn. Fasten. Leave a fairly long yarn tail for easy fastening. You should have made 19 stitches altogether in this row (image 2).
Row 2:
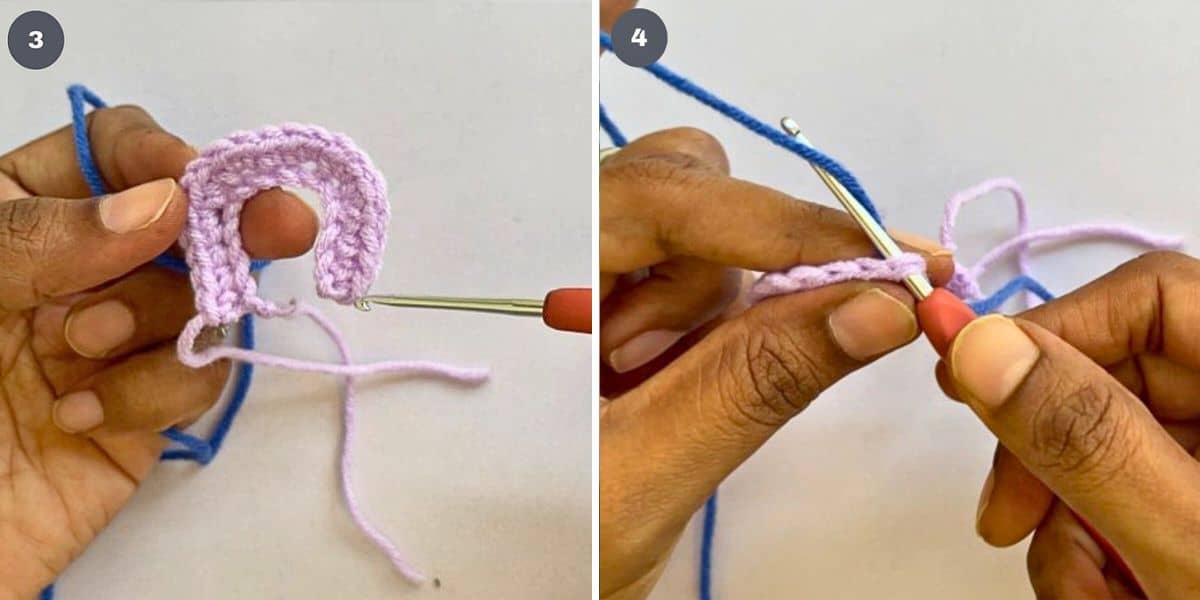
Note: Instead of continuing the next row from where the last stitch on the first row ends, you will be starting each row and every next row on the same side (i.e. on the right side of the rainbow). This will ensure the width of each color on the rainbow is the same (image 3).
- For this row, use blue yarn. Hold the yarn against the back of the rainbow. Insert the hook into the first stitch in the first row (purple row), yarn over and pull through the stitch. Make a ch (image 4).
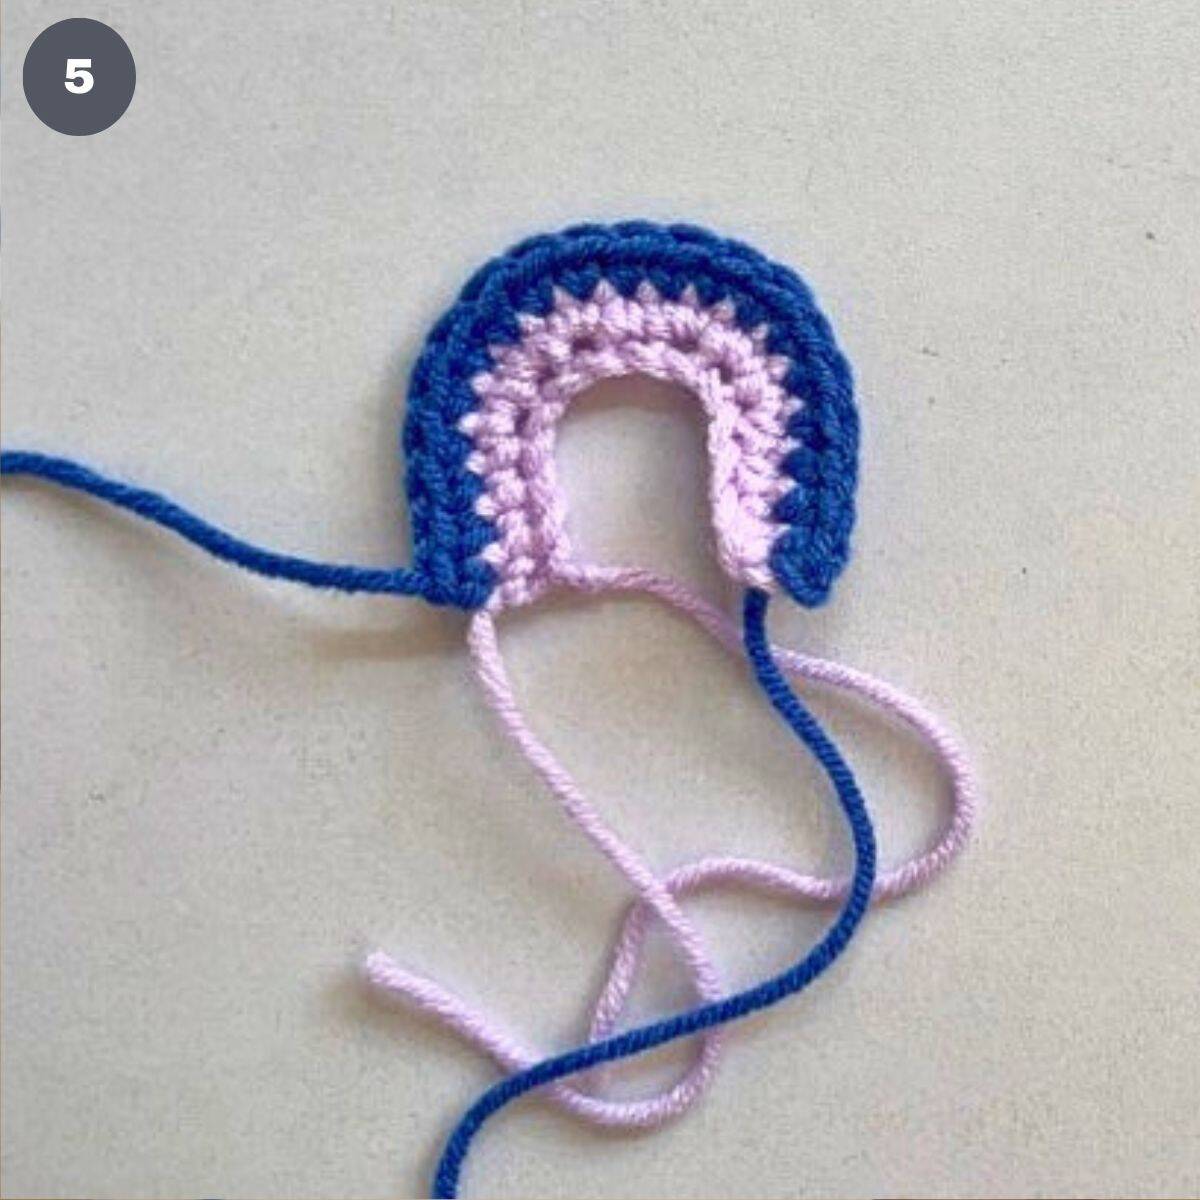
- One sc into the same stitch as the ch.
- Eighteen sc (one sc into each stitch until the end). You should have 19 stitches in this row (image 5).
- To fasten, pull the loop and cut the yarn. Fasten. Leave a long tail for easy fastening.
Row 3:
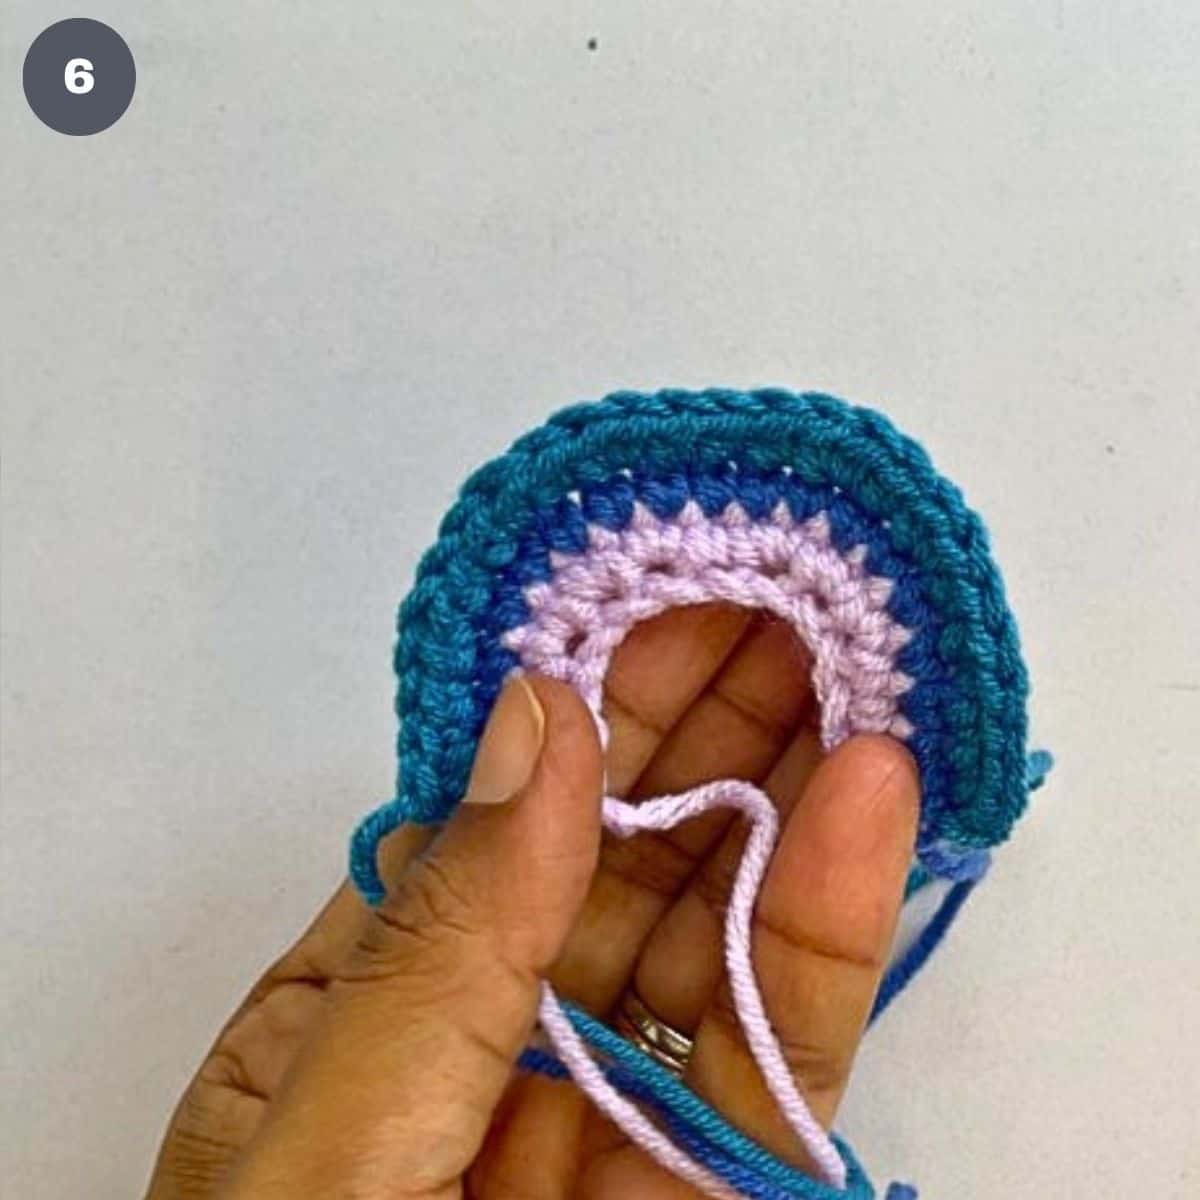
- For this row, use the cyan yarn. Insert hook into the 1st sc stitch in the 2nd row. Yarn over and pull through the stitch. Make a ch.
- One sc into the same stitch as the ch.
- Two sc into the next two stitches.
- One sc inc and one sc (3 times).
- One sc.
- One sc and one sc inc (3 times)
- Three sc.
- Fasten the yarn as in the last 2 rows, leaving a fairly long tail of yarn for fastening. You should have 25 stitches in this row (image 6).
Row 4: For this row, use the green yarn.
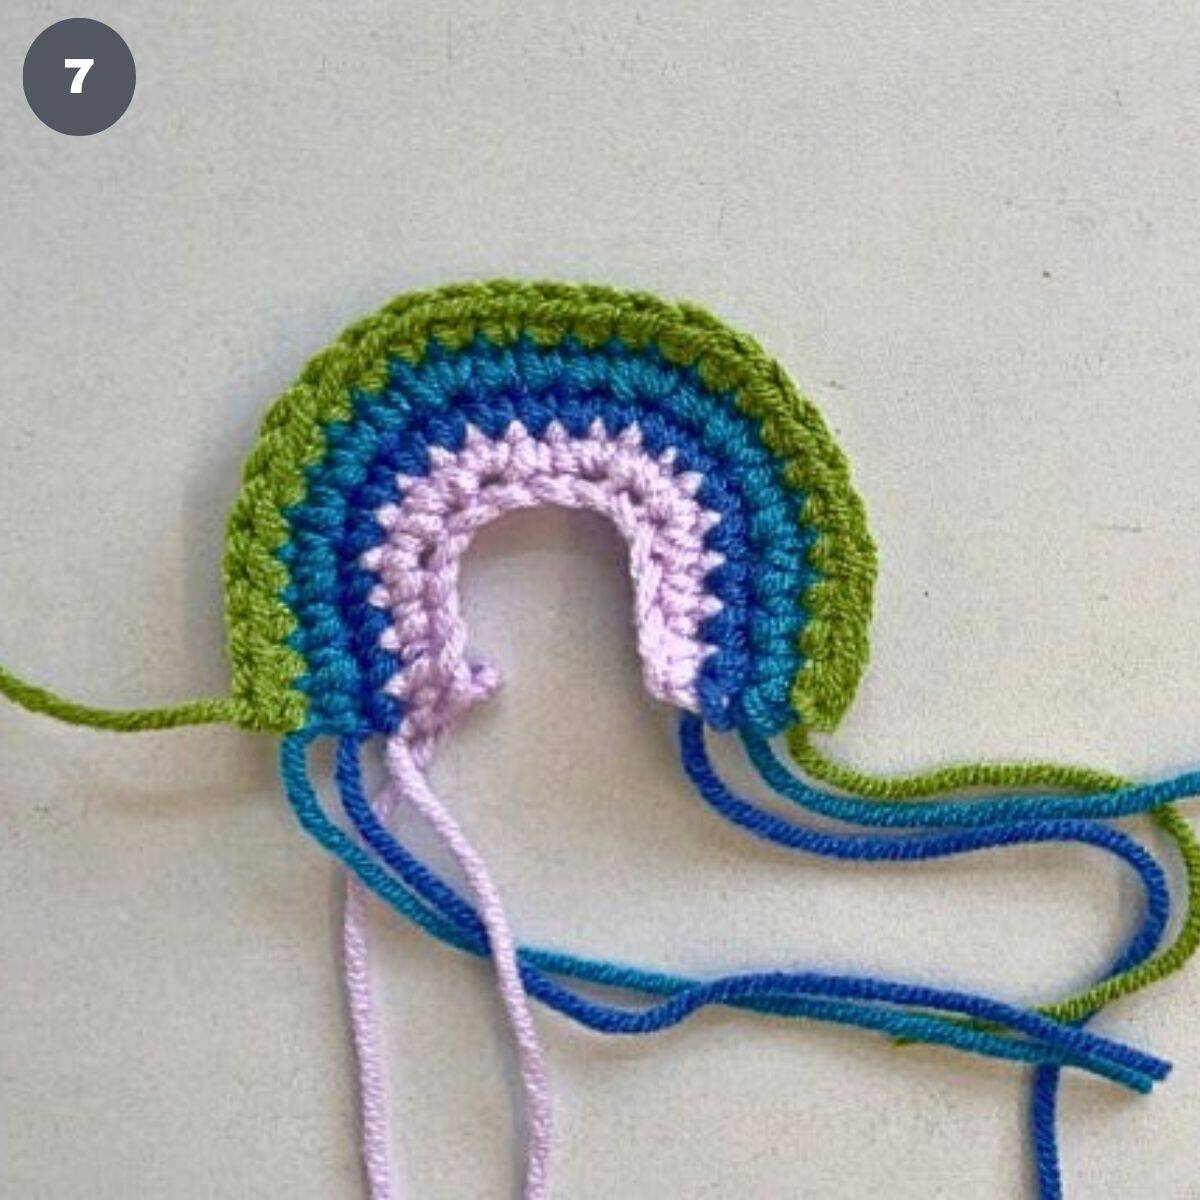
- Insert hook into the 1st stitch of the previous row. Yarn over and make a ch.
- One sc into the same stitch as the ch.
- Twenty four sc (one sc into each stitch until the end). You should have 25 stitches in this row.
- Fasten yarn as in the previous rows (image 7).
Row 5: For this row, use the yellow yarn.
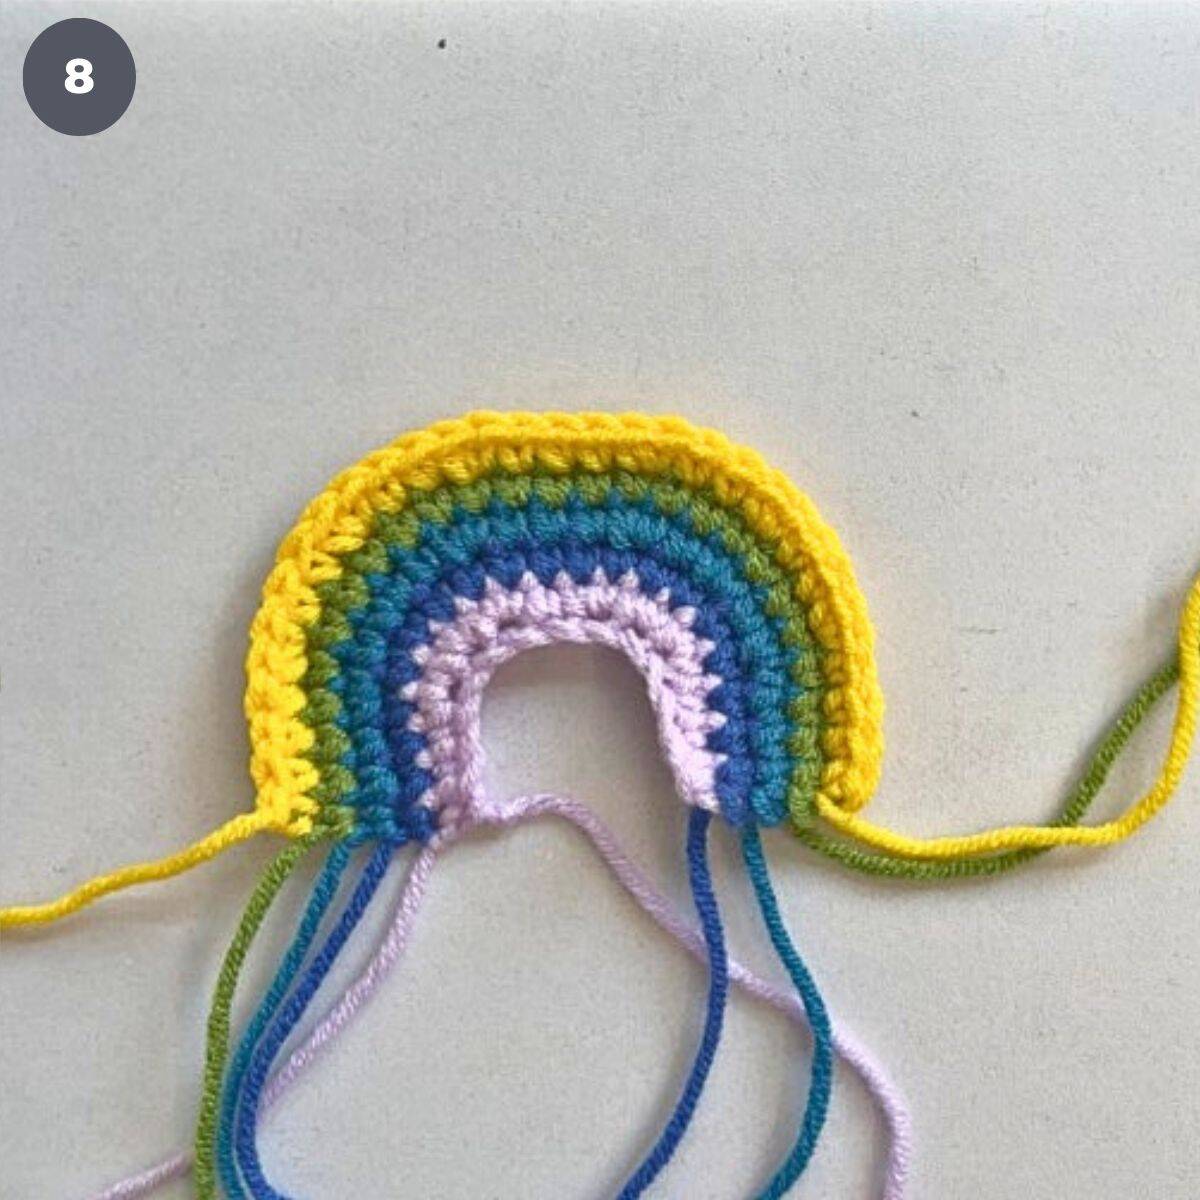
- Insert hook into the 1st stitch of the previous row. Yarn over and make a ch.
- One sc into the same stitch as the ch.
- One sc into the next stitch.
- Two sc and one sc inc (3 times)
- Three sc.
- One sc inc and two sc (3 times).
- 2 sc.
- Fasten the yarn. You should have 31 stitches in this row (image 8).
Row 6: For this row, use the orange yarn.
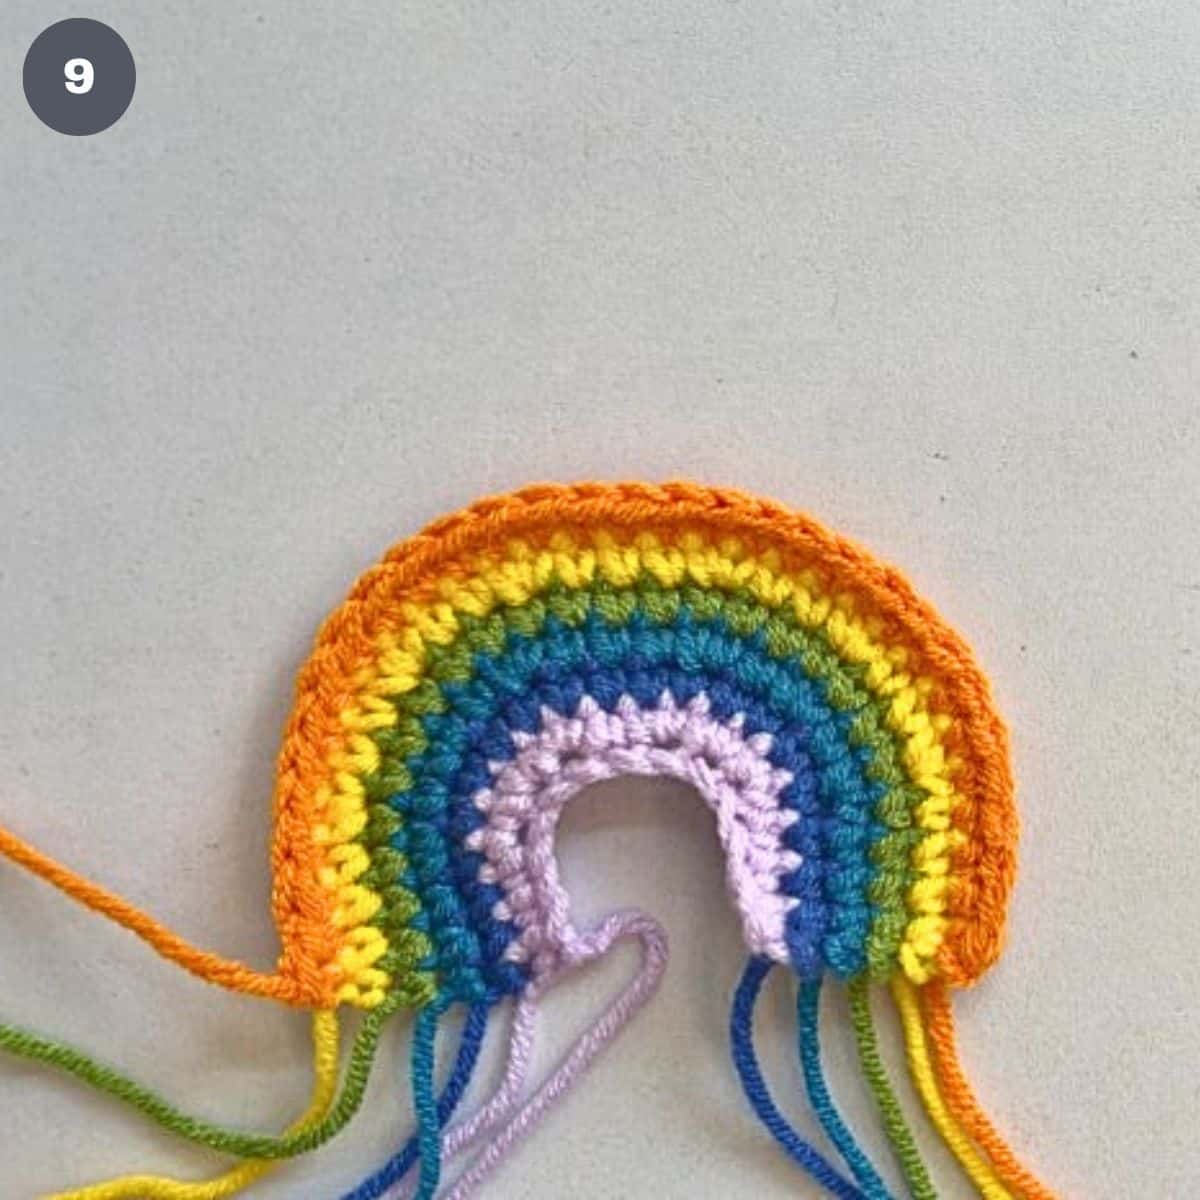
- Insert hook into the 1st stitch of the previous row. Yarn over and make a ch.
- One sc into the same stitch as the ch.
- 30 sc (One sc into each stitch until the end of the row).
- Fasten yarn as in the previous rows. There should be 31 stitches in this row (image 9).
Row 7: For this last row, use the red yarn.
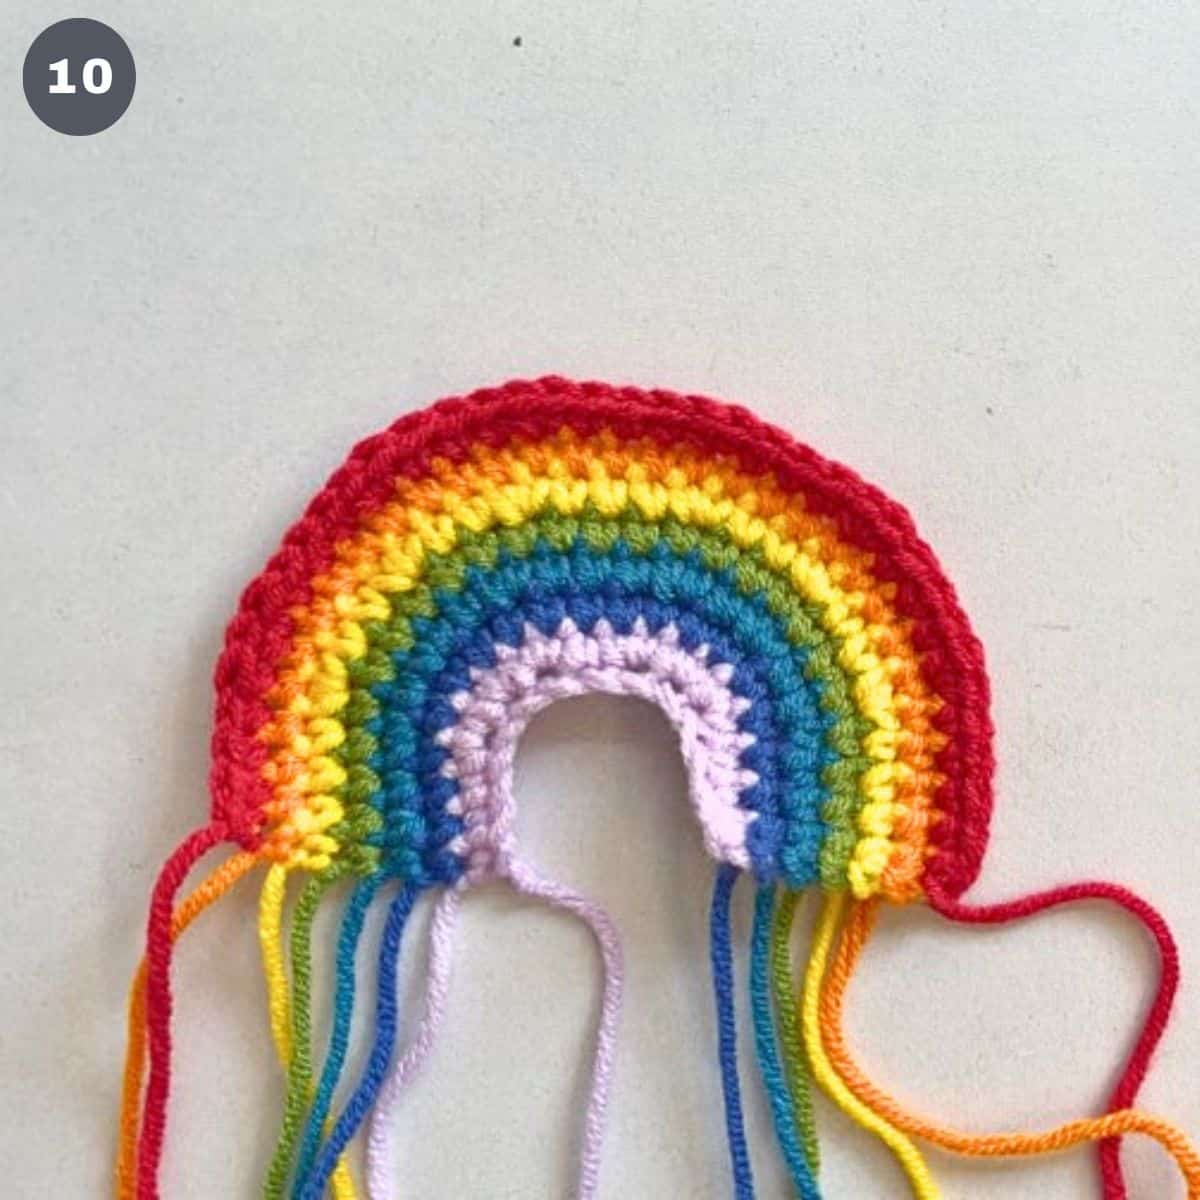
- Insert hook into the 1st stitch of the previous row. Yarn over and make a ch.
- One sc into the same stitch as the ch.
- One sc.
- Three sc and one sc inc (3 times).
- Three sc.
- One sc inc and three sc (3 times)
- Two sc.
- Fasten the yarn (image 10).
Step 3: Stitch and trim the yarn ends
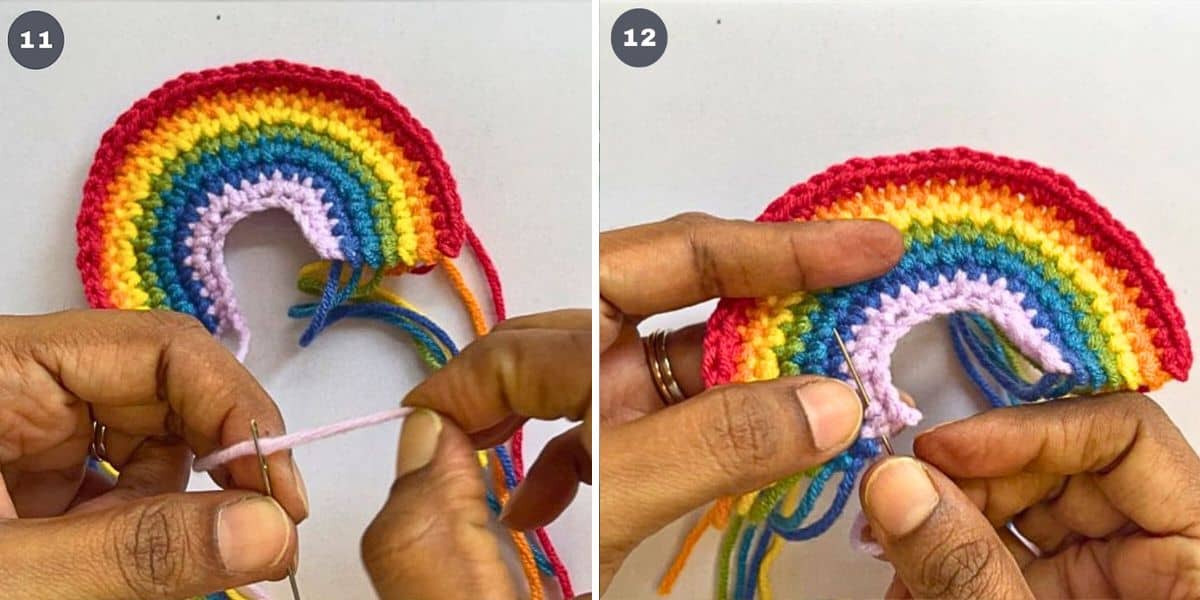
Thread the excess purple yarn into a tapestry needle (image 11). Stitch the yarn through a few purple stitches on the rainbow (image 12).
Make sure the yarn does not show on the rainbow. Trim off excess.
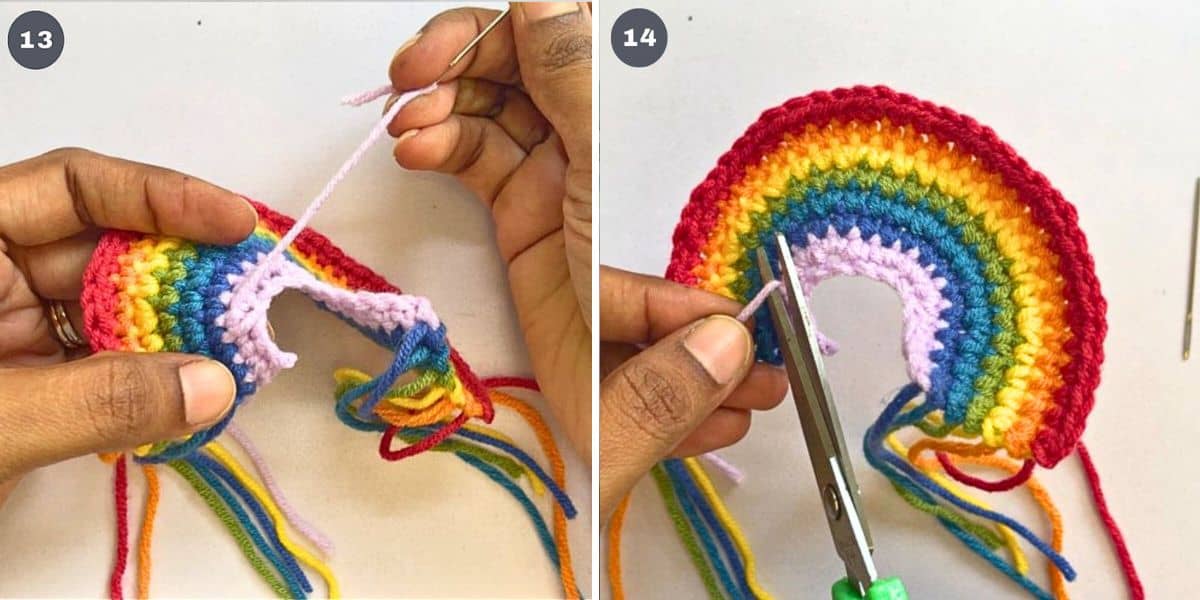
Repeat this step for all the excess strands of yarn (images 13 & 14).
And that completes the crochet rainbow.
Tips
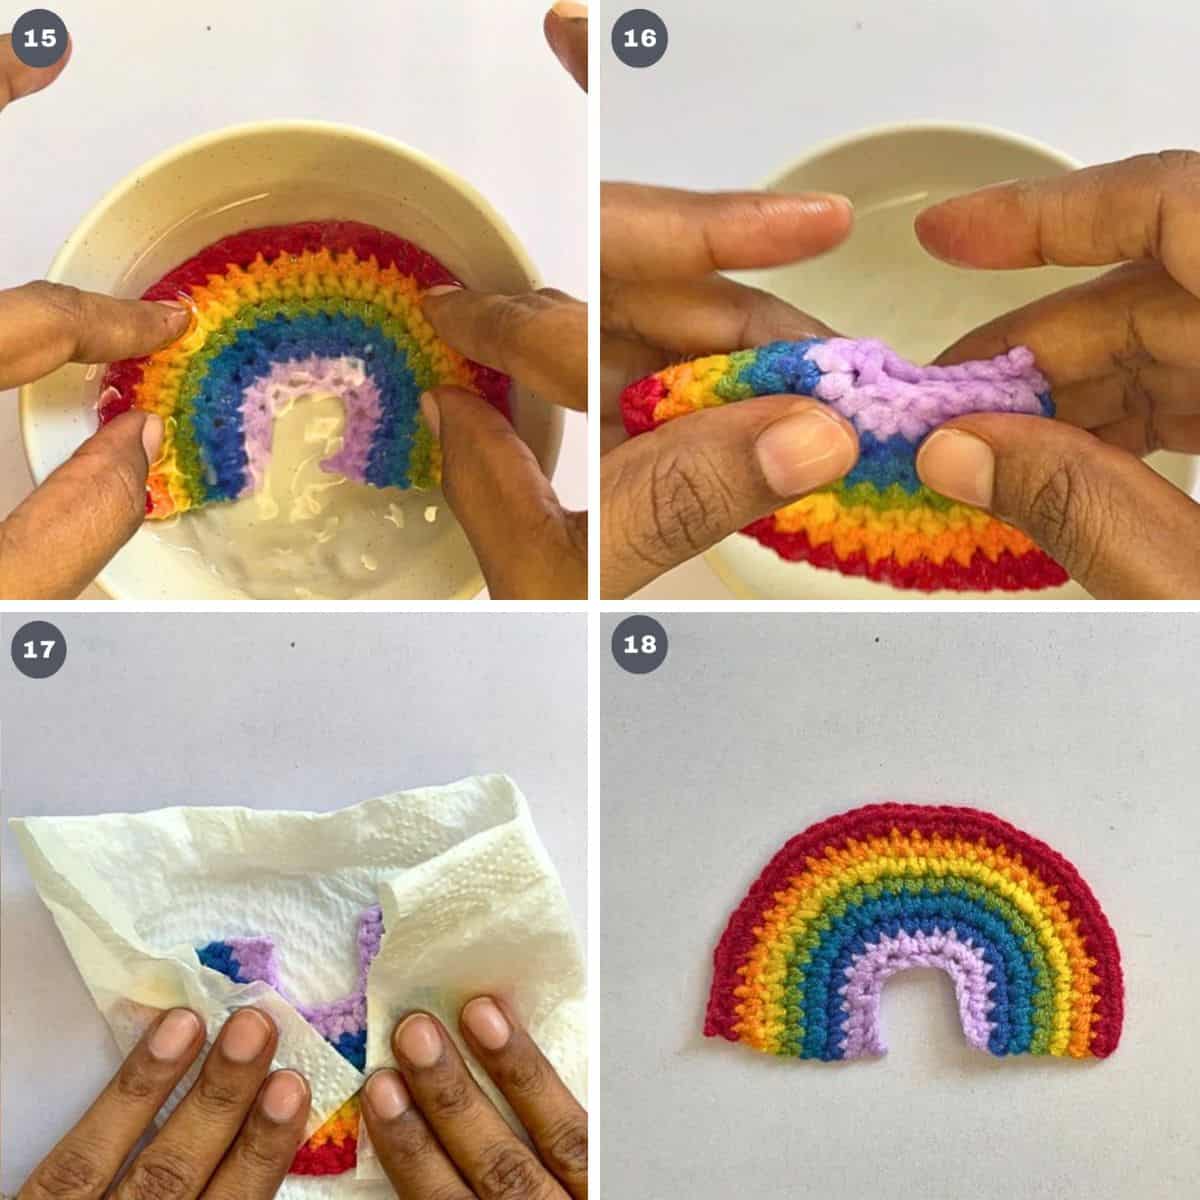
- If your crochet rainbow curls up or does not lay flat, dip it in water until completely soaked (image 15), remove and gently squeeze the water (image 16). Place it on a flat surface, on a dry towel or kitchen towel (image 17). Press another dry towel or cloth on it to absorb as much water as possible and let it dry in that flat position. This will give you a nice and flat crochet rainbow (image 18).
- If you want to make a thicker rainbow, make 2 pieces following the tutorial above, and then stitch them together with yarn and needle.
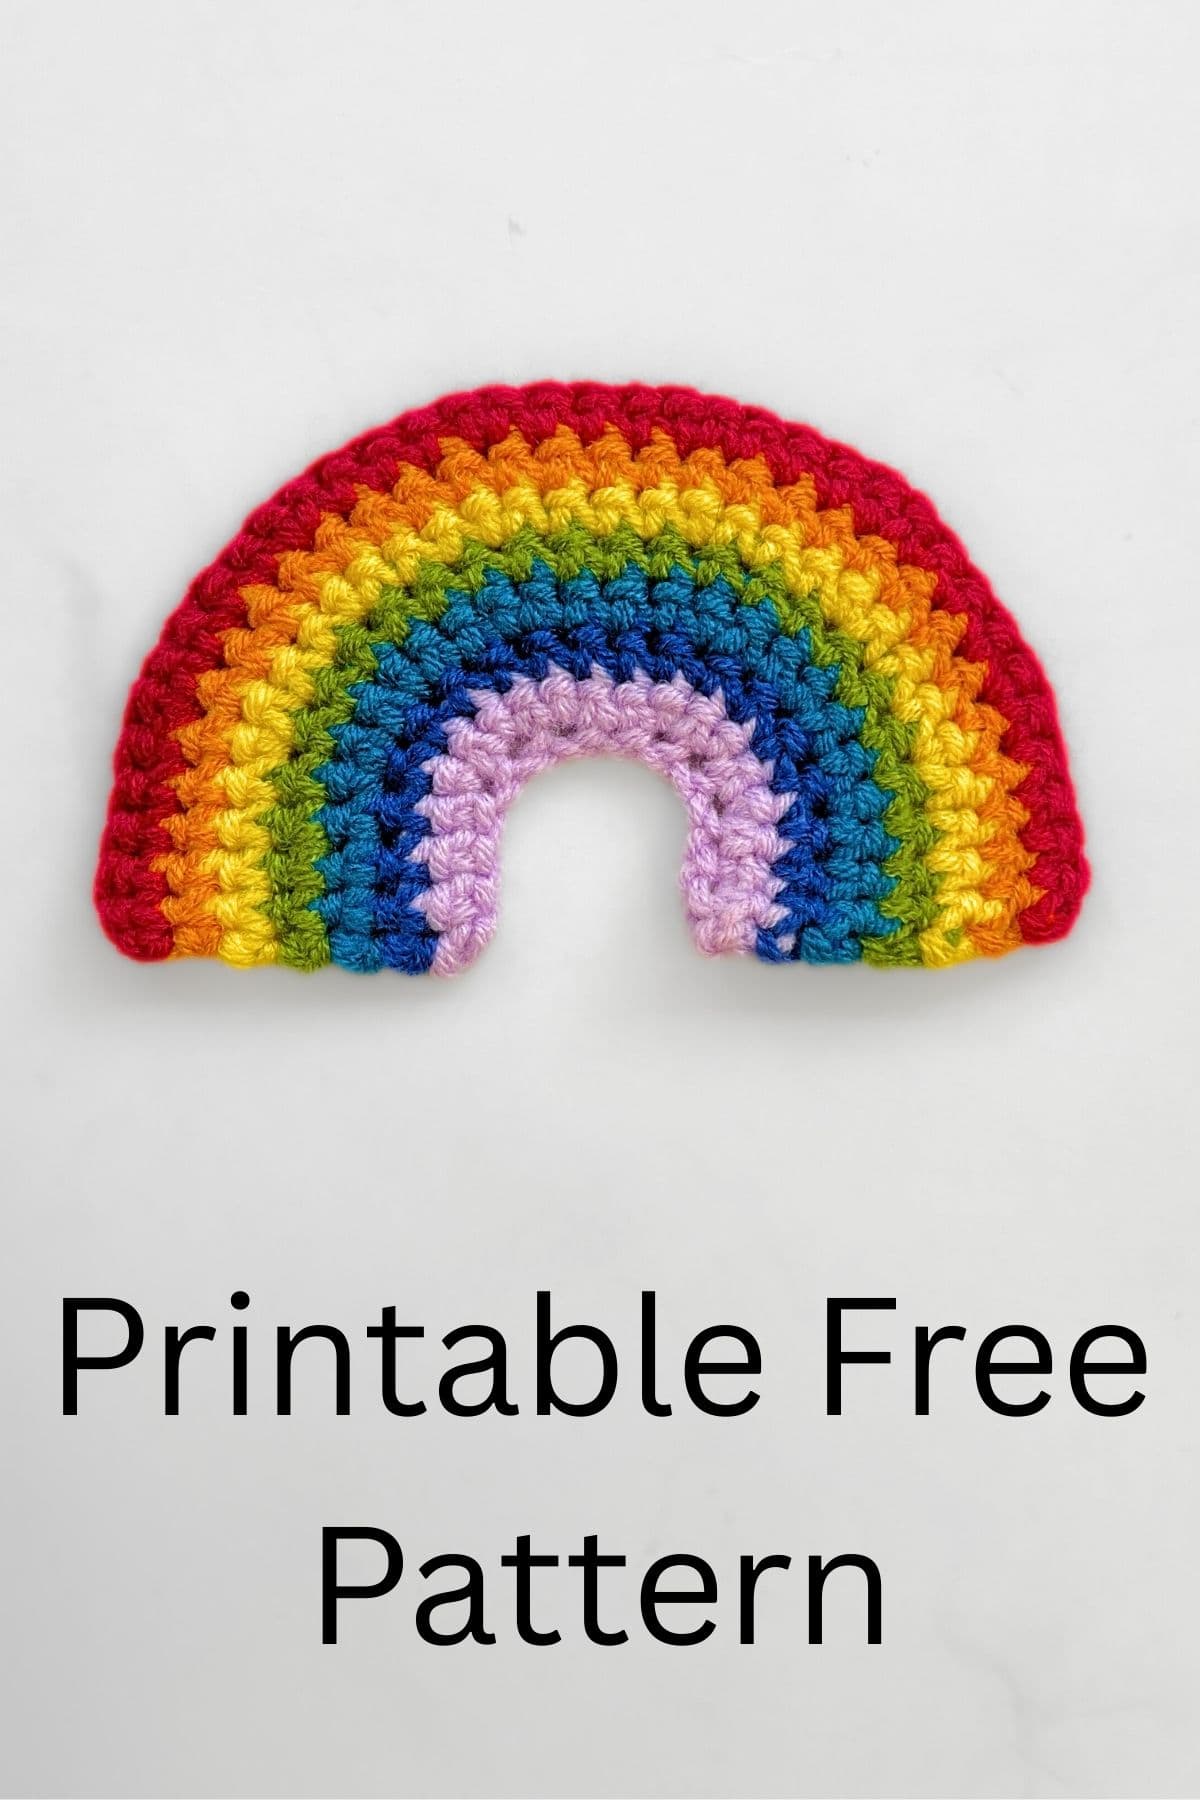
Downloadable Free Crochet Pattern
Here is the downloadable free rainbow crochet pattern (pdf version) for the beautiful pattern above. Click on the image below to retrieve the free easy pattern for your personal use.
Happy crocheting!


Leave a Reply